Scratch-N-Stamp
Search

Checkout

Keep up with Sales, New Products and other events at Scrap `n Stamp. Sign up for our newsletter now!

What's New

Hot Deals


art journal

Tuesday with Tara {take 308} Hold On Art Journal Spread

Happy Tuesday!

Today I had the best intentions of sharing a new card featuring a new-to-my-stash product… but I’ve been sick with a super fun bug (ha) during the time I would have had to create!  So, I’m sharing a throw back post!  My challenge word for today is “lift” and I came across this fun art journal spread that’s a bit interactive, so I thought it was a good one to share!  I hope you like it- it’s from way back in 2017!

Hope you enjoy the throwback!

I hope you’ve had a great week and that you enjoyed our Freaky Friday Blog Hop (if you missed it, it’s not to late to check it out and comment for a chance to win a $25 gift certificate to the online store!  We’ll announce the winners on Friday!).

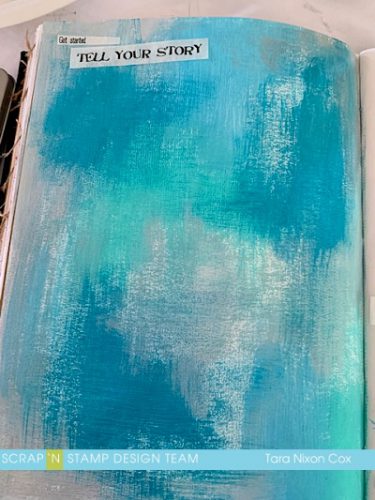
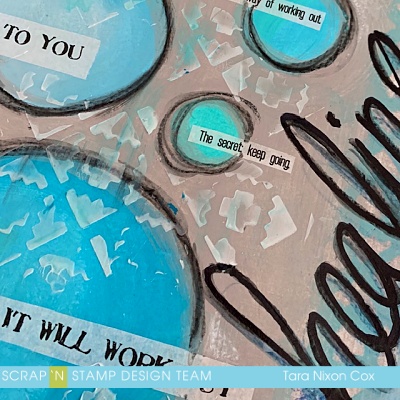
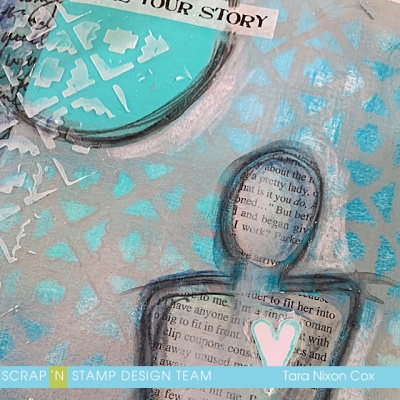
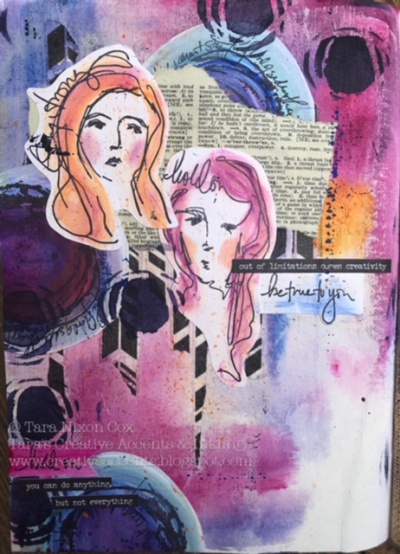
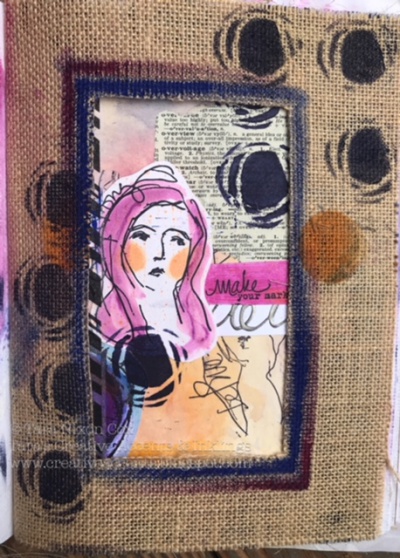
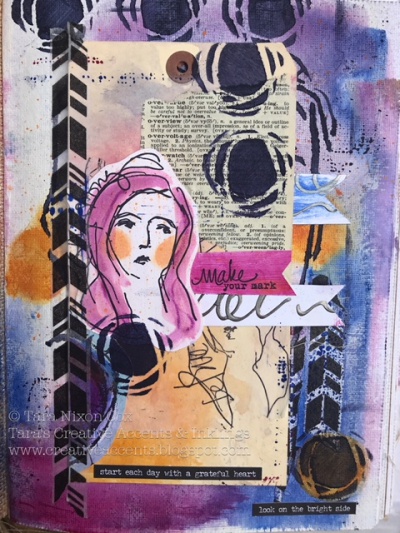
While the hop was happening, I was making a hot mess in an all day Art Journaling class with Dina Wakley!  We had such a fun time, and I tried some new things and stepped out of my comfort zone… it was fabulous!  Today I want to share with you the ‘big’ project we did in her new Mixed Media journal– a six ‘page’ spread with one continuous theme.  Wow!  Since this was a class, I’m not going to be giving you any step-by-step details, though I will encourage you to take a class with Dina if you ever get a chance, she’s a really great teacher!  If she doesn’t teach in an area near you, she’s got classes available online and some great youtube videos to check out as well!

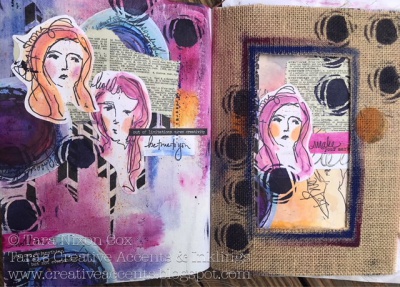
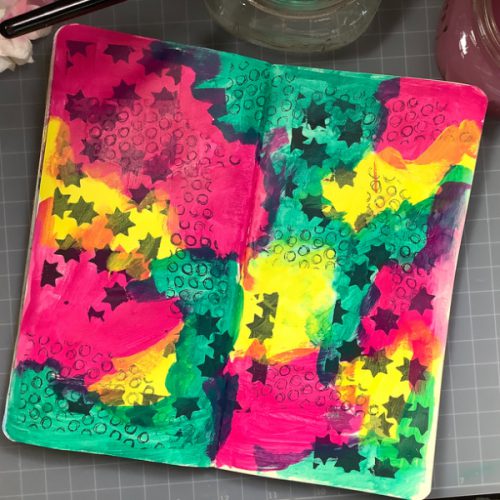
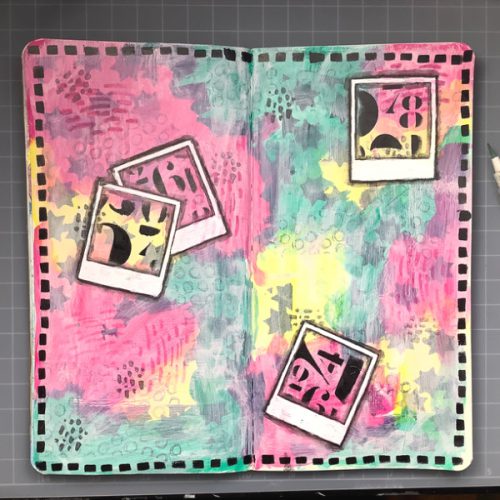
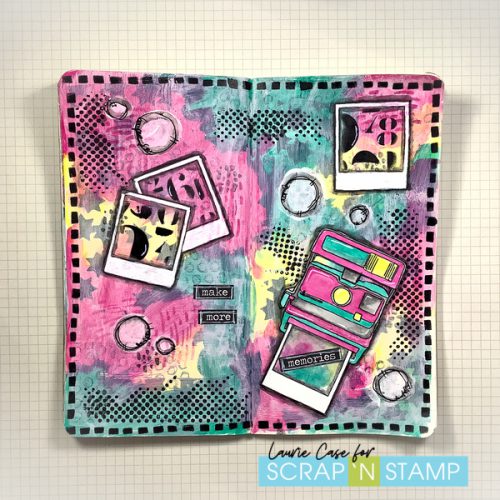
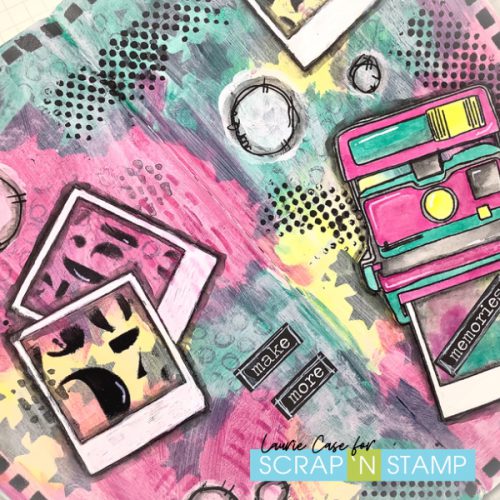
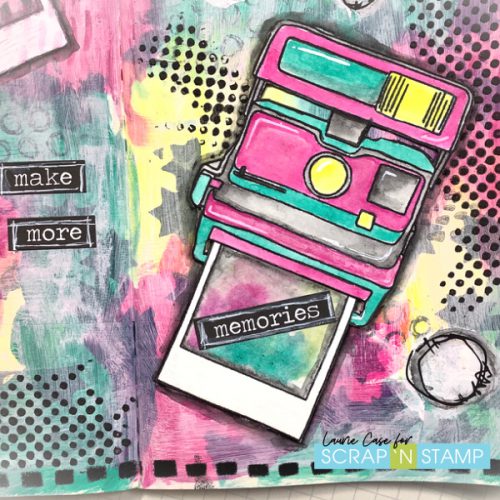
As I said, we worked in the new journal and our spread started with a page of watercolor paper, then burlap (2 sides) then a large tag (2 sides-inserted with her Printed Paper Tape) and finally another page of watercolor paper.  I used images from the ‘Words in Faces‘ stamp set as my focal point.  My color scheme was primarily Lapis, Fuchsia and Cheddar paints from her collection.  I also used a variety of other stamps & stencils from her collection… lots of fun stuff to work with!

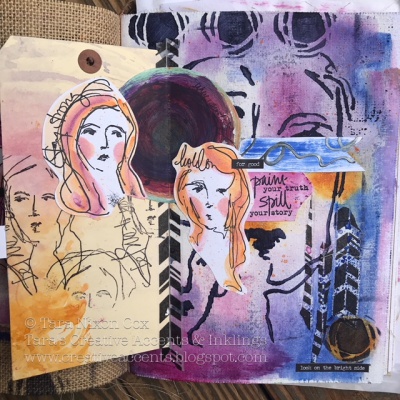
Space doesn’t allow for me to share a ton of close up photos… but I hope you can get a taste of the creative fun I had!  So many things about this stretched me out of my comfort zone, and I loved it!  Hopefully it inspires you to move out of yours this week… and make a hot mess 🙂

Inky hugs,

Tara

Tuesday with Tara {take 308} Hold On Art Journal Spread Read More »

Art Journal Page with Laurie

Happy Saturday!! Today’s keyword on the SNS Challenge Facebook page is “Mixed Media”. I’ve only just begun to dive into the world of mixed media and art journaling. It’s always interested me and there’s so many talented art journalers out there! I could spend hours watching videos! So, after a bit of research, ie YouTube, I got a couple of must haves and started my own.

Here is a list of must haves. It’s a short one. You likely have almost everything you need already!

  1. Gesso…paper prep. Acts like primer for your walls. Can also be used as a white paint.
  2. Gel Medium…gluing down papers (collage) and also seals the page
  3. An inexpensive set of brushes…to apply your mediums

That’s it! You don’t even need an expensive journal! The first page I ever did was in an old book and it worked perfectly. I’ve started working in these traveller’s notebooks from Amazon. They are the perfect size so not too intimidating. Plus, they’re cheap and come in a pack of 3!

To start, I glue to pages together with the Gel Medium. This bulks it up a bit. On this particular layout, I used papers from the Dina Wakley Collage Papers-Backgrounds. This is thin tissue paper. Just rip it up, apply a thin layer of gel medium to your page, stick the paper down and then seal it with a light layer of the gel medium again! Don’t overthink on the placement!!! Make it random and messy. I never have a plan when going into this and as a beginner, I think this is easiest.

This is after the collage paper were adhered and the paint was applied. Looks awful, right? THat’s ok, just go with it! I used Dylusions Acrylic Paints in the colours Bubblegum Pink, Lemon Zest and Polished Jade. Remember, you don’t need special paints!! Use what you have. Watercolours of any sort work great too!

This is where the gesso comes in handy. Or any white acrylic paint. I used a thin coat of gesso over the entire page to tone down that crazy background. Then it was time to add more stuff. For my focal images I used the Oh, Snap Stamp Set from Concord and 9th. Again, I’m using what’s in my stash.

I used Versafine Onyx Black Ink for the stamping. It’s waterproof so I know I’m safe to add more stuff overtop. Let’s have another look.

You can see how the gesso tamed things down a bit. I took a random stamp set in my stash that had some random strokes and dots and did some more stamping. I stamped a few of the polaroid images and added a border using Black Marble Paint and the A Stitch in Time Small Stencil. On the inner portion of the frames, I used the Mini Stencil Set #7 from Tim Holtz. I love this stencil set! I didn’t take the time to mask anything off, just carefully blotted the ink with a makeup sponge wedge.

I stamped and fussy cut the camera image and painted it using the same paints as the background. You can see I covered up the lower right frame I originally stamped. I didn’t preplan where the camera was going to go but it worked out in the end!

The sentiment strips come from a sticker book similar to this. I use a white pencil, or gel pen to add details throughout the page.

You may also notice that I’ve added some white circles. I again used the gesso for this along with my finger. The page was still a bit too bright for me so by adding more white it helps tame it down but also adds more interest. I outlined each circle with a black pen.

We’re almost done! At the last minute, I decided to add some more stenciling using Black Embossing Paste(Black Gesso would also work for this) and the Halftone Borders Stencil from TCW.

And that wraps it up! What I love about art journaling is that there really aren’t any rules. Just slap stuff down onto your paper and go with it!!

Thanks for sticking around for this rather long post, I hope you enjoyed!

Have a great day!

Laurie

Art Journal Page with Laurie Read More »

Tuesday with Tara {take 213}

Happy Tuesday! Today I’m sharing an art journal spread I did while I was on vacation at the beach recently. I had packed a tote with my Dina Wakley paints & a few other supplies, along with my Media Journal, Scribble Sticks & some Collage Sayings, which ended up being a foundation for these pages.

Healing art journal spread featuring Dina Wakley Media

I was inspired by the many shades of blue when I looked at the ocean… it was stunning, so I chose to work almost completely with blues for these pages (I didn’t have ALL the Dina Wakley blues… but I’ve since ordered the ones I was missing! LOL.) You’ll see on these pages: Sky, Turquoise, Lapis & Night together with Elephant & Mineral). I also used some modeling paste I had packed (similar to this one by Ranger) Washi Tape & a Glue Stick. I neglected to pack gel/multi medium and white paint, so that challenged me a bit… but I managed to make it work.

When I started I just knew I wanted to work with blues… so I just started to randomly apply blue paint to a page, overlapping and blending colors as I went. I had some stencils with me, so thought I would lift color off the background with a baby wipe afterwards (I had a mixed blue background, painted over it with elephant, then placed the stencil on top while it was still slightly wet and lifted color through the stencil with a baby wipe). I selected some sayings from the collage tissue and decided I would work with those on my pages, so placed them (not glued them!) on the first phase of my background before continuing on. Here’s step one of the left page:

I decided to sketch out some rough circles for the facing page, filling them afterwards with different shades of blue. I then selected collage sentiments and sorted out a rough layout. I typically forget to snap progress photos when I work in my art journal (especially when it’s been so long since I’ve done it, as was the case this time!) but I wanted to remember where each piece fit, so a quick photo on my phone was a great reference tool 🙂

After filling in the circles, I painted around them with elephant to tie the pages together, then decided to add a circle to the left page to anchor the collage words I had chosen for that page. I added black outlines to my circles with a combination of Scribble Sticks and Stablio Water color pencil. I sketched my title ‘healing’ the same way, then went over it with a black alcohol marker to really make it pop. Details like washi tape and texture paste through the stencil were added to both pages.

I also decided to try my hand at sketching out a loose figure similar to the ones Dina draws. Because I had no white paint, I cut some book print in roughly the same shape and glued it down inside my figure, adding some shading with Scribble Sticks.

I finished with some ‘scribbly journaling’ which overlaps so it’s more of a design element than being actually legible.  I only had a chisel tip marker with me, so I’m not thrilled with my writing… as Dina says, “done is better than perfect” so I made it work. For me it was just a bit of therapy text about my journey of healing so far, since I was recently diagnosed with an auto-immune disease. You can visit my personal blog to see a closer look at each individual page of this spread if you’d like!

Inky (& painty) hugs,

Tara

Tuesday with Tara {take 213} Read More »

Free Shipping Anywhere In Canada