Scratch-N-Stamp
Search

Checkout

Keep up with Sales, New Products and other events at Scrap `n Stamp. Sign up for our newsletter now!

What's New

Hot Deals


coredinations

My Pumpkins – Halloween Bonus Project

HAPPY HALLOWEEN!!  Hi There, It’s me Shari from Ain’t That Artsy Fartsy and I’m so happy to be here today to share a fun little décor piece I made for Halloween.  With so much Halloween inspiration out there, and with a little apropos change to a song lyric, I came up with…..

dsc00308

…wait for it……

dsc00319

While you’re all laughing and chair dancing, I’ll tell you a little bit of what I did to make this altered wooden house.

dsc00291

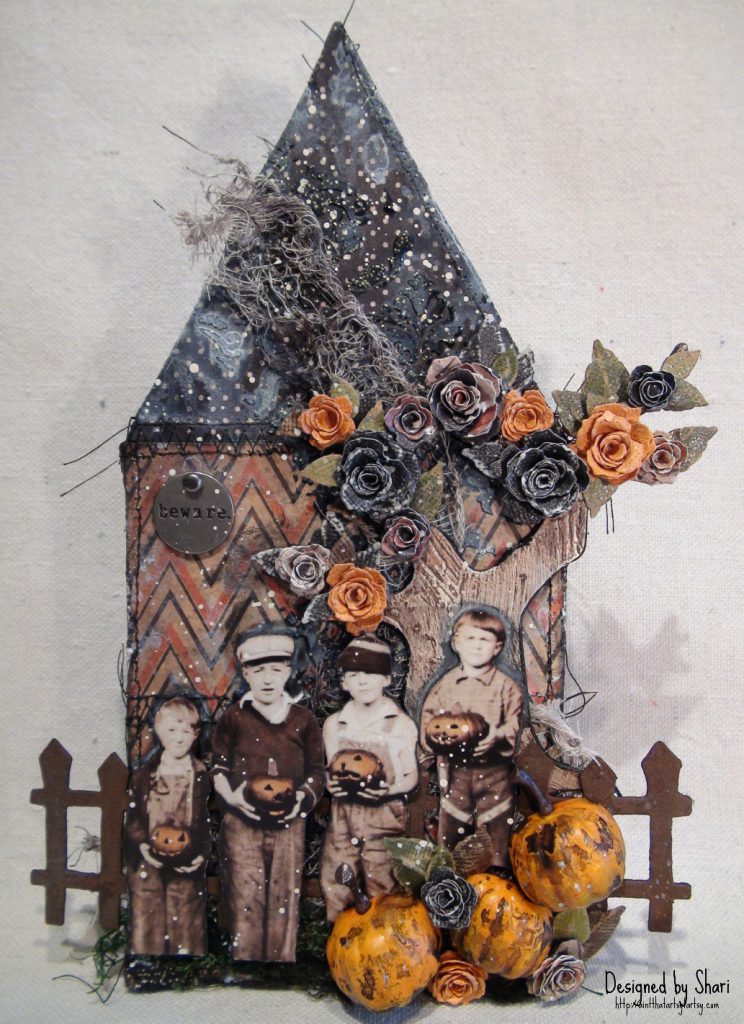
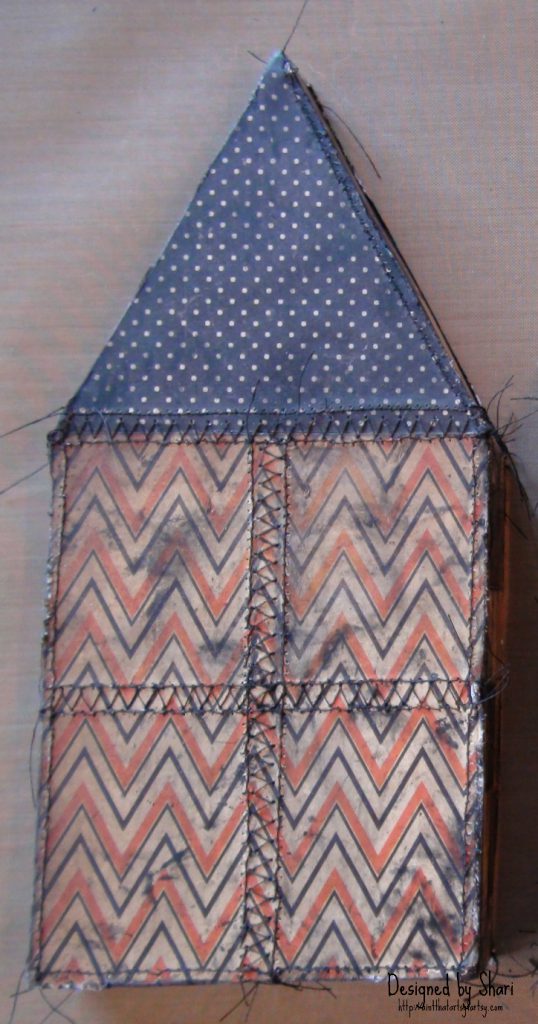
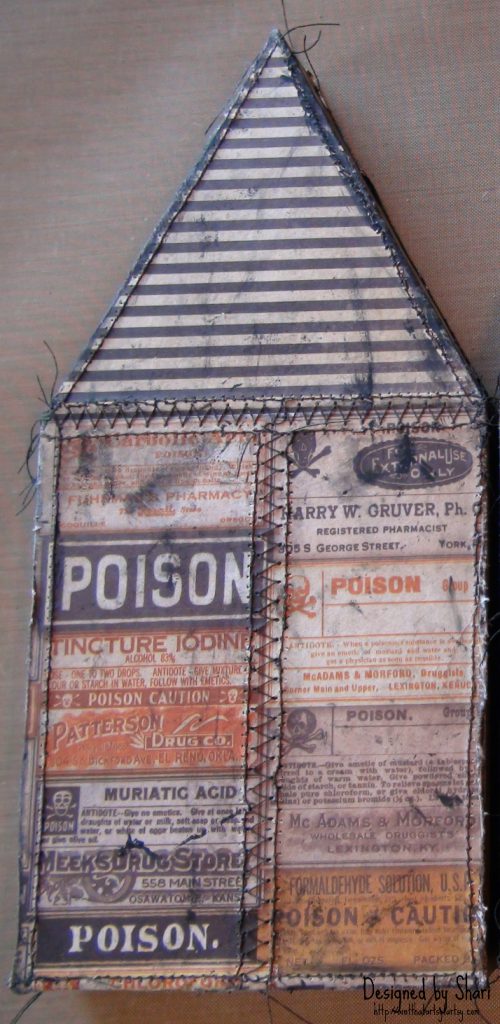
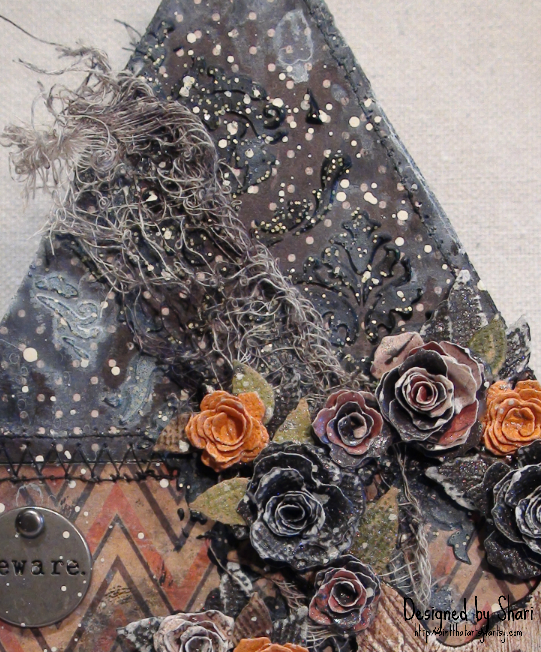
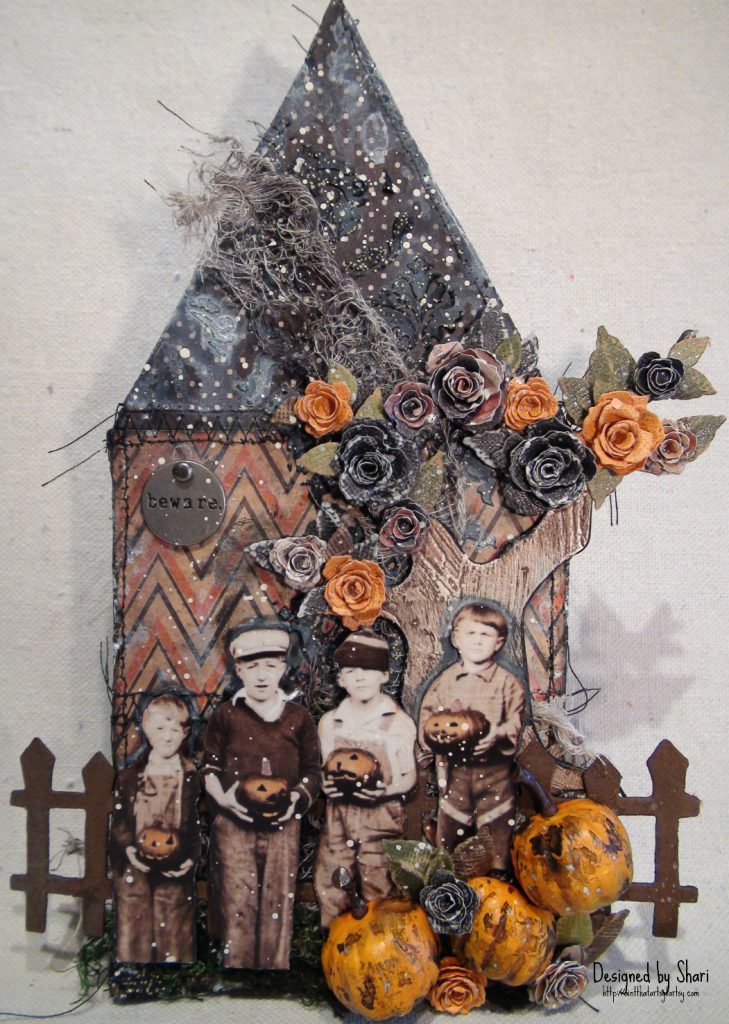
I cut my house out of a piece of unfinished poplar.  This house measures 9″ x 4″ x 1″ and I covered the front and back with pieces of Tim Holtz Regions Beyond Paper Stash that I had stitched together with my sewing machine.

dsc00292

I roughed up the edges with my paper distresser and inked with Black Soot DI then adhered to the front and back surfaces with matte Decou-Page.  I added smears of black gesso with my fingers and adhered a long piece of Design Tape to the outside edge.

dsc00310

I added stenciling to the front and back sides of the house with Tim’s Gothic Layering Stencil and black modeling paste.  While the paste was still wet, I sprinkled Shabby Shutters Distress Glitter over it, tapped off the excess and let air dry.  While that was drying, I spritzed pieces of cheese cloth with a combo of Hickory Smoke and Black Soot DSS and heat set.
dsc00327

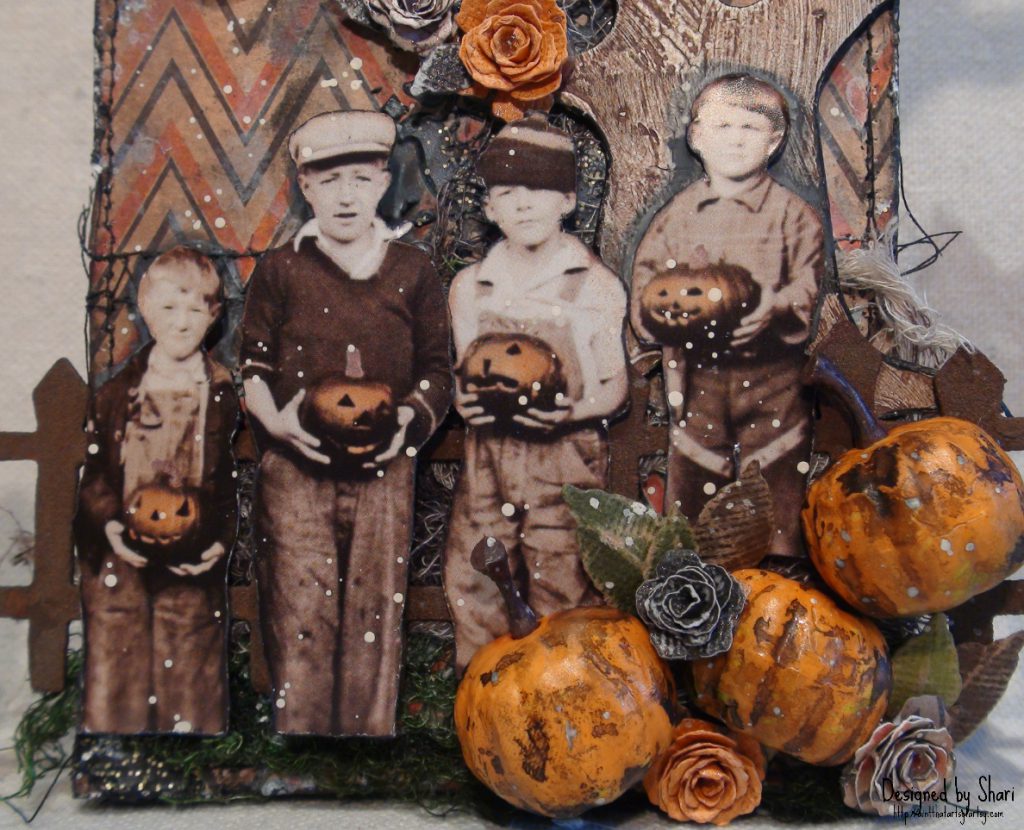
The tree and fence are older Sizzix dies that I treated with crackle paint and rusting powder respectively.  When the crackle paint dried on the tree, I rubbed it with antiquing cream to accentuate all of the neat texture, then I started to adhere the pieces onto the house.

dsc00309

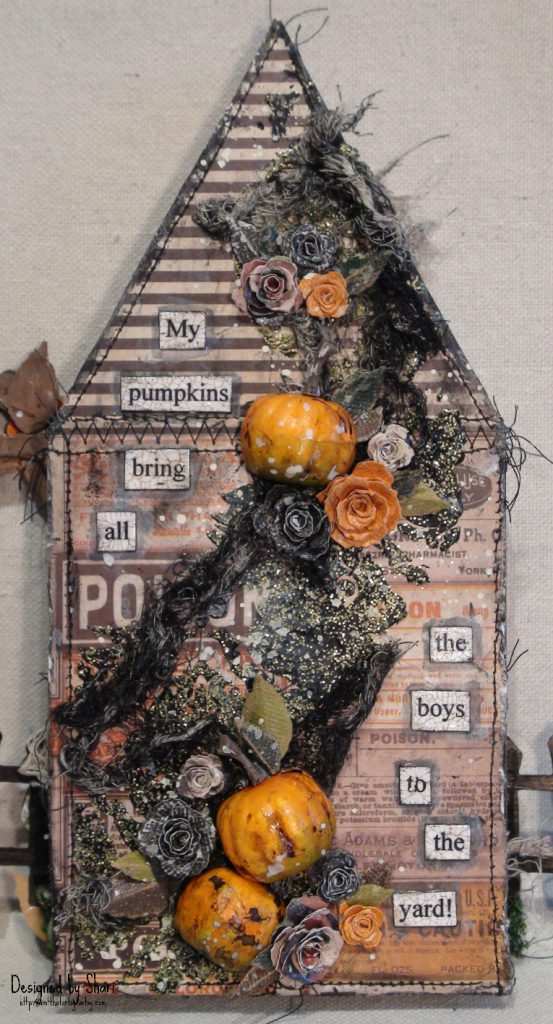
This little foursome of cutie-pies is from Tim’s Found Relatives-Occasions.  I fussy cut them from their card and colored their Jack ‘o Lanterns with my Pumpkin Spice DM.  I die cut a bunch of leaves and roses from the Tiny Tattered Florals die from a mixture of Kraft Core, Color Core and Regions Beyond Paper Stash.  I stained the Pumpkin Pieces with Hickory Smoke DSS and gave all of the roses and leaves a spritzing of Pewter Perfect Pearls Mist.

dsc00321

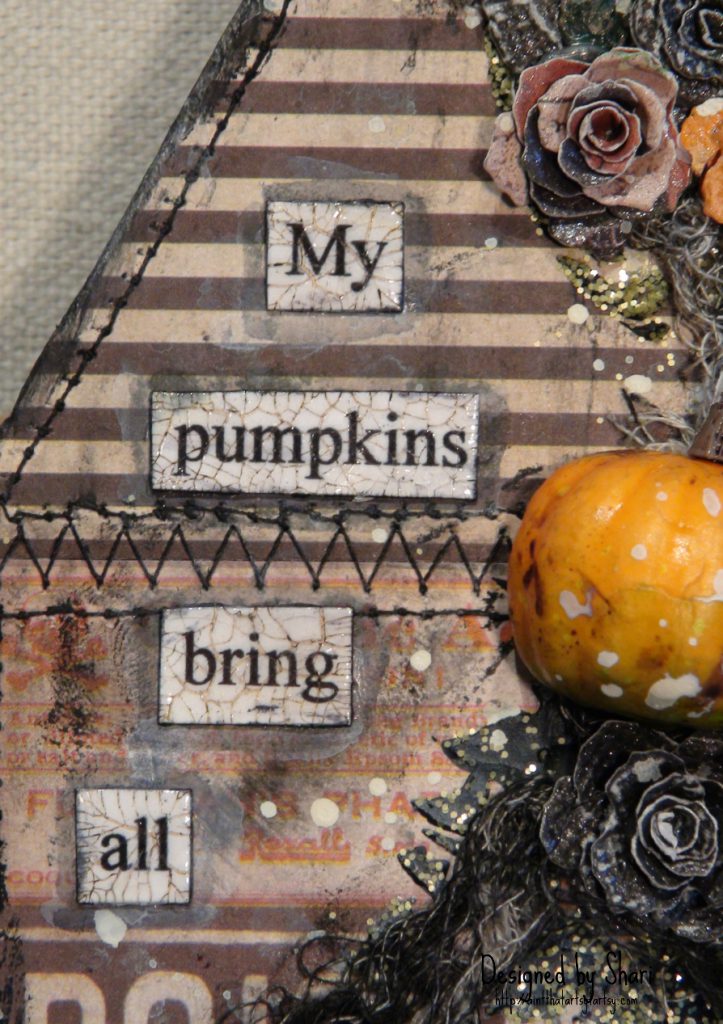
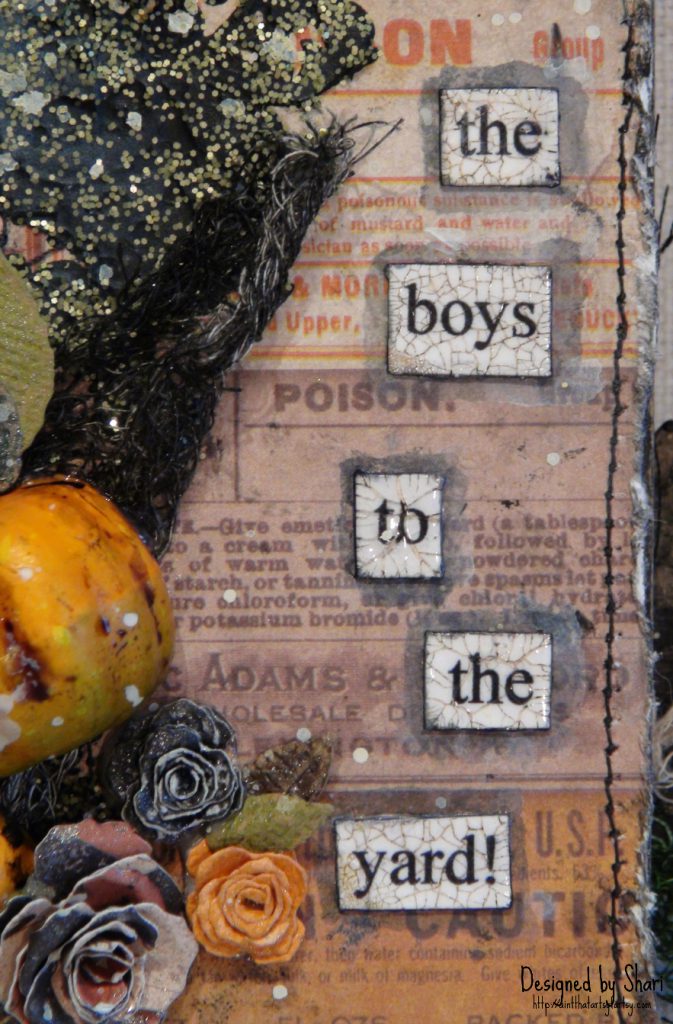
The song lyrics were printed onto white card stock and cut into bands.  I sealed with matte Decou-Page and then coated with clear crackle glaze.  When the crackle glaze was dry, I rubbed with Hickory Smoke DI and adhered onto the house with matte Decou-page.

dsc00322

I outlined the word bands with Black Soot DI and my water brush, then brushed a wash of translucent white paint around the edge of the house, spritzed with water and let the watery paint drip down.

dsc00327

To finish the house, I attached a Typed Token and applied one final splatter of off-white paint to the front and back sides of the house.

I hope you’ve enjoyed my little Halloween house today and will come back later in the week for our Throwback Thursday feature.

Until next time–Stay Artsy Fartsy!! XOXO-Shari

My Pumpkins – Halloween Bonus Project Read More »

Tuesday Tutorial: Thinking Outside Your Nesties – Part 1

Hi everyone. This tutorial was put together by Shellie for us last year but I decided that it was time to feature it again because the technique is so much fun. It’s a great way to use your Nestabilities that has a real ‘wow!’ factor and it works with all kinds of shapes – circles, ovals, squares, rectangles, octagons and even the different labels. The key is to choose a stamp that is larger than the size of your Nestie so that it will go ‘hang’ over the edge.

Here is the original tutorial using regular stamps and Part 2 will show you how to use the same technique with our Studio K Digital Stamps.

Thinking Outside Your Nesties:

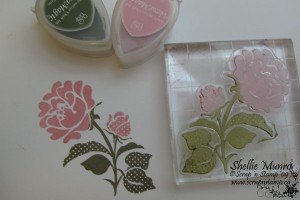
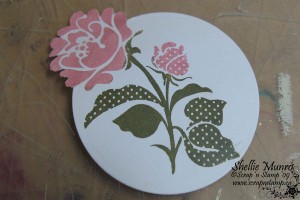
1. Select a stamp and then coordinate it with a Nestie is slightly smaller so that part of the image will be outside the Nestie shape. I chose  a floral image and inked it with Sage & Pink Petunia VersaMagic  dewdrop ink pads.

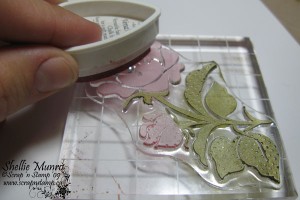
I used the direct to stamp technique to ink the different colors on my flower.

The shape of these dewdrop ink pads is perfect for inking small areas.

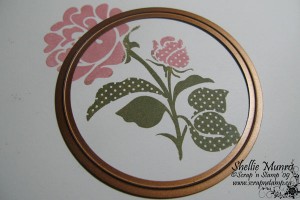
3. Choose a Nestie that fits the main part of your image allowing part of it to ‘hang out’ of the Nestie.

I used the  Large Standard Circles but you could use other shapes like ovals, octagons or one of the labels sets. Just lay the Nestie over your stamped image and try it out to see if you like it. Try different kinds until you find the one that you think will look the best.

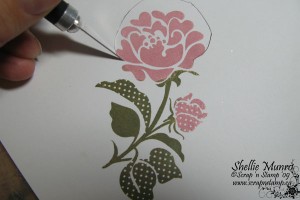
4. Using your craft knife cut around the part of your image that will hang outside of the Nestie. Make sure you cut right against the image where your Nestie will sit.

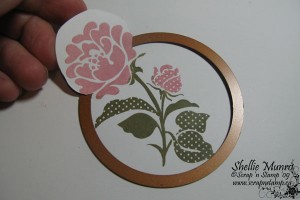
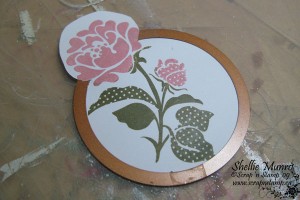
5. Place your Nestie over your image making sure your cut area is on top of the Nestie.

6. Run your Nestie/image stack through your Big Shot or Cuttlebug.

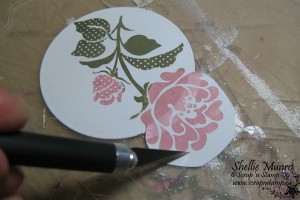
7. Cut around the rest of the image that was outside your Nestie with scissors or your craft knife.

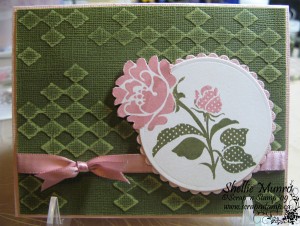
This is what is will look like when you are done.

To Finish The Card:

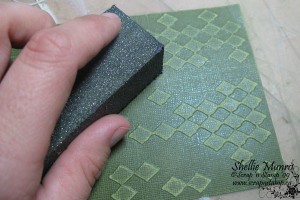
1. Emboss a piece of Core’dinations Cardstock using the Diamonds in the Rough CuttleBug Embossing Folder.

Once embossed gently sand the raised image using a sanding block.

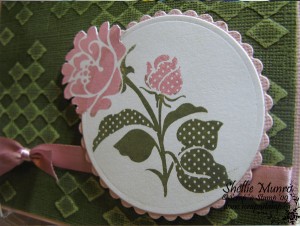
2. Create a border for your stamped image using the coordinating size of Petite Scalloped Circle Nestabilities.

Layer the card elements, add a little ribbon and you are done!

Thanks for dropping by. Hope you give this fun technique a try.

Happy crafting!

Shellie

© Scrap ‘n Stamp Canada 2010

Tuesday Tutorial: Thinking Outside Your Nesties – Part 1 Read More »

November Sketch Challenge #1

Nov-1Every Friday we post a new sketch challenge on the Blog with a sample made by one of our talented Design Team members for inspiration.  You can use this sketch to create your own version of the card or as the jumping off point for a scrapbook page, home decor items or whatever you like. We would love to have you share your creations so we create a new gallery each month that you can upload your pictures to. It’s a great way to inspire others and get share ideas and techniques.

As a little bonus we hold a random draw every month for FREE stuff from Scrap ‘n Stamp that you can win just by uploading your creations to our gallery. Hope you will play along.

___________________________________________________________________________

Here is what you could win this month:

November-Prize

2 Packages of Kaiser Craft Rhinestones, 1 Package Kaiser craft Grosgrain Ribbon, and this fabulous CuttleBug Embossing Folder a retail value of $14.96

___________________________________________________________________________

Now for some Fabulous Samples from our Design Team!

Mary-Ann Made this one:

nov2

Supplies Used: Core’Dinations cardstock, Gold StarDream Cardstock, Studio K Glitter & Embossing Powder, Inkadinkado Stamps and Kaiser Craft Pearls

Tanis made this one Using the most adorable snowman!

Tanis-SNS-11-06-09

Supplies Used:

Filigree Snowman, Wassail Paper, Ultra Smooth Cardstock,Memento Black ink, Stickles, Silver Brads

Nadia made this card:

nov1

Supplies used:  Coredinations cardstock, Basic Grey paper, Cuttlebug Embossing Folder Floral Fantasy, Spellbinders Nestabilities, ribbon, Kaiser Rhinestones, Inkadinkado Stamps and VersaMagic Inks.

November Sketch Challenge #1 Read More »

Free Shipping Anywhere In Canada