Scratch-N-Stamp
Search

Checkout

Keep up with Sales, New Products and other events at Scrap `n Stamp. Sign up for our newsletter now!

What's New

Hot Deals


mixed media

MFT Floral Blooms

Hello Crafty friends, Nancy F here today to share on the Scrap’n Stamp blog. I decided to do something a little different, yet still playing along with the monthly challenge. I am doing an all mixed media style card, from used books pages to gel pressing. So grab your favorite beverage and sit back and enjoy it.
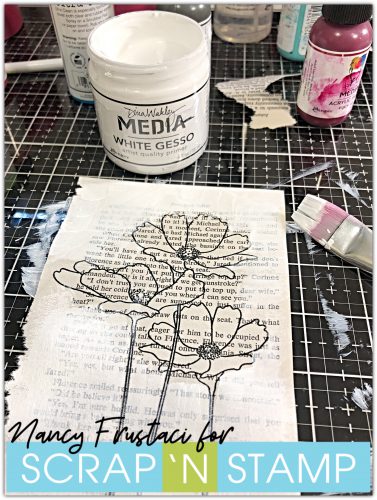
mixed media pages, stamped the floral  blooms on to pages of an old book and heat set it with some embossing powder. I then added gesso around the flowers

I started by stamping out these beautiful Flowers in bloom set from My Favorite things on to the pages of the book using my stamping tool and Versa Clair nocturn ink .  Then I heat set with clear embossing powder to help the image stand out from the writing, then repeated this process four times. 

I also had too many ideas flowing through my head by this point, from art journaling layouts to more cards. So stay tuned for more projects.
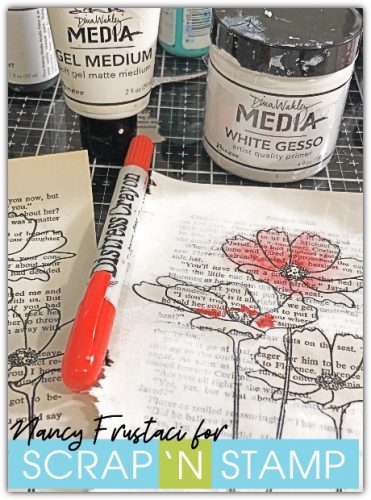
adding colour to the flowers with distress crayons and Dina Wakley paints


Now that all the stamping and embossing was completed it was time for the fun messy part, getting in with the paints and gesso. This is always my favorite part. 

To bring the focus more to the flowers I decided to add Dina Wakley media white gesso to the book pages, carefully going around the flowers. This really helped to mute the print down some and allow the flowers to pop. I decided to actually add some gel medium to the petals of the flowers, I felt this would seal the paper and allow me to wipe any mistakes away easily.
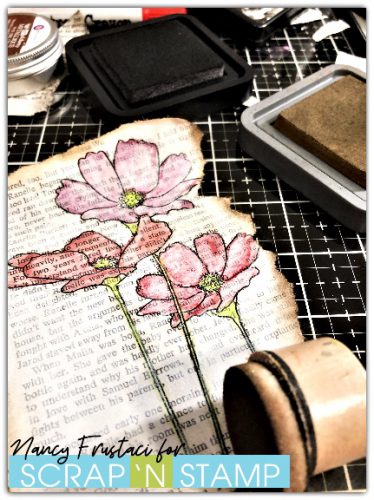
finishing off the edges of the book page with some ground espresso, and black soot

 I created three styles of cards with three versions of the painting. 

For the above, I would add my paint in and then wipe it away allowing it to stain the paper and give it a night tinted look. Once I was happy with how it looked I decided to distress the edges of the paper, using distress oxides and regular inks.
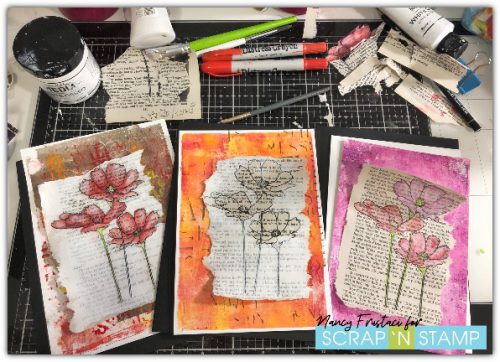
adding the flowers too some previously created gel pressed backgrounds

The cards themselves were larger than normal, cards measured 5 ½ X 7 ¾. I used some of my previously created gel backgrounds and really did not want to trim much off of them, thus keeping as much of the detail as possible. I chose the background to match or enhance the flowers.
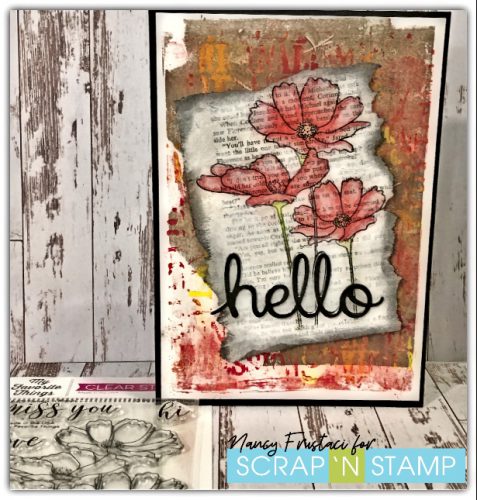
A close up of one of the finished cards,

  Each gel pressed backgrounds were added to the card flat using a liquid adhesive. For a little dimension popped up the painted flowers using some foam tape. To complete the card I used a simple hello die and layered a few of them together to create dimension also adding a mirror layer to the mix.

I hope you were able to get some inspiration from the above and welcome your comments. Please also make sure to use the links below for your crafting needs. 

Have a Great Week! 


MFT Floral Blooms Read More »

Gel Press Bliss

Hello and Happy Friday Crafty Friends,

I am so happy to be on the blog today sharing a couple of cards I created using the Gel Press, some Dina Wakley media paints and a couple of beautiful stamps from Picket Fence Studio. I hope you enjoy and find some inspiration.

I love love love the gel press and all the wonderful things you can create with them. I will have a lot more projects using them in the future.

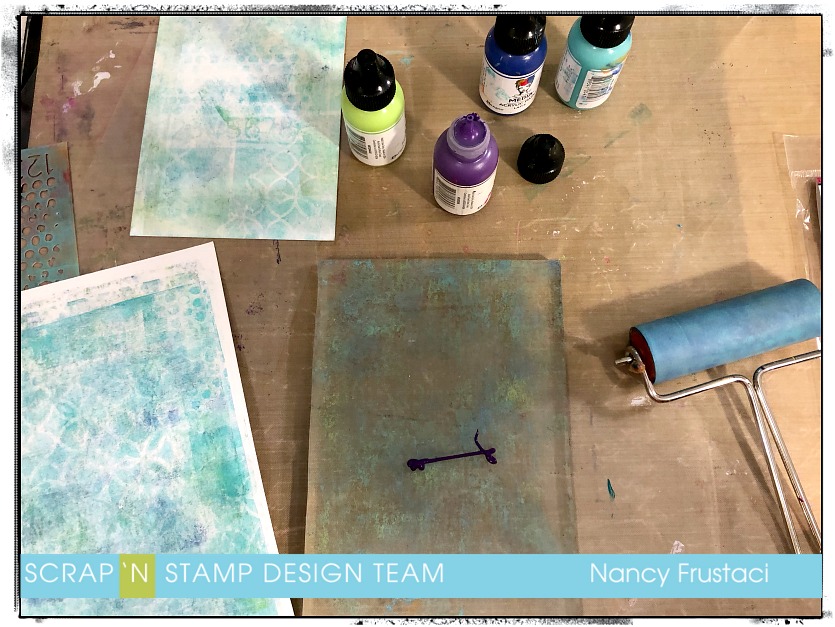
These cards came about as a happy accident, I literally was just playing around with the gell press, trying different colors and stencils, and man once you start on this journey, you really cannot stop doing the prints.

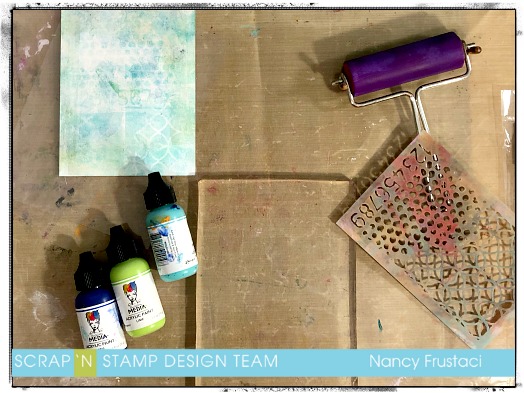
I pulled out all my products, my paints which are Dina Wakley Media, my gel press, of course, a stencil i had in my stash from a Tim Holtz tag kit and my ink roller. I cut down different sizes and types of paper I would need for pressing. By using different weights and types would give for more options in future projects etc. (The best tip  I heard is to have all your paper precut and ready to go before you start, I have caught myself without and had to stop midway through creating. Not fun when you are on a roll and covered in paint.) Which has happened to me lol, I sometimes just go for it and forget to plan and end up just grabbing random scraps from around my messy craft room and desk.

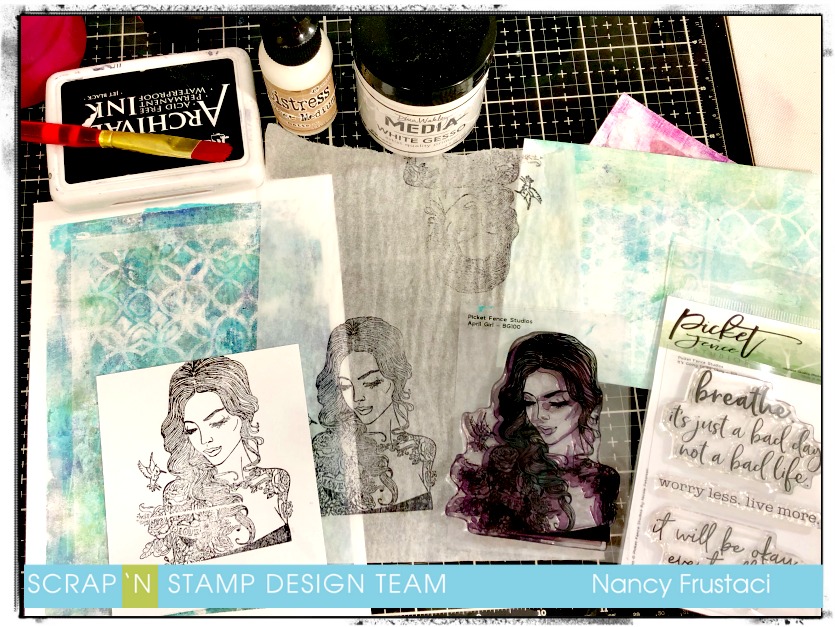
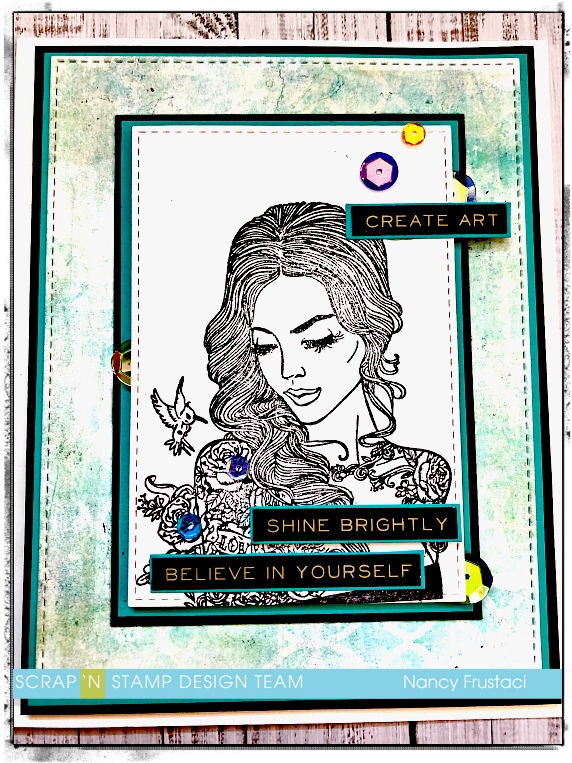
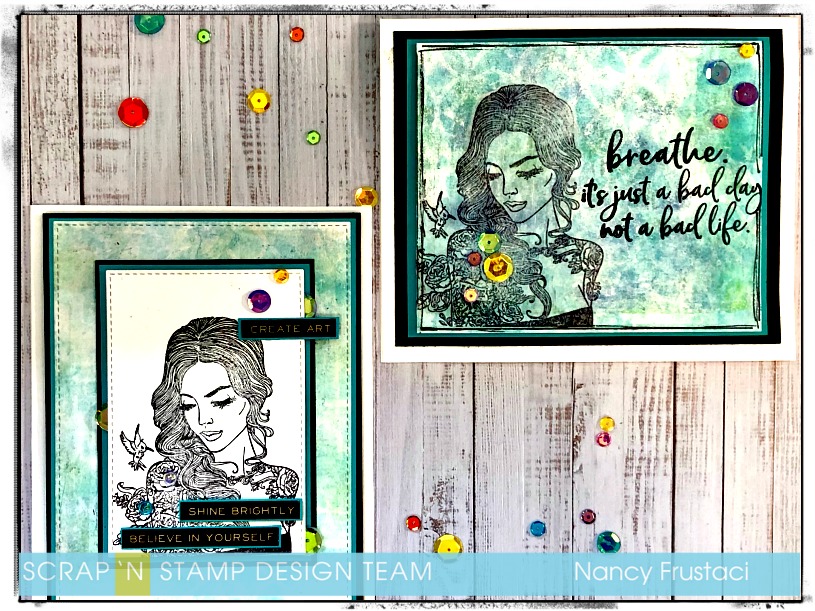
Once I had the backgrounds where I liked them, I set them aside too dry. I had recently purchased these two wonderful Picket Fence stamps from Scrap’n Stamp, which was just sitting on my desk waiting to be used. I felt the April girl would be the right fit for the look of the background. I decided to create two different versions of the card. For the first one, I stamped her on to a piece of collage paper that I had in my stash. I stamped her using Archival ink. The second image I stamped on to heavy weight white cardstock.

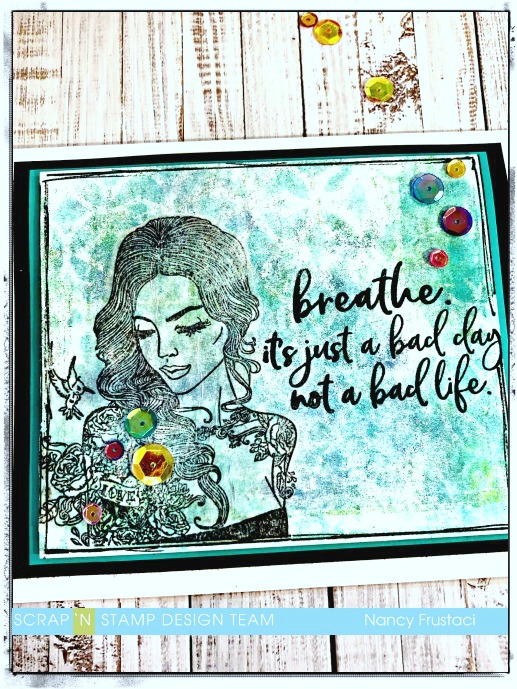
I cut out the image from the Collage paper and added her to the Gell press background paper I had previously created. I love how the paper just disappears and you are left with just the stunning image that popped and showcased all the stenciled texture. I pulled out my stamp press and added the sentiment using Versa Clair nocturn ink. I love how bold and crisp this ink is, I highly recommend it.

I popped up the inked panel, which measures 4 3/4 x 4, on to some teal card stock which I cut down to 5 x 4 1/8, using some foam tape and then adhered that on to a layer of black cardstock, just to make everything pop. To finish off the card and cover up some a little issues I added some really vibrant sequins from my stash and drew some sketchy lines with my black pen.

For the second card, I decided to change it up a bit and add some die cutting to the mix using the My Favorite Things stitched rectangle dies. I love the added texture and interest it adds. I cut down multiple layers of card stock, once again using the black and teal cardstock, to layer both the focal image and the gell pressed background. I die cut the stamped image and inked background as I thought this would make it all pop. I adhered the teal and gel pressed background flat down to the black cardstock, which in turn I popped up on to the white card base. For the focal image, I popped her up on to teal layer and flat to the black. Giving just enough dimension to the card.

To finish the card off I layered the Tim Holtz sentiment stickers on to that same teal cardstock and strategically placed them onto the card trying ton to cover the image up too much. Finally, to bring it all together I added the same pretty sequins to just the right areas of the card, it just added that little extra something that was missing.

If you have not had the chance to play with a gel press I highly recommend that you do, you can even start off small as Scrap’n Stamp carries various sizes, one as small as 3x 5 and all the paint and supplies you need to get started. I do warn you though it is highly addictive.

I hope you have a wonderful long weekend with a lot of time to have fun and create.

~Nancy


Gel Press Bliss Read More »

Tuesday with Tara {take 197}

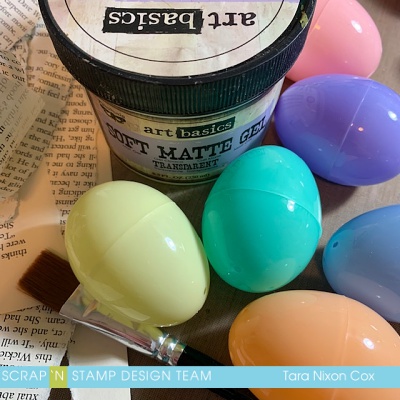
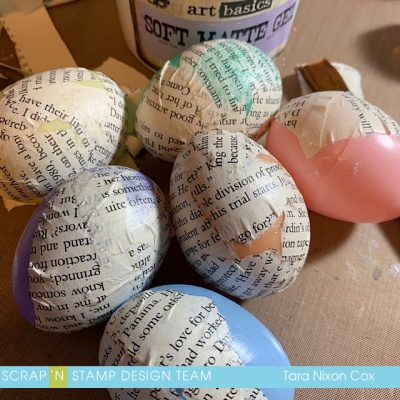
Happy Tuesday!  As I was reminded of a project I shared here back in 2017, decorating Easter Eggs with alcohol ink, I thought it would be fun to use my paper crafting/ art supplies in another way on eggs.  This time I decided to start with simple plastic eggs, available almost anywhere this time of year and to do some simple decoupage on them.  I started with a matte gel (mine was by Prima, but this one from Ranger, or any ‘matte medium’ will work just as well!) as my adhesive to adhere torn strips of book paper to my eggs.

I worked in two steps, first covering about half the eggs, then finishing it off once the first part was dry.  This gave me a dry spot to hang onto while I worked and kept me from getting quite as much stuck to my fingers 😉  The eggs dried fairly quickly, though I let them sit overnight before moving on to the next phase…

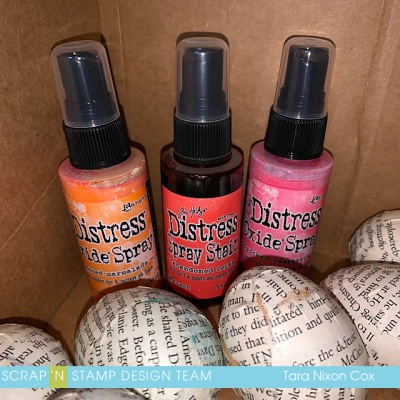
I decided to experiment with different coloring mediums, but primarily wanted to see how Distress Oxide sprays (you can save on the new set of 12 sprays here) & ink pads would work!

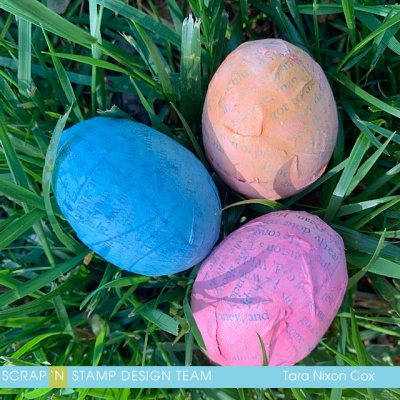
I started by spraying some of the original Distress Stain Spray onto a couple eggs, then quickly realized I would need to start with a coat of gesso to make it work best, so I wiped off my eggs with a cotton cloth and applied white gesso to all my eggs, misting with water to make it less opaque so I could still see the text.  This was also a great time to apply a bit of gesso thicker to a few spots where words I didn’t want on my eggs had snuck in… )note to self, maybe don’t use a murder mystery as your collage paper next time. lol).  I didn’t snap a photo of this stage so you’ll have to use your imagination!  I applied the Abandoned Coral to two eggs, then sprayed one with Spiced Marmalade Distress Oxide Spray and the other with Picked Raspberry.  I rolled them around in a box to capture all the angles, heat them with a heat tool, misted some water to get it to oxidize… and eventually finished them off by blotting again with a cotton rag.  I love the soft chalkiness of the color and the fun mix I got where the original spray shows through!  As a bonus, my fingers were nice and inky (though I did wash my hands between colors to keep my colors more pure).

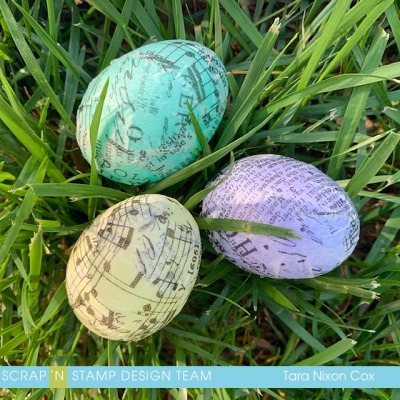
Next I decided to see how the Distress Oxide Ink pads would compare- so I used a foam blending tool and picked my colors.  For this, I just applied ink & blended, then misted with water, wiped dry and added another layer.  Both techniques worked fabulous!  This photo shows that the colors are just as intense, though the inking is more mottled and organic looking on the eggs that I sprayed.  Whatever you use, be sure to mist with water as this will help set the oxide ink and keep the color from spreading over the other eggs (and onto hands that pick them up to have a closer look!).

I had some collage tissue I wanted to try as well, so I did some simple decoupage of torn tissue onto my colored eggs.  I thought about adding more to these, but decided to leave them as is to let the design and color of the eggs show through!

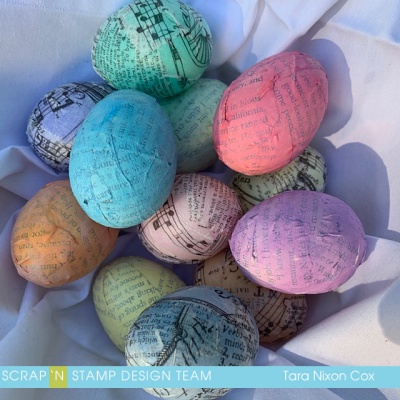
The tissue technique was much faster since it only took one step, but the final look will depend what color your original plastic eggs are 🙂  here’s a peek at my little basket of eggs-

I hope this inspires you to pull out your supplies and have some mixed media fun for Easter!  The possibilities are endless…

Inky hugs,

Tara


Tuesday with Tara {take 197} Read More »

Free Shipping Anywhere In Canada