Scratch-N-Stamp
Search

Checkout

Keep up with Sales, New Products and other events at Scrap `n Stamp. Sign up for our newsletter now!

What's New

Hot Deals


Author name: Chala Frank

Watercolour Leaf Print Card

Hi There!
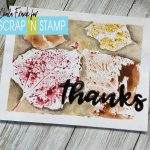
Thanks for popping by to check out my Watercolour Leaf Print Card.

This card is so simple yet elegant and I love the technique of printing with things from nature.

You will need to venture outside to find some leaves of varying shapes and sizes.  If you can find leaves that have not yet gone crispy, I found they worked best for this technique.

I am using Canson XL Mix Media 98lb paper, however, you can use regular watercolour if you like.  I am using the mixed media paper as I was unsure if I wanted to stamp a sentiment on the front.  I find that sometimes watercolour can be a bit “toothy” and stamping does not always come out clear.

The next item you are going to need is some watercolours.  The brand does not so much matter, as long as you like using them, that is the important thing.  I am using Grumbacher watercolours.  They start out in the tube and I squeezed out a small amount into a pallet, which I then let the paints dry and I can reactivate them with a couple spritzes of water.

I am using a flat watercolour brush, two small rounds and a 1/4 inch angle shader brush, but you can use whatever brushes you like to work with.  I first use the flat brush to apply some of the watercolour onto the back of the leaf.  Using the back takes advantage of all the vein details and will transfer better onto the paper.  The consistency of the paint is really up to you and what look you are going for, however, I found that a thicker consistency of paint seemed to work best to transfer a more detailed image onto the paper.

Once I had enough paint on the leaf I then turned it over and laid it onto the paper applying even pressure to transfer the image.  You can do this as many times as you like, with which ever leaf and colour that you think looks best.

Let these stamped images dry completely before moving onto the next step.  You can use a heat tool to speed the process up if you like.

Now we will use our round brushes to wet the areas between the stamped images.  Drop in whatever background colours you like to help make the images pop.  I stuck with a very simple pallet and used some left over mixed paint that I already had.  Basically what I am trying to achieve is some shadowing behind the leaves to help them stand out.

I suggest that you do this process slowly and build many layers of paint, drying in between.  I find that if I take my time and build many layers as opposed to trying to get a thick layer of paint right away, I am much happier with the outcome.   Be patient and enjoy the process of layering the paint and take note of how the pigments flow.  Don’t forget to have fun!  Play around and experiment!  You can see my layering process by clicking HERE to watch the video.

When I was happy with the background I achieved I then dried the project and removed the light tack tape that I used to adhere the paper to my board.  I like creating a white border around my watercolours.

I shifted gears for the sentiment on the front, instead of stamping I decided to go with a simple “Thanks” die cut and adhered three layers together with Art Glitter Glue to create some dimension.  I secured the panel onto an A2 120lb white cardstock base and then secured the “Thanks” sentiment down on the lower right hand corner and added some Glossy Accents for shine.

The inside sentiment was stamped in VersaClaire Nocturne ink with a sentiment from the Kind Thanks stamp set from My Favorite Things.
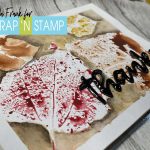
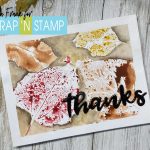
 I hope you enjoyed today’s card technique and I would love if you posted what you create over at the Facebook Challenge page!

Have a crafty day!

~Chala

Watercolour Leaf Print Card Read More »

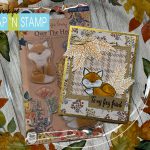
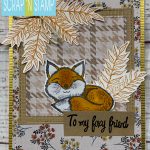
Foxy Friend – Over the Hedge – Henry the Fox from Craft Consortium

Welcome back!

Today I am sharing with you an adorable stamp set from Craft Consortium called Over the Hedge – Henry the Fox.  I thought this stamp set tied in with our Random Acts of Cardness Challenge word Furry Friends.

There is something about this time of year that makes me want to create cards in the woodland theme.  Fall to me is earthy tones and furry friends and that is what I am hoping to convey in today’s card.

If you would rather watch the video and for close up pictures you can click HERE.

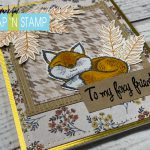
I started out by preparing my background layer papers.  I trimmed a corrugated piece of gold cardstock to fit an A2 size card base.

Next I pulled some fall papers from my stash (I promised myself I would have to use what I already have).  The papers are from the Give Thanks Recollection pack and a Woven Papers pack, although you can use any papers you like.  I used the Paper Rose  – Stitched Rectangles and some stackable stitched Square dies to die cut the different layers.

I then stamped out the images onto some 110lb cardstock.  I used Memento Tuxedo Black ink for the fox as I wanted to Copic colour him.  I stamped the foliage in Rusty Hinge Distress ink.  I think the next time I make this card I will use Versamark Watermark ink and some gold embossing powder instead.   I think that would have tied in nicely with the gold paper.  Then I fussy cut out the images and adhered all the layers together using my Art Glitter Glue.

The sentiment is stamped with VersaClair Nocturne Black ink onto some craft cardstock and heat embossed with clear embossing powder.  I trimmed it to size and adhered to the lower right portion of the card.

This card is super cute and came together so quickly.  This is one I want to mass make for my friends for sure!

I hope you enjoyed today’s card.  Looking forward to the furry friends that you share on the Facebook Challenge Page!

Warm Hugs!

~Chala


Foxy Friend – Over the Hedge – Henry the Fox from Craft Consortium Read More »

Fall Foliage with Tim Holtz

Happy Saturday Friends!

Well, there must have been a glitch in the Matrix as we seem to have the word Fall show up twice for our Random Act of Cardness Challenge this month.  That’s okay!  Who doesn’t like a little extra inspiration?  Especially when it involves Tim Holtz!

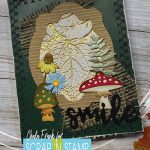
Today I am using the Foliage 3D Embossing Folder  and the Funky Foliage Thinlit Dies by Sizzix and Tim Holtz.  These two products are perfect for fall themed cards.

If you would rather watch the video then read about the process you can click HERE

Now I must admit I had a general idea of what I wanted this card to look like and it didn’t come out exactly the way I wanted it, but that’s okay.  We aren’t always going to love every thing we create and I have learned to just enjoy the process with this one.

I started by taking the 3D embossing folder and apply Versamark Watermark Ink onto one side of the folder.  I then place a piece of 120lb white cardstock inside and ran it through my Gemini Jr.

Next, I applied Sunflower Sparkle Perfect Pearls  to the side with the Versamark.  This really helps to bring out the dimension in the embossed piece.

I then die cut a frame using my Silhouette machine, but you can use a frame die if you have one.  I adhered that frame onto a part of the embossed cardstock that I liked and then fussy cut around the frame.  You can save the left over pieces to add to another card.   I also die cut the two mushrooms, sunflower, fern sprig and little floral and adhered them together with some Art Glitter Glue.  I also added some Vintage Photo Distress Ink to the edges to add dimension to the die cuts.

I have recently been challenging myself to add more layers and different textures and mediums to my cards.  I pulled out my burlap and will some to my card.  I pulled out some chalkboard cardstock in a hunter green colour and will use that to adhere all the elements on.  Before I do that I want to distress the edge with a paper distresser.  You don’t have to do this step, I just thought it would add more texture to the card.

To add even more interest I decided to use a decorative stitch with my sewing machine around the edge of the card.  I can now adhere the panel down to an A2 side folding card base.

The last step is to add a sentiment and I pulled out some of my word dies and thought “Smile” suited this card the best.

I love everything that is going on with this card, but there is something that it is missing and I can’t put my finger on it….perhaps you guys can let me know what you would add or do differently with it.

Well, that’s it for me for today.  I hope that you are inspired to create some fall cards of your own!

Take care and stay crafty!

~Chala

Fall Foliage with Tim Holtz Read More »

Free Shipping Anywhere In Canada