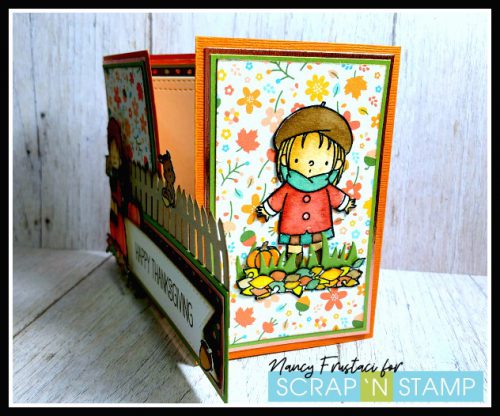
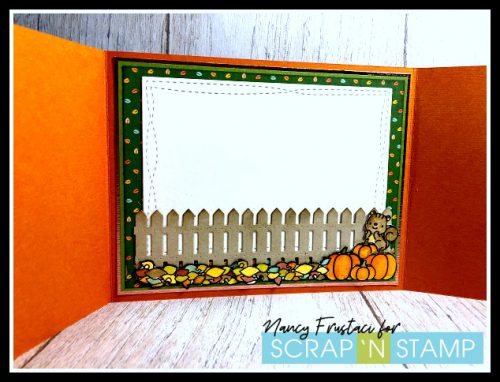
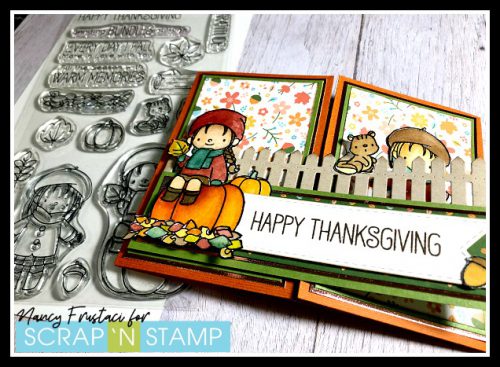
Scratch-N-Stamp
Search

Checkout

Keep up with Sales, New Products and other events at Scrap `n Stamp. Sign up for our newsletter now!

What's New

Hot Deals


Author name: Nancy Frustaci

MFT Floral Blooms

Hello Crafty friends, Nancy F here today to share on the Scrap’n Stamp blog. I decided to do something a little different, yet still playing along with the monthly challenge. I am doing an all mixed media style card, from used books pages to gel pressing. So grab your favorite beverage and sit back and enjoy it.

mixed media pages, stamped the floral  blooms on to pages of an old book and heat set it with some embossing powder. I then added gesso around the flowers

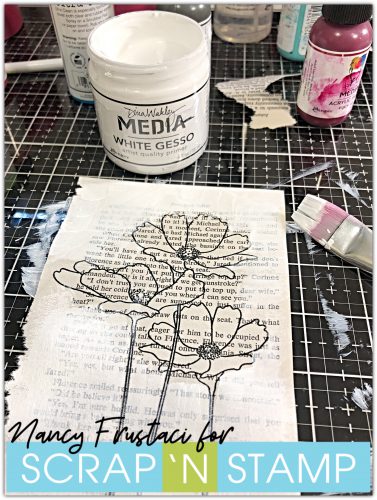
I started by stamping out these beautiful Flowers in bloom set from My Favorite things on to the pages of the book using my stamping tool and Versa Clair nocturn ink .  Then I heat set with clear embossing powder to help the image stand out from the writing, then repeated this process four times. 

I also had too many ideas flowing through my head by this point, from art journaling layouts to more cards. So stay tuned for more projects.

adding colour to the flowers with distress crayons and Dina Wakley paints


Now that all the stamping and embossing was completed it was time for the fun messy part, getting in with the paints and gesso. This is always my favorite part. 

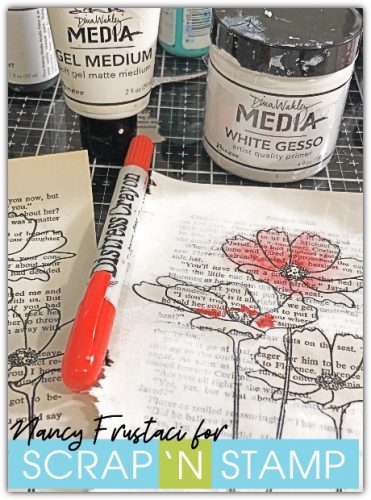
To bring the focus more to the flowers I decided to add Dina Wakley media white gesso to the book pages, carefully going around the flowers. This really helped to mute the print down some and allow the flowers to pop. I decided to actually add some gel medium to the petals of the flowers, I felt this would seal the paper and allow me to wipe any mistakes away easily.

finishing off the edges of the book page with some ground espresso, and black soot

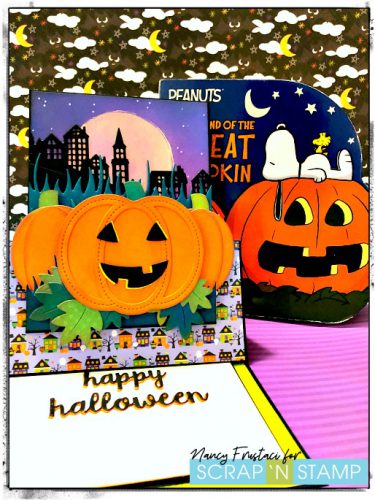
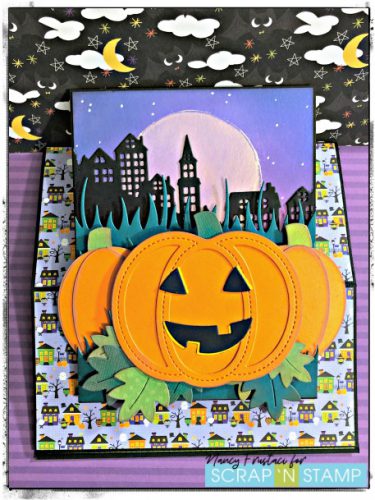
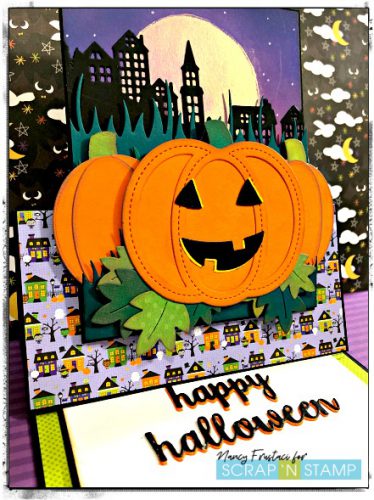
 I created three styles of cards with three versions of the painting. 

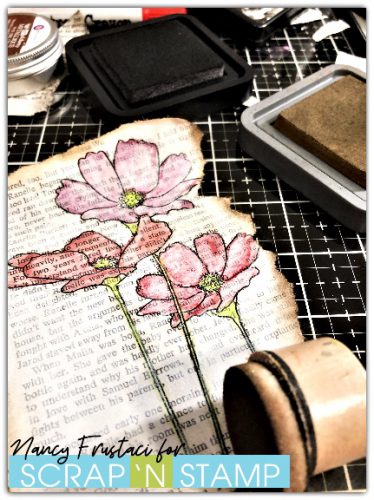
For the above, I would add my paint in and then wipe it away allowing it to stain the paper and give it a night tinted look. Once I was happy with how it looked I decided to distress the edges of the paper, using distress oxides and regular inks.

adding the flowers too some previously created gel pressed backgrounds

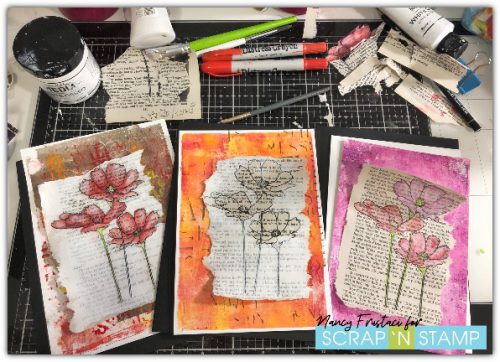
The cards themselves were larger than normal, cards measured 5 ½ X 7 ¾. I used some of my previously created gel backgrounds and really did not want to trim much off of them, thus keeping as much of the detail as possible. I chose the background to match or enhance the flowers.

A close up of one of the finished cards,

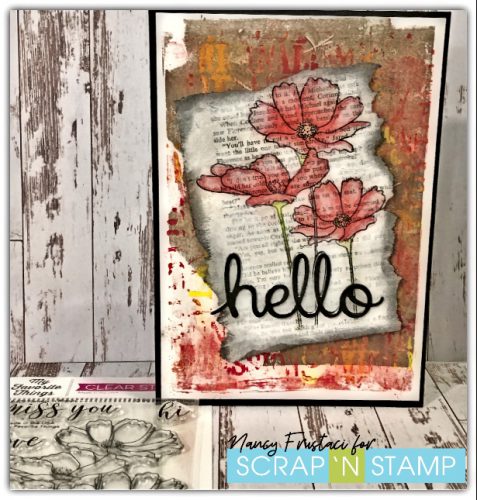
  Each gel pressed backgrounds were added to the card flat using a liquid adhesive. For a little dimension popped up the painted flowers using some foam tape. To complete the card I used a simple hello die and layered a few of them together to create dimension also adding a mirror layer to the mix.

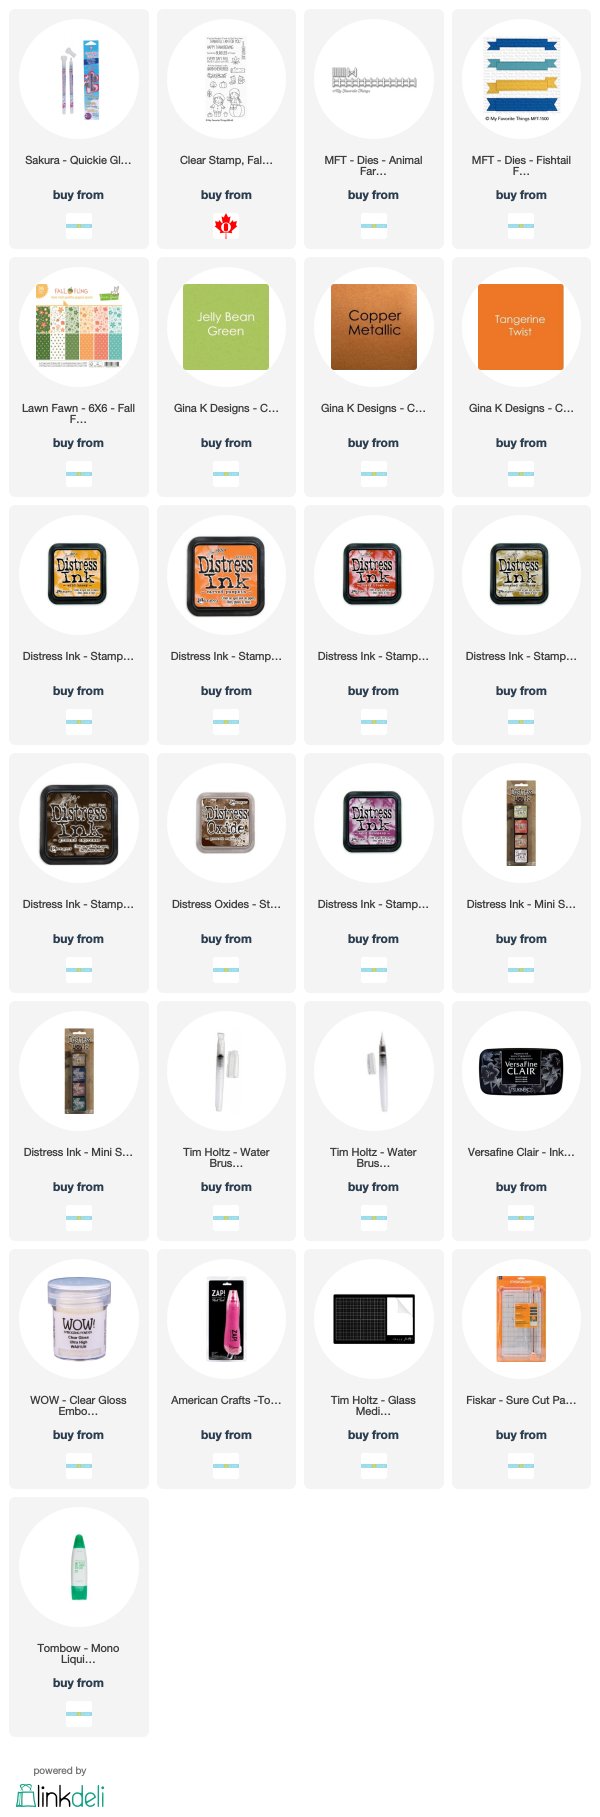
I hope you were able to get some inspiration from the above and welcome your comments. Please also make sure to use the links below for your crafting needs. 

Have a Great Week! 


MFT Floral Blooms Read More »

Lawn Fawn, The Great Stitched Pumpkin

Happy Almost Halloween. Nancy F on the Scrap’n Stamp blog today with a fun little easel card inspired by the classic Peanuts book, “The Legend of the Great Pumpkin”. For this card, which should have been two but I had a little oops along the way, I am featuring the Lawn Fawn Stitched Pumpkin dies, as well the amazing Tim Holtz distress oxides from Ranger Ink.

I am going to share the close up of the cards here and link to my blog for the full description of the process.

Easel card inspired by the legend of the great pumpkin, using Lawn Fawn stitched pumpkin die and stitched frame die, along with distress oxide backgrounds

My inspiration as I stated above was the classic Peanuts book, “The Legend of the Great Pumpkin”. I had it sitting in my room thanks to my little monkeys. I knew that the Lawn Fawn Stitched Pumpkin dies would be perfect to try and recreate the cover of the book and that I could continue with the distress challenge when creating the backgrounds. These inks are my go-to for everything the last few years, they are just so versatile.

I created the night’s skyline with more colours than I think I needed by the time I assembled everything, lol. I used mustard seed, carved pumpkin, seedless preserves, wilted violet chipped saphire and blueprint sketch.

Easel Halloween card, featuring Lawn Fawn Stitched Pumpkin dies distress oxides and pattern paper

I die cut numerous pumpkins and leave from the Lawn Fawns Stitched Pumpkin and Stitched Pumpkin frame dies, which also have the little face, leafs and stems included. I also die-cut grass from another Lawn Fawn set and created my own stencil for the moon using a circle die and acetate.

Side view of the easle card, with the cute pumpkin

I decided to create an easel card to switch it up a little as I have been getting bored with the same old thing. I hope I can inspire you to try something a little different

For more of an in-depth look at how I created the card please head over to my blog.

Hope you have a wonderful week and a fantastic and safe Halloween.

Nancy F


Lawn Fawn, The Great Stitched Pumpkin Read More »

My Favorite Things Thanksgiving Gatefold Card

Hello and Happy Wednesday my crafty friends. Nancy F on the blog today with a fun Thanksgiving-inspired card. Always a good time creating for Scrap’n Stamp Canada

For today’s cards, I am featuring the My Favorite Things Fall Friends stamp set, the Lawn Fawn Fall Fling pattern and my colouring medium of choice, Ranger Distress ink cubes.

Stamped the images from the Fall friends set on to Bristol cardstock  with versa Clair ink and heat embossed with clear powder colouring all the images in with distress inks and oxides

Being that our October challenge on the Scrap’n Stamp facebook page was to create using distress oxides, I decided to stretch it out a bit and use the regular inks along with one of the oxides. I thought this was the best way to colour in these adorable little images from My Favorite Things. I stamped them out using Versa Clair nocturn ink and heat set using some clear embossing powder and then went to town painting them in with the inks. I ended up mixing and layering colors to get the right shades and look.

The distress inks I chose to use were wild honey, rusty hinge, carved pumpkin, brushed corduroy, ground espresso, both in oxide and regular ink, as well as tea dye, pine needles, and aged mahogany.


Once I was finished painting all the images in, I fussy cut everything out as I did not have the coordinating dies. Good news for you, however, Scrap’n Stamp does carry the die set and I highly suggest purchasing the coordinating die if you get the set. Makes things a lot easier.

I decided it would be fun to create a little bit of a different card than my usual, as I felt a little bit stuck in a rut so I decided to create a gatefold card to really bring this scene to a whole other level.

To create the gatefold card I cut down a piece of 12 x 12 orange cardstock to 4 1/4 x 11 and scored each end at 2 3/4. I then need to figure out my layers and scene for the card. This took me a bit of time but I am really happy with the finished product.

I really wanted to play up the colours I used for the little girls and pumpkin and managed to find pattern paper that really worked well. I used the Lawn Fawn Fall Fling pattern paper as well as some green shimmer cardstock and metallic coooper cardstock.

I cut down three layers for both the front panels and the inside just to add a little extra dimension, stability, and interest. The front panel measurements are as followed, Cooper panels (2) @ 2 1/2 x 4 Green shimmer (2) @ 2 3/8 x 3 7/8, layer 3-pattern paper (2) @ 2 1/4 x 3 3/4.

The inside panel measurements are as follows Copper 4 x 5 1/2, Green Shimmer 3 7/8 x 5 1/8 the Green leafy pattern paper is 3 3/4 x 4 15/16. I also added in a white panel which was die cut from the MFT wonky stitched rectangle dies. While I was die cutting I thought it would be fun to add a little more interest and create not only a scene on the outside of the card but also finish off the inside with a similar look. To accomplish this I die cut the picket fence from Kraft cardstock which I edged with some ground espresso distress ink.

I repeated this on the outside of the card which was the anchor for the rest of my little scene. I cut green cardstock down to measure 1 1/2 x 5 1/8 and layered on a piece of copper 1 1/4 x 4 15/16 and then added a strip of that same pattern paper from the inside which measures 1 1/8 x 4 7/8 on top of the metallic paper. I die cut a white banner strip and stamped the sentiment once again using ground expresso. Before I attached everything to the front of the card I decided to add in that Behind Second die cut fence. this really pulled the scene together. I added each of the cute little girls to the flaps of the card. One in front of the fence, she was popped up with a bit of foam tape and the other girl behind the fence flat to the card. I added some leaves and pumpkins to both the flaps of the card as well as the inside with the little squirel.

I was really quite happy with the way this card turned out. I hope you enjoyed it and come over to the Scrap’n Stamp Challenge page to share with us some of your projects using distress oxides.

Have a wonderful week.

Nancy F.


My Favorite Things Thanksgiving Gatefold Card Read More »

Free Shipping Anywhere In Canada