
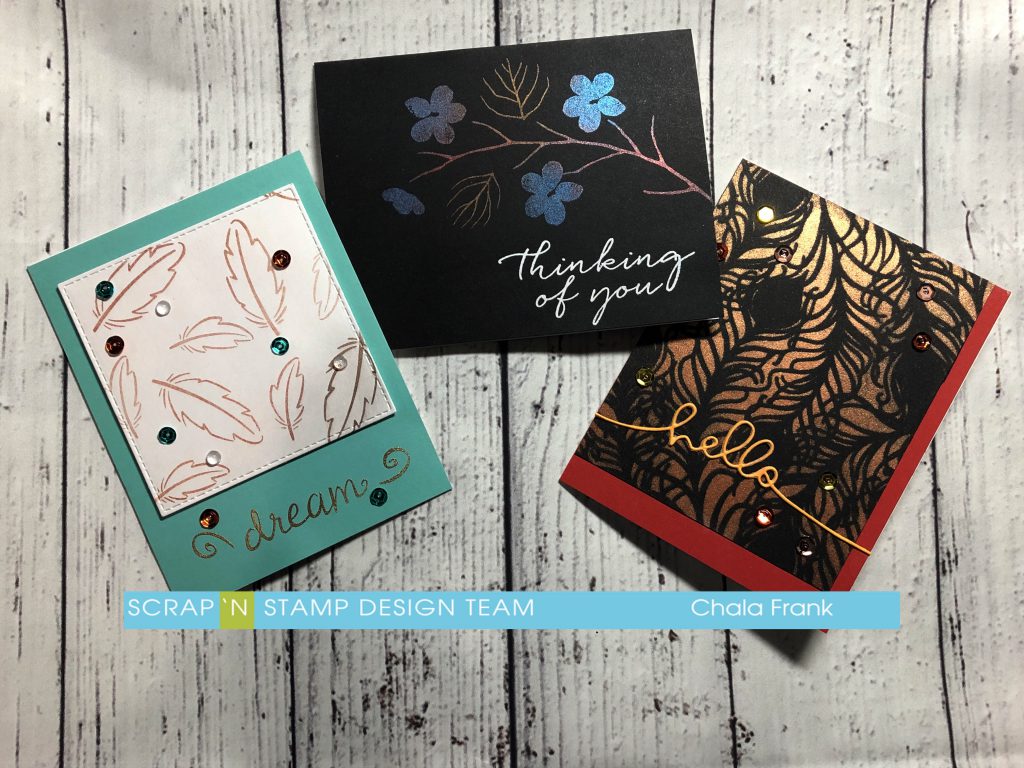
Hello again! It’s Chala and I am here to show you what I have created using the popular Perfect Pearls/PearlEx technique and Versamark ink.
To get started grab your favourite stamps and stencils. Today I am using PearlEx. However, you can use Perfect Pearls and get the same effect.
I pulled out my Beautiful Branches stamp set from Concord & 9th and stamped the branch, leaf veins and flower with Versamark ink onto an A2 size panel of Lawn Fawn’s Black Licorice cardstock. I like to use a stamp platform when doing this. My favourite platform is the Tim Holtz Stamp Platform because you can turn the lid to fit clear or thick stamps. I then use a stiff brush (like the one you get in the Perfect Pearls Letter it set) and apply the powder to the images. You can pounce on or use circular motions to apply the pigment to the Versamark ink. The colours I am using are from the PearlEx Series 1 pack. For the flowers I use the Duo Red-Blue, the branch is Super Copper and the leaves are Sunset Gold.
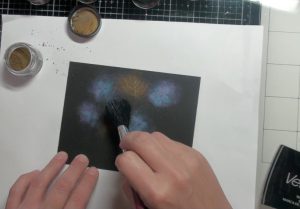
Once you have your pigment powders applied you can tap and wipe off any excess powder using a soft microfibre cloth or Swiffer.
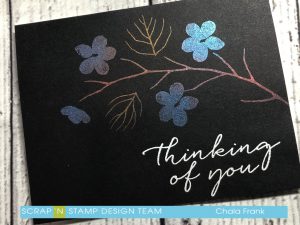
I treat the bottom right hand corner with antistatic powder, careful not to rub it on the newly applied pigments. I stamp my sentiment again with Versamark ink and heat set white embossing powder with my heat tool. I then apply the panel to an A2 size card base and the first card is done.
If you want to set your stamped powder image to ensure it does not rub off you can use a spray lacquer like Krylon Crystal Clear. However, I prefer to use something a little less toxic and with a better smell……hairspray! Just make sure you hold it approximately 12″ away and apply an even coat. Some people will also spritz with water and heat set…but, I like to use the hairspray method as I am afraid of over spritzing the water and having my project run!
For the second card I stayed with the Lawn Fawn’s Black Licorice cardstock but this time used a stencil. You can use any stencil you like! For this card I am using the Hero Arts Peacock Feather stencil. I temporarily tape down the black panel onto my Tim Holtz Glass Media Mat with some removable adhesive. I then tape the stencil down with a masking tape. I prefer to use the Purple Thermo Web Removable tape, but I ran out and only had some painters tape on hand. Tape the top of the stencil in such a way that you create a hinge so that you can easily lift the stencil to check on ink coverage. Once you have that adhered down to your work surface all you need to do is apply the Versamark ink directly down overtop of the stencil making sure you apply a good amount down.
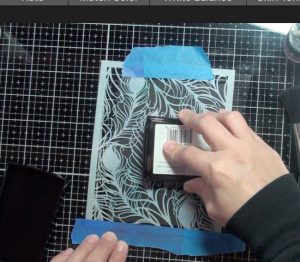
Now you can remove your stencil and apply your pigments as we did above. I used Super Russet for this copper look. I then wipe off with a soft microfibre cloth. I give a blast of my heat tool and spray with hairspray. The shine is AMAZING!!! I cut the panel down with my Fiskars sure cut paper trimmer and adhere it off centre onto a rust coloured cardstock and then onto the card base itself. I added a delicate stacked “hello” scripty die cut sentiment by running it through my Xyron sticker maker. I trim off any of the overhang with my Cutter Bee Scissors. I embellished with some sequins in complimentary colours. I like to adhere these with Glossy Accents so that if any of the adhesive squishes out it will dry clear and it has a strong hold!
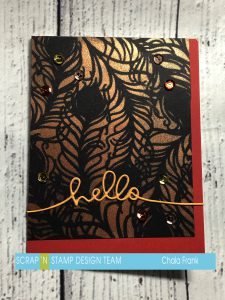
This card reminds me of the crushed velvet artwork from the 70’s!
I LOVE IT! LOL!
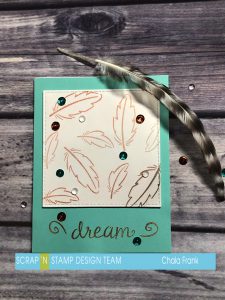
For my final card I wanted to show you that you can use this technique on light/white cardstock as well.
I am using the Dream stamp set from Lawn Fawn. I stamp out several of the feathers on the background leaving room for the Dream sentiment which I stamped with Versamark ink and heat set with Gold embossing powder on the bottom right hand corner. Again, I apply the pigment like I did for the first and second cards. After I was done I wasn’t totally in love with how it looked…so, I pulled out a stitched square die and cut out an area I liked. I can save the leftover pieces for another project.
I then adhered the square with 3M foam tape onto some Lawn Fawn Mermaid cardstock, re-stamped and heat set the sentiment with the same Gold embossing powder and embellished with some complimentary sequins. Here’s a look at the final card. I like the subtlety of the shine these feathers!
I hope you enjoyed today’s cards and it inspired you to try this technique. Check your stash for stamps or stencils or treat yourself and take a look at what Scrap’N Stamp has in stock. There are always great deals to be had!
If you like seeing exactly how these cards were put together you can watch the video here.
Thank you so much for spending your time with me today!
Happy Crafting!
~Chala

very pretty cards! I love how they turned out and your trick to use hairspray to set.