
Hello!
My name is Susan and I’m thrilled to be joining the Scrap’n Stamp design team. I grew up less than an hours drive from Vancouver where the store is located and now I’m about 4 hours away in a small town with no crafting stores but it still feels like I’m close enough to call it local. By day I work as an Education Assistant at our local high school. When I’m not there you can usually find me in my craft room. I love ALL styles of card making but I tend to gravitate to clean & simple although that wasn’t always the case. My style has changed over the years and I’m sure it will continue to change. I also enjoy scrapbooking and making mini scrapbook albums. If I’m not at work or in my craft room I’m probably out exploring somewhere with my husband and our dog.
You can find me at Creating with Susan
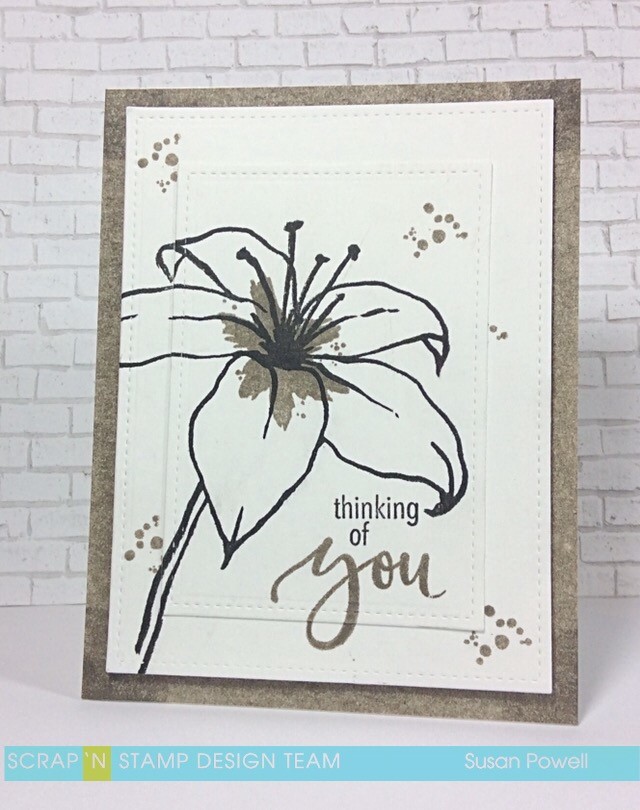
I have a quick and easy card to share with you today using the Lily Stamp set from Concord & 9th. I used a MISTI to keep all my layers lined up but I share a tip with you below that will work if you don’t have a MISTI or other stamp positioning tool.
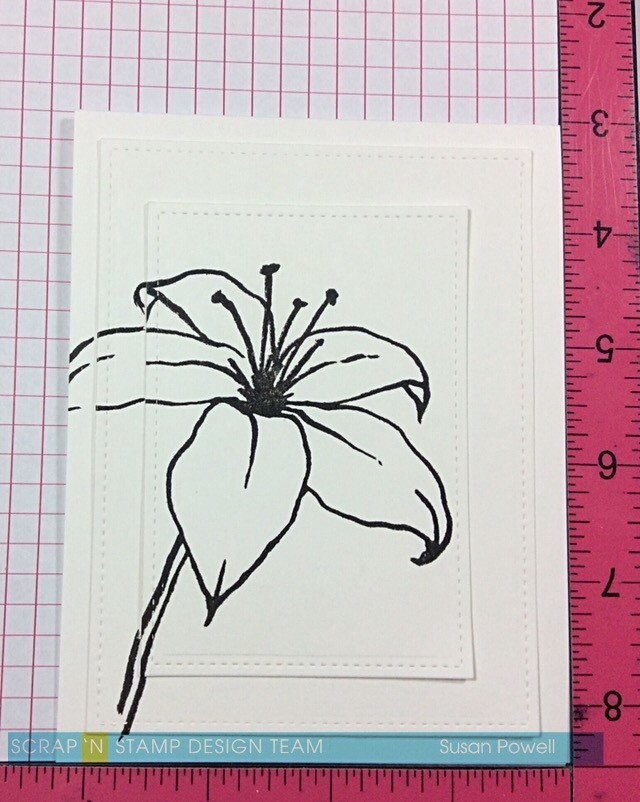
Start by cutting your card base to 4 1/4 x 11″ and scoring it 5 1/2″. Next I used two stitched rectangle dies to cut the two panels. If you don’t have any dies that’s okay, cut one piece to 3 3/4 x 5″ and another piece to 2 3/4 x 4″. In the picture below you’ll see the card base was in there too but I changed my mind and put the panels onto a colored piece which you’ll see in a bit.
I layered up the pieces using a little bit of tape runner to hold them together. I placed the stamp where I wanted it and then picked it up with the lid of the MISTI, inked it up and stamped it. Be sure to press down all over for better coverage around the edges. You can see that the stamping on the bottom layer has a tiny gap between the stamping on the middle layer. To fix this I removed the top two layers, inked up the stamp again without removing it from the lid and then pressed down. The stamp and the paper are in the same spot so it will line up perfectly every time.
If you don’t have a MISTI, that’s okay. Layer up the panels the same way and using a large block, stamp your image being sure to press down well. For the edges that have gaps between layers, use a marker to draw in the lines. It’s that simple.
I used my MISTI to stamp the center of the flower. It’s not necessary but since I had it out…

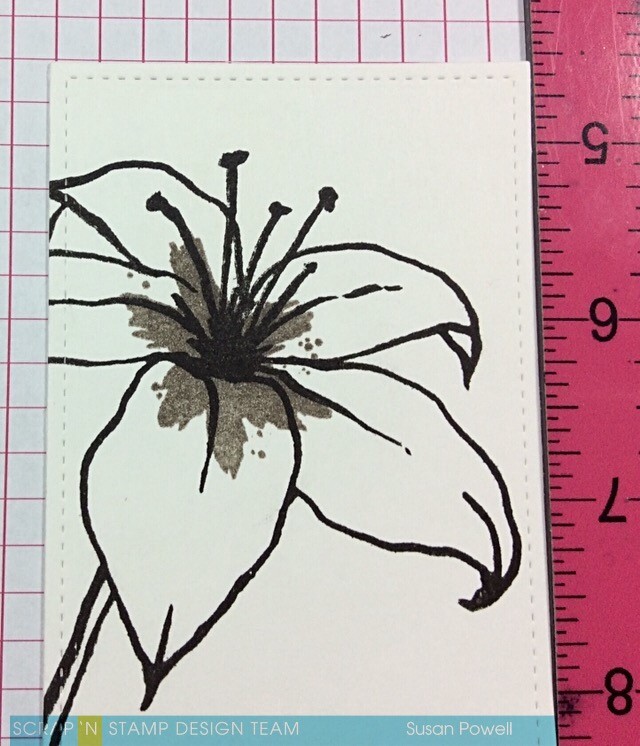
Next I added the dots and the sentiment using stamps from the same set. I put the top two layers back into my MISTI, positioned the YOU portion of the sentiment and stamped it with the same ink as the flower center. I removed the top layer and then stamped the sentiment again. (Sorry, I forgot to take pics of that)
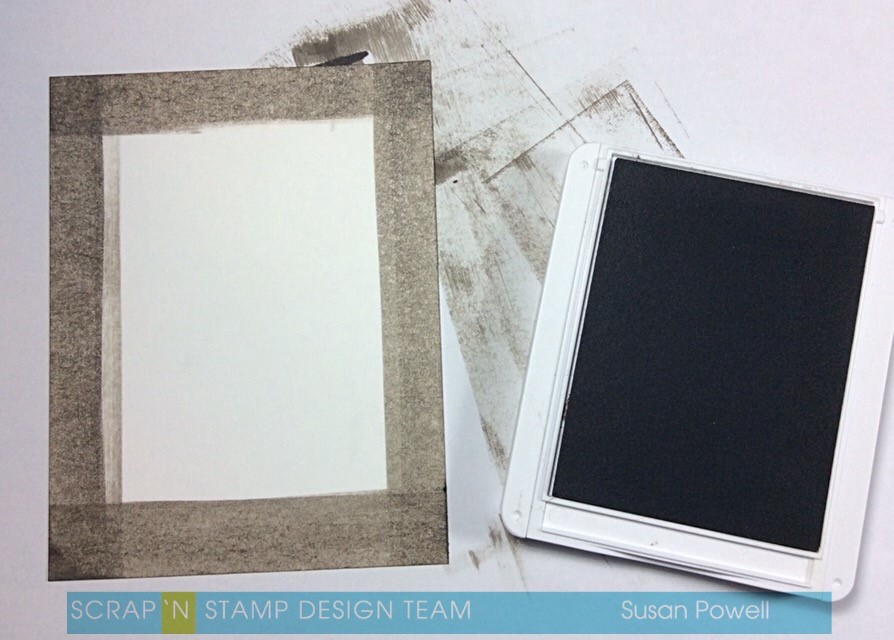
As I was adhering the top two panels together I decided I didn’t want a white card base. Instead I wanted the base to be the same color as the center of the flower. I don’t have any coordinating card stock so I dragged the ink pad along the outside edges of the front of the card base. No need to cover the whole thing since we only see a little bit of it.
I added the stamped panels to the card base with craft foam for some dimension.
You could change out the color and the sentiment to make a nice set of cards for someone.
Happy Stampin’
and thanks so much for visiting!
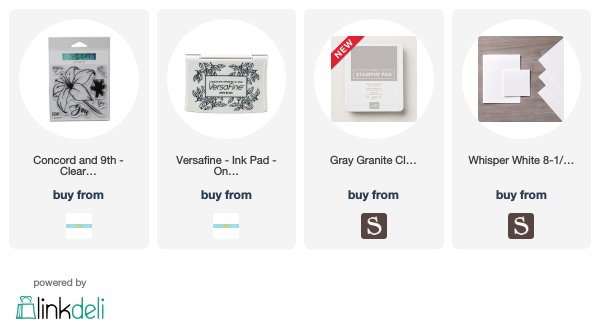
Shopping list:
Click on the picture below to be taken to where you can order the product. I use affiliate links when possible which means I will get a small commission if you purchase through my links. There is no additional cost to you and helps with the running of my blog. I appreciate your support.

Adding the top layer to your CAS card makes it look extra special! A beautiful flower stamp. Thanks for sharing all of your process & tips 🙂
Thank you Deborah.