Scratch-N-Stamp
Search

Checkout

Keep up with Sales, New Products and other events at Scrap `n Stamp. Sign up for our newsletter now!

What's New

Hot Deals


Design Team

Seas the Day

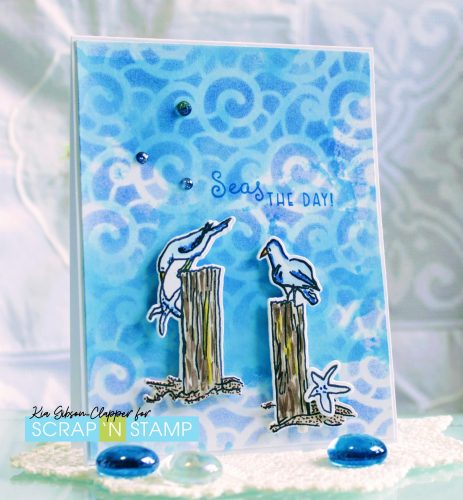
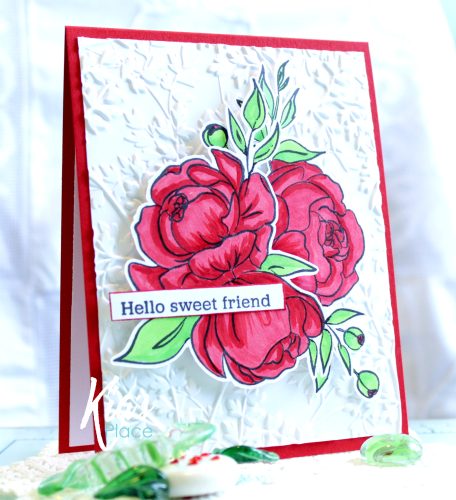
Hello to you. Kia here with you today to share this fabulous stamp and die set by Colorado Craft Company, along with the background stencil by Gina K Designs. To get a bit of a different look for this card I first did smooshing using Neenah cardstock and Salty Ocean Distress Oxide along with Mermaid Lagoon Distress Oxide inks.

Putting down the dry background piece on my work surface I added the stencil over the piece securing it in place. Using a domed foam blending tool along with Blueprint Sketch Distress Oxide ink I pounced the tool up and down lightly to fill the card piece with ink, which created beautiful dimensions and further textures. While I had the tools out I also did a piece just using the stencil for the inside of my card.

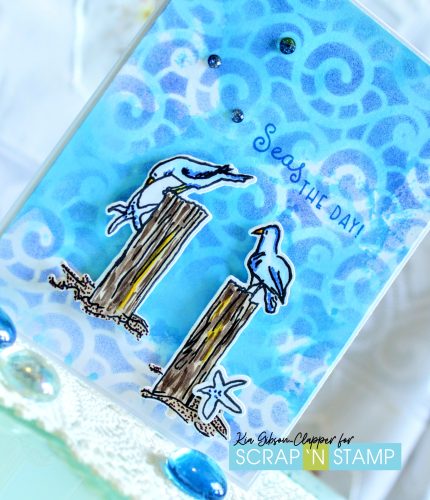
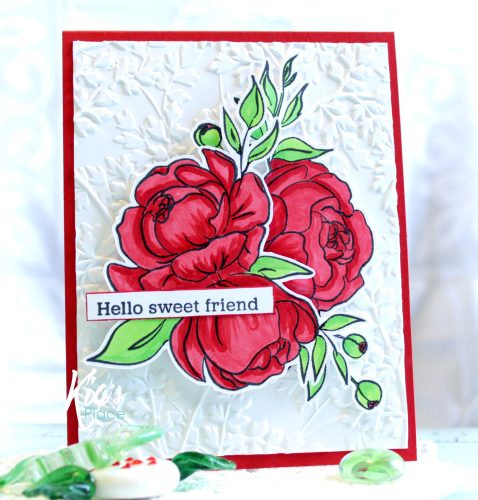
In my mini Misti using Memento Ink in Tuxedo Black I stamped the images, then proceeded to colour using Copic markers in the following colours: The Birds B000, B41, B26 and Y13, R17 on the beaks. The posts are done using E42, E47 and Y19 with C00 and C1 on the Starfish along with B26 dots.

Using the coordinating die, I die cut the pieces with my Gemini Jr. machine. I attached the background piece to my card front using Art Glitter glue, along with the piece I did for the card inside. On the inside piece I also stamped using the beautiful sentiment included in the set.

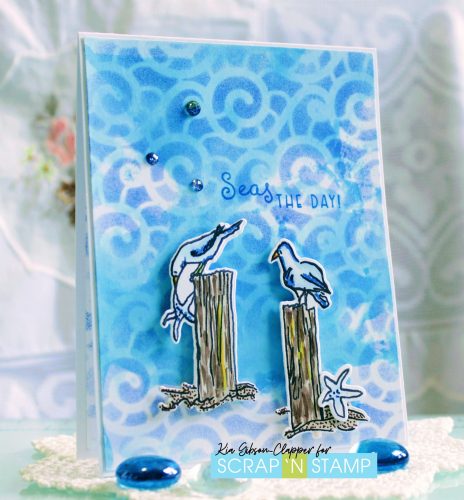
On the card front I attached the die cut piece using foam strips, including the extra Starfish. I then stamped the sentiment “Seas the Day” using VersaFine Clair ink in Blue Belle.

To finish with a bit of sparkle I added Pinkfresh gems in Ombre, being silver and blue gems, which are so pretty.

I hope you have enjoyed this card today, and look forward to seeing you next Friday.


Seas the Day Read More »

Sweet Friend

Hello crafty friends, Kia here with you today to share this card called “Sweet Friend”, which is featuring Altenew’s Precious Peony stamps set. This is such a beautiful set, which always makes it fun to colour. I used two of the stamps from the set for this design, and only 5 Copic markers for colour. Using such a small number of Copic’s was a first for me, but I love the results.

I picked two of the stamp images from the set to colour. The Copic colours for the flowers are R35 and R27, and for the leaves YG05, YG06 and YG07.

Once I finished with the colouring I cut the images out, and set them aside. Moving on to the background I opted to use an embossing folder, which is also from Altenew called Garden Harmony and Hammermill cardstock. I spritzed both side of the card before running through my machine.

To put it all together I picked a Gina K Design cardstock called Red Hot for my card base. Using glue I attached the embossed piece to my card front. I then attached the right side image using glue. To the left image I added foam squares before attaching it resting over the opposite flower. I then finished my card with a sentiment from Pinkfresh Design called Heart Smiles.

For the inside of my card I again embossed another piece of Hammermill card, gluing it in place. I then stamped a sentiment also from the Pinkfresh Heart Smiles stamp set, and went around the edges of the piece using a Copic marker, which I also did for the sentiment on the front of the card.

Thank you for visiting today. I hope you have enjoyed this card as much as I enjoyed making it. I wll be back next week with another card made from this set. See you then.


Sweet Friend Read More »

Hanging Out

Hello all! Are you ready for Halloween?

Today I am sharing a Halloween card with you that has me smiling. As most of you know, I love colour, and this card is all about colour.

Using Neenah cardstock and distress Oxide inks along with a couple of stencils I first added the moon with the Lawn Fawn stencil and distress oxide inks in Hickory Smoke and Tumbled Glass for the clouds.

I then added colours across the front of the panel in rainbow colours. In my mini Misti I stamped all the pieces I wanted to use, again on Neenah cardstock, and proceeded to colour using Copic markers, aand cut them out.

The Copic colours I used are as follows:

R29, R27, RV29; YR07, YR68, YR07; Y13, Y15, Y18; YG07, YG09, YG06; B14, B12, B02; V09, V17, BV02; RV06, RV04, RV02; Branches E37, E35, E33 AND YG07, YG09; Spider C3, C5, C7; Pumpkin YR18, YR09.

I added water splatters to the rainbow inks drying with a paper towel. I then arranged the critters in colour order along the front of the card using foam squares.

To finish the front I stamped the sentiment using Memento Ink in Tuxedo Black. Using a white gel pen I added highlights to the critters.

I also did the inside to coordinate with the front of the card. This was such a fun card to make and I hope you have enjoyed it as well. Thanks so much for visiting today. Following are Affiliate links to the store for the products I have used for this card, at no extra cost to you.


Hanging Out Read More »

Categories: Cards, Design Team
Tags:
Free Shipping Anywhere In Canada