Scratch-N-Stamp
Search

Checkout

Keep up with Sales, New Products and other events at Scrap `n Stamp. Sign up for our newsletter now!

What's New

Hot Deals


Elizabeth Craft Designs

Bounty of Backgrounds

Hello Again!  It’s Chala and I am back to share a bounty of backgrounds with you!  I will be using two simple techniques to create 9 cards!

Since I created so many cards it may be easier for you to watch the video.  It is a bit on the longer side, running approximately 24 minutes, but you can always skip through what you don’t want to watch.  You can click HERE to watch the whole process and see all 9 cards I created.

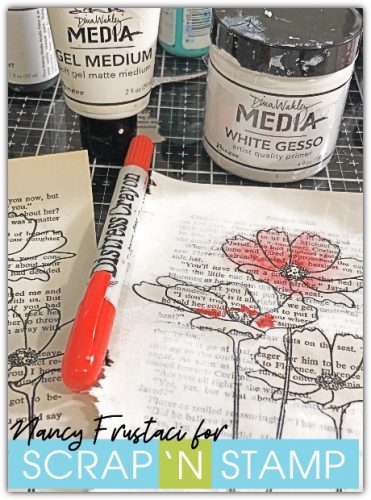
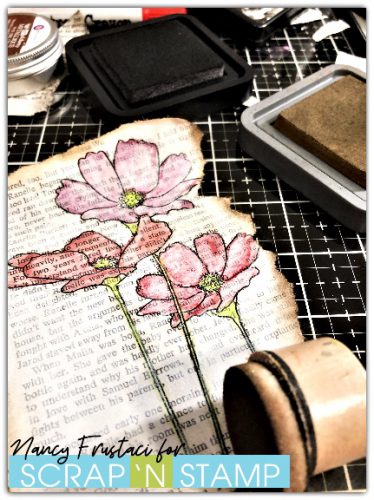
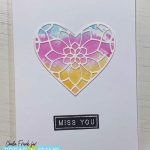
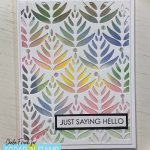
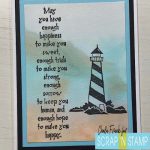
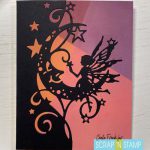
The first technique I used was the “smooshing” technique with Watercolour Markers.  You can use any watercolour markers you have on hand.  I used some cheap Artist Loft as well as Zig Real Clean Brushes.  I love this technique for the cool loose backgrounds you get.  If you don’t have watercolour markers, don’t fret!  You can also use this technique with your Distress Inks!  Just smoosh them onto some acetate, squirt water and lay your panel down.  Just keep in mind where you put your colours down to avoid making “muddy” colours when they blend.

I let the panel soak up the “smooshed ink” until the panel starts to curl up.  You can then lay it down again to cover any spots that may have been missed.

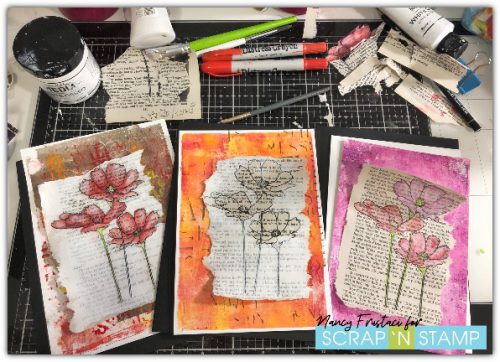
I did four panels that were “loose” and the last panel I created I tried to control the scene a bit more as I wanted a “beach” feel.

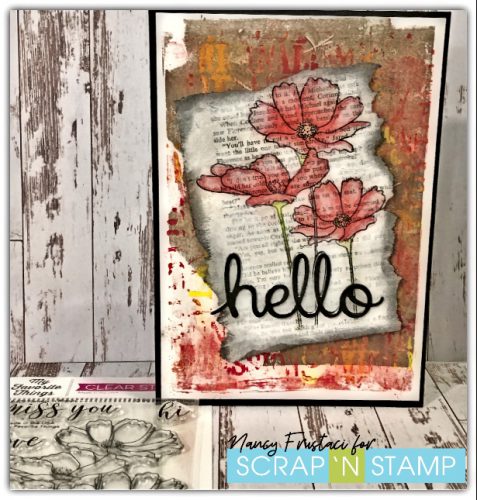
I then went through my stash and found several dies and stamps that I haven’t used in a while to layer over top.  I will provide a list below of the items I can link to.

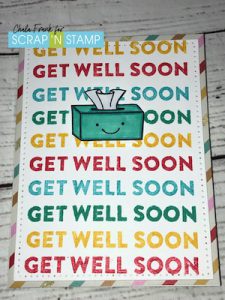
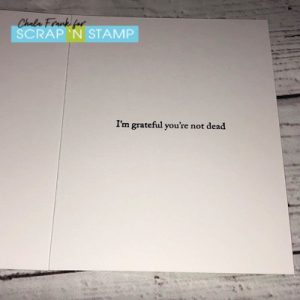
Here is a look at a few of the cards I created using this technique

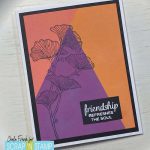
The next technique I used was overlaping Distress Oxide Ink blending with some masking.  Watch the video to find out how I avoided a sticky disaster!

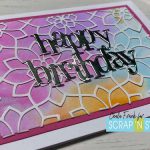
This created some beautiful and bold backgrounds and it even created some custom colours by layers two different distress oxide colours on top of each other.  These beautiful backgrounds really speak for them self, so I just added some simple stamping and/or die cuts over top.  Here is a look at three of the cards I created using this technique.

Again, I really encourage you to check out the video to see the entire process of how these cards came together.

I hope these cards have given you some inspiration to create your own bounty of backgrounds!

As promised ,here is a list of materials used with links where available.

Materials:

MFT Rectangle Stax set 2 – similar – Hero Arts Nesting Rectangle Dies

Post-it removable labelling tape

Artist Loft Watercolour Markers

Zig Real Brush Water Markers

Distress Oxide Ink in:  Spiced Marmalade, Abandoned Coral, Seedless Preserve, Cracked Pistachio, Faded Jeans, Salty Ocean

Blending Brushes

Concord & 9th – Alphabet Die set

Stencils

Birch Press Viola Die Plates

Birch Press Kinsley Heart Layer set

Elizabeth Craft Dies – Leaf Pattern Background

Creative Expressions Luna Fairy Edger Die

Lavinia Stamps Dandelions

Hero Arts – Thinking of You stamp set

Stampers Anonymous Beautifully Braided

Gems/sequins

Art Glitter Glue

White cardstock

Coloured Cardstock

Wendy Vecchi Make Art Stay-tion

Tim Holtz Glass Mat

Stay crafty my friends!

-Chala xoxox


Bounty of Backgrounds Read More »

Get Well Greeting….and Grief

Hey Friends!  It Chala and I just wanted to start off by saying I was so bummed that I was not able to participate in the Snarky New Year Blog Hop…so, I am sharing one now!

 Anyone who knows me knows that I LOVE the snark and sarcasm!  Unfortunately, my year started with the passing of several family members (3 in one week), one of which was my incredibly sweet (yet chaos envoking) Father-in Law who lived with us.   He was diagnosed with cancer in September and it has been a tough several months for our family as he was determined to stay at home as long as he could to celebrate Christmas with his grandkids.  Thankfully, he was able to fulfill this goal.  However, we sadly lost him the morning of January 1, 2020.  Now, I should note that we are a bit of an odd family.  Our days are filled with sarcasm and humour and we are often hard for “outsiders” to understand.  But,  it is with this sarcasm and much humour that we dealt with his diagnosis and this tremendous loss and ongoing grief.   So, please take today’s card with the humour it was intended to invoke to lighten the mood and I hope it makes you laugh as much as it made my family laugh.

Since so many of my friends and family have also been fighting off the flu, sniffles, colds and coughs, I thought it would be fun to make a “Get Well” card.

Hero Arts Snarky Mix and Match

I am using the “Get Well Soon” sentiment from the Snarky Mix & Match stamp set by Hero Arts. This has got to be one of my favourite snarky sentiment sets on the market!  I stamped the sentiment several times on an A2 size card base in with Distress Inks in the colours Wild Honey, Candied Apple, Broken China and Evergreen Bough.  Then die cut with a rectangle die.  The one I used is from Elizabeth craft designs.  However, a similar one is MFT A2 stitched rectangle stax  set 2 dies.


I picked through my rather large stash of patterned paper and picked out a rainbow stripe pattern.  I admit, I am not exactly sure where it came from…..but, the Taylored Expressions 6×6 – Hello Sunshine paper pack would coordinate beautifully with the Distress Ink colours that I chose. I trimmed the patterned paper down and adhered it to an A2 size side folding card base that I made from Lawn Fawn 8.5″ x 11″ – 80lb White Cardstock.

I loved the rainbow colours of the card….but, felt it needed a little something on the front. I saw the Tissue box from the Lawn Fawn – On the Mend stamp set and thought it would look really cute.  I like being able to mix and match several stamp sets/companies to stretch my use of them.  I stamped the tissue box with Memento Black Tuxedo Ink and coloured it with Copic Markers in the colours C2 – Cool Gray, BG13 – Mint Green and BG 15 – Aqua.  I fussy cut the image out and popped it up with a square foam adhesive.

For the inside sentiment, I stamped the “I’m grateful you’re not dead” with my favourite sentiment ink Versafine Claire Nocturne Ink. (I thought this was really funny….thankfully, so did my family!)

I know this card is very simple and I’m sorry I don’t have a coordinating video…but, I am still trying to get back into the creative groove!

Thank you for stopping by and letting me share a little personal side of my life!

Hoping you all enjoy your week!


In Memory of Robert Harrington Frank

“Don’t do it, it’s a trick!”

~Chala, xoxoxo

Get Well Greeting….and Grief Read More »

MFT Floral Blooms

Hello Crafty friends, Nancy F here today to share on the Scrap’n Stamp blog. I decided to do something a little different, yet still playing along with the monthly challenge. I am doing an all mixed media style card, from used books pages to gel pressing. So grab your favorite beverage and sit back and enjoy it.

mixed media pages, stamped the floral  blooms on to pages of an old book and heat set it with some embossing powder. I then added gesso around the flowers

I started by stamping out these beautiful Flowers in bloom set from My Favorite things on to the pages of the book using my stamping tool and Versa Clair nocturn ink .  Then I heat set with clear embossing powder to help the image stand out from the writing, then repeated this process four times. 

I also had too many ideas flowing through my head by this point, from art journaling layouts to more cards. So stay tuned for more projects.

adding colour to the flowers with distress crayons and Dina Wakley paints


Now that all the stamping and embossing was completed it was time for the fun messy part, getting in with the paints and gesso. This is always my favorite part. 

To bring the focus more to the flowers I decided to add Dina Wakley media white gesso to the book pages, carefully going around the flowers. This really helped to mute the print down some and allow the flowers to pop. I decided to actually add some gel medium to the petals of the flowers, I felt this would seal the paper and allow me to wipe any mistakes away easily.

finishing off the edges of the book page with some ground espresso, and black soot

 I created three styles of cards with three versions of the painting. 

For the above, I would add my paint in and then wipe it away allowing it to stain the paper and give it a night tinted look. Once I was happy with how it looked I decided to distress the edges of the paper, using distress oxides and regular inks.

adding the flowers too some previously created gel pressed backgrounds

The cards themselves were larger than normal, cards measured 5 ½ X 7 ¾. I used some of my previously created gel backgrounds and really did not want to trim much off of them, thus keeping as much of the detail as possible. I chose the background to match or enhance the flowers.

A close up of one of the finished cards,

  Each gel pressed backgrounds were added to the card flat using a liquid adhesive. For a little dimension popped up the painted flowers using some foam tape. To complete the card I used a simple hello die and layered a few of them together to create dimension also adding a mirror layer to the mix.

I hope you were able to get some inspiration from the above and welcome your comments. Please also make sure to use the links below for your crafting needs. 

Have a Great Week! 


MFT Floral Blooms Read More »

Free Shipping Anywhere In Canada