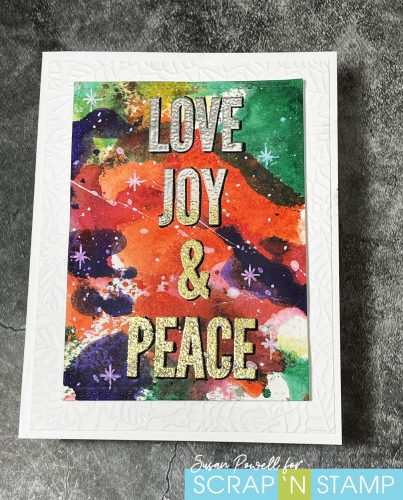
Tuesday with Tara {take 421} Birthday Bug
Happy Tuesday! It’s definitely the season for making & sending Christmas cards, because of that it can be a bit challenging for those people who have December birthdays. My grandson, who turned 1 yesterday, is one of those people! I decided to use the same stamp set I worked with for the Christmas Critters Blog Hop (you can see my card HERE) and use it on a quick, but playful birthday card!
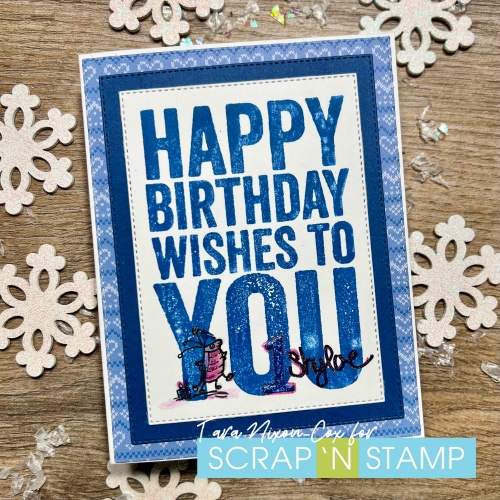
I had a blue rectangle die cut and the Lawn Fawn Knit Picky Winter 6×6 paper pad sitting on my desk, so they were the inspiration for the rest of the card! I wanted to use one of the little bugs in the Christmas Hats stamp set by Anita Jeram, thinking they would be cute paired with this bold birthday greeting by Tim Holtz. I love using these bold sentiments when I need a quick card!
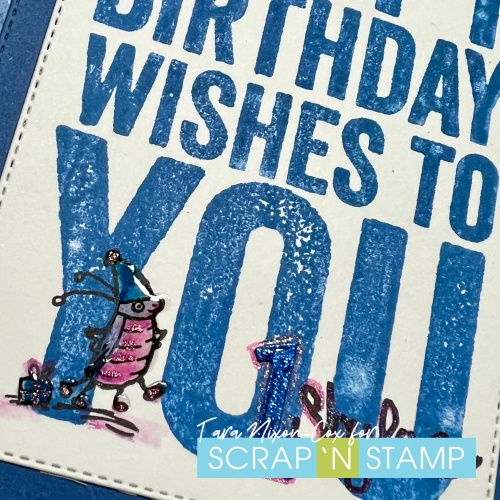
I stamped the sentiment in Prize Ribbon Distress Ink and added this cute little bug in black. I almost left it just like that, but decided to add a bit of color and shimmer with a touch of a gelly roll Stardust pen, as well (did you know you can do watercolor blending with these? You can see it a bit on the bug’s belly). I finished it off (as well as the die cut “1” I added) with a bit of Glossy Accents to help it stand out!
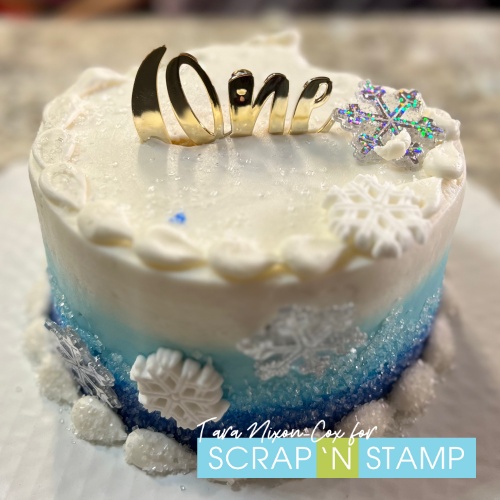
I didn’t make this adorable little cake (that Shyloe was not at all interested in smashing. LOL), but thought I’d share since it matched my card so well! Isn’t it pretty!?
I’ve got another birthday card using the same colors to share as well- watch for it on my Instagram & blog later this week! If you haven’t done our Christmas Critters blog hop yet, start here and check it out- there’s some really great makes to inspire you!
Inky hugs,
Tara
Tuesday with Tara {take 421} Birthday Bug Read More »