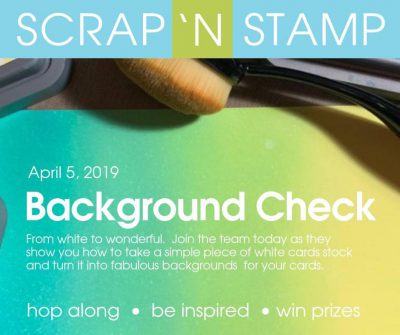
Background Check Blog Hop
Welcome to the Scrap ‘N Stamp April Blog Hop! We are so glad you are here with us today to get some inspiration on a fun variety of ways to create backgrounds using the Life Changing Blender Brushes that are new in the SNS online store!
Here’s the full hop order! You’re at the beginning with me (Tara) and my card! If you get lost anywhere along the way, just pop back here for the next link 🙂 Don’t forget to leave comments along the way for a chance to win fabulous prizes… we are giving away 8 Background prize packs and one $50 gift certificate to random commenters along the way! BONUS: You can have 20% OFF the brushes this weekend using the coupon code BRUSH20 (ends Sunday!)
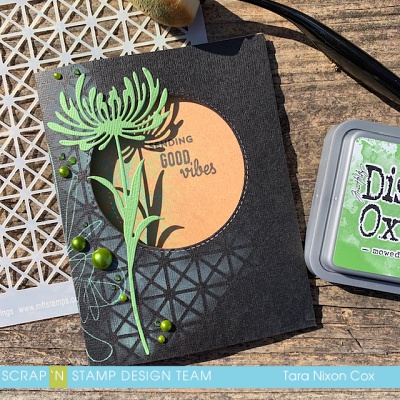
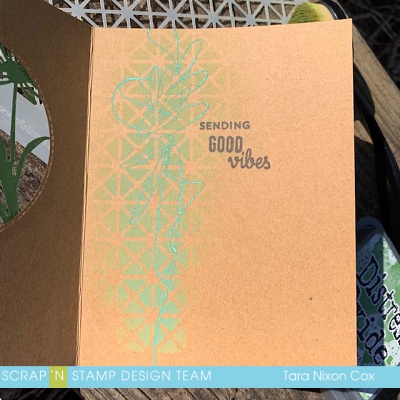
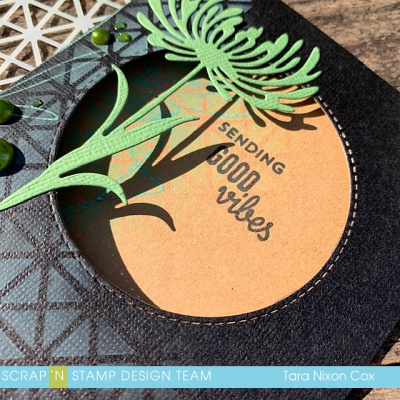
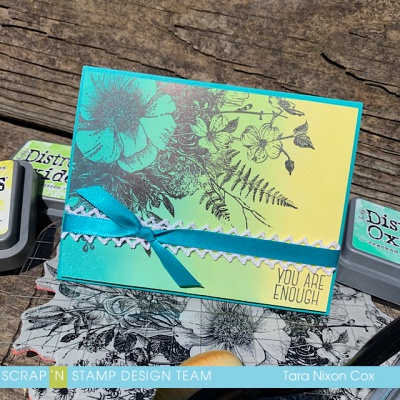
I made two similar cards for today’s hop- here’s a look at them together:
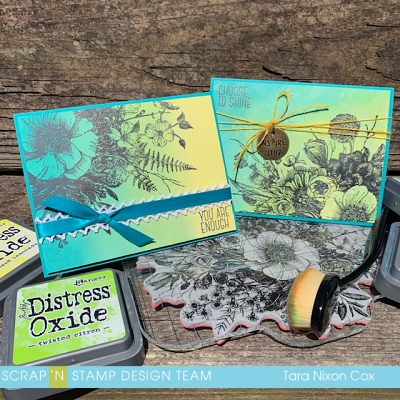
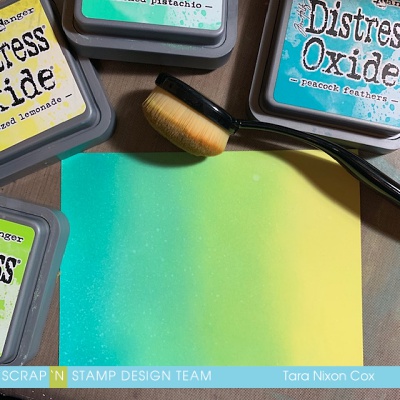
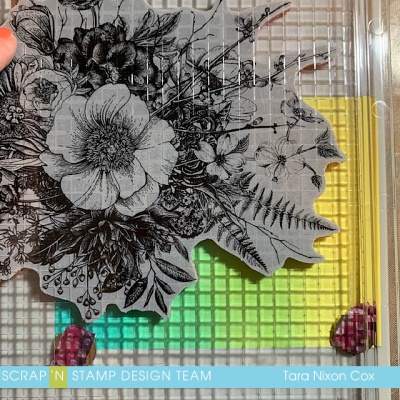
For these cards I wanted to feature a simple ombre type background to let this HUGE stamp shine- it’s Glorious Garden by Tim Holtz and it comes with four simple sentiments and a grid block big enough for the design (I was super excited to see that, though I used it with my stamp platform). I am brand new to these brushes and a pretty die hard fan of the Ranger Blending tools, but I found these easy to work with and create smooth ‘line free’ blends with my Distress Oxide Inks (for both cards I used Squeezed Lemonade, Twisted Citron, Cracked Pistachio and Peacock Feathers). They were also really easy on the hands, which I’ve heard from a lot of people who struggle with gripping tools. There are several smaller set options if you aren’t ready for the full set of brushes (or don’t have the budget- I totally get it!). I think the 2 pack sampler would be a great start!
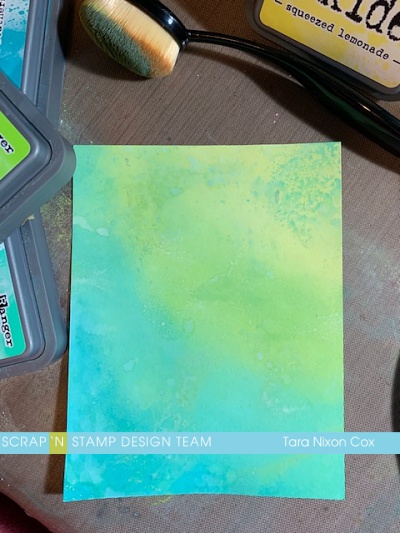
My ‘before’ photo of my first card is actually the graphic for the hop, but here it is again so you can check out those smooth blends… I only misted a tiny bit of water to add a bit of oxidization.
Here is what the stamp placement looked like in my stamp platform. I used Versafine Clair and stamped twice to make sure my impression was perfect.
I wanted to keep these cards really simple, so just added a bit of ribbon with some lace behind it. When adding ribbon to a top layer like this, I have a little trick I use to keep the knot (or bow) in exactly the right spot. First, I cut the ribbon so it’s plenty long (at least 3-4 times the width of the layer, ) and tie the knot/bow in a loop, like this:
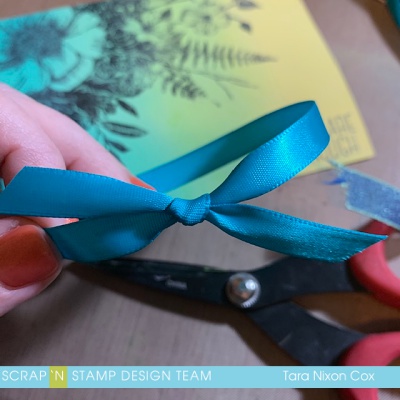
Then I find my perfect spot and snip the ribbon so it has overhang on both sides, which I will adhere to the back of my card.

The amount of overlap doesn’t really matter, as long as there is enough to tape securely (it may be 1/2″ on one side and 3″ on the other… nobody will know!) Here’s another look at that card:
For my second card, I did a diagonal ombre and added a bit more oxidization with some wet, inky layers on my craft sheet. I wanted the yellow to be in the big blossom this time, with the design coming up from the bottom right corner. Here’s a peek at my background before I stamped on it.. love that subtle oxidization!
And here’s the finished card!
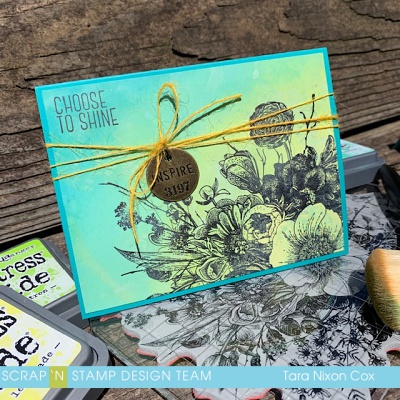
I went for yellow twine and a Tim Holtz charm to finish it off:

The cards are very simple, but the fabulous backgrounds and that gorgeous floral stamp really shine. I hope you like them! I’ll have a similar card design on a very different background to share with you on Tuesday, so please check back! If you are ready to try your hand at creating fabulous, inky backgrounds, please join us on our Challenge Page! We’d love to see what you create (and you’ll get another chance to win a gift certificate!).
Hop on over to see what Nancy E. has created next!
Have fun hopping!
Inky hugs,
Tara
Background Check Blog Hop Read More »