Scratch-N-Stamp
Search

Checkout

Keep up with Sales, New Products and other events at Scrap `n Stamp. Sign up for our newsletter now!

What's New

Hot Deals


Studio Katia

Tuesday with Tara {take 312} Mod Cactus

Happy Tuesday!  The new Mod Cactus stamps by Tim Holtz are such a fun set, with a variety of unique 2 step stamping designs.

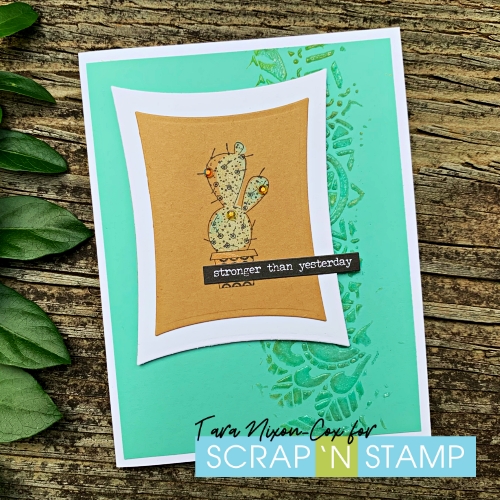
I had these die cut pieces leftover from my tunnel card project, so I selected a cactus stamp I thought fit well on the Kraft panel and pulled out some Distress Oxide Inks.  I inked and stamped the solid portion in a mix of Shabby Shutters, Cracked Pistachio & Spiced Marmalade and set it aside to dry fully.  While it dried, I searched for some Cardstock that picked up the colors in my image.

After trimming down a piece to layer on a white card base, I pulled out a Tim Holtz Doodle Art stencil and some clear texture paste.  I wanted a rough border down the cart and used a small amount of paste and a palette knife to smooth it through the stencil.  While the paste was still wet, I sprinkled some Distress Embossing Glaze over it.  I used a mix of Speckled Egg & Salvaged Patina glazes and saved the excess powder for my next card.  You may see some bits of orange in my design as well… just a little bonus from using a dirty stencil 😉

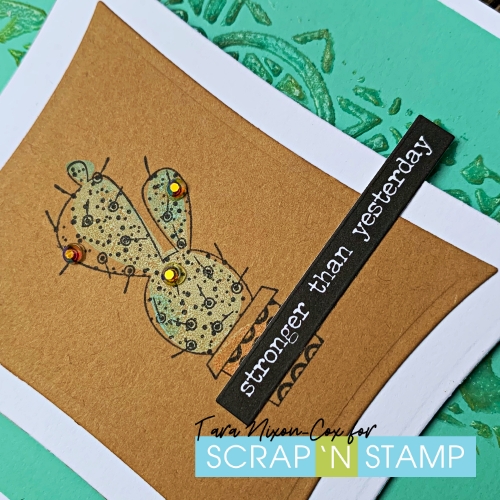
I finished off my card with some chit chat stickers. (I have a big stash of these and use them a lot… really want to add some stamps like the tiny text set to my collection so I have an endless supply!). I chose some sentiments that would hopefully be encouraging to someone going through a touch time right now.

And yes, I made a second card as well since I had another scrap of Kraft Cardstock on my desk that I thought I could fit 3 cacti on…

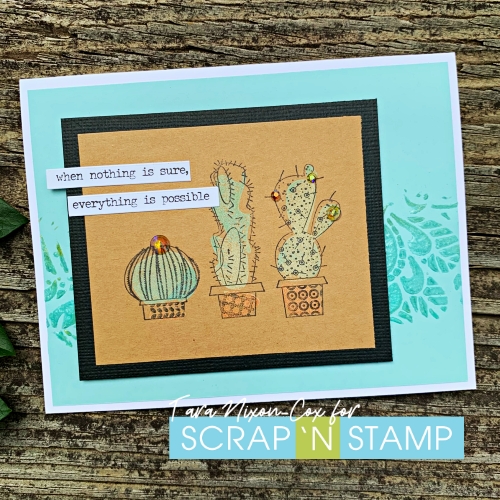
Aren’t they cute? All the ink colors & details are the same as my first card- as you can see I decided to add a bit of Studio Katia bling to the cacti as well!  I love the different designs on all the pots- so fun!

Here’s hoping you are “stronger than yesterday” and have a creative day!

Inky hugs,

Tara

Tuesday with Tara {take 312} Mod Cactus Read More »

Tuesday with Tara {take 310} Get Well Bloom

Happy Tuesday!

Today’s card is a bit of redemption for the hot mess I made experimenting with blowing Dina Wakley’s Gloss Sprays to make backgrounds… I salvaged what I could from the messiest of the hot mess (like the ones I tried to smoosh together- big fail) and I did some die cutting!  My card today features one of the Colorize dies that Tim Holtz has been releasing, this one is called BLOOM and unfortunately SNS doesn’t have it in stock (but they are trying to get it!).  I’m using the die cuts together with some simple black stamping with a Heffy Doodle Get Well stamp and a big Best Friend Background background by MFT.

These Colorize dies (since bloom isn’t in stock, I’m linking to a random fave!) are pretty cool, you cut pieces for multiple layers which build up to complete the design.  There’s at least 3 pieces for each, thankfully they are marked on the back which color to cut them (according to the package design) so I stuck with the basics here, with my vibrant, messy, glossy twist!  I cut the pieces marked pink from pinkish parts of my paper and yellow from the yellowish parts, etc.  It ended up pretty cool and I love how the glossy bits (where the paint was thicker when it dried) really add fun texture!

As you can see, I added a bit of splatter to the yellow panel to bring a bit more of the gloss on the card.  I’ve been trying to create more ‘flat’ cards these days instead of constantly reaching for 3D foam to add texture.  This card still has plenty with all of those layers in my bloom!  I did not manage to resist the urge to add a bit of bling though… I swear these little Studio Katia crystals call to me!

Apart from putting the bloom die cut together, this card was stamped & assembled fairly quickly and I think it would brighten the day of someone who isn’t feeling well, don’t you?

Inky hugs,

Tara


Tuesday with Tara {take 310} Get Well Bloom Read More »

Tuesday with Tara {take 309} blowing hugs

Happy Tuesday!

I know… that’s not how it works, we don’t blow hugs. We blow kisses… but my challenge word today is “BLOW” and my card is sending hugs, so it is what it is.

This card really feels to me like a comedy of errors.  Every step seemed to turn into a hot mess and yet somehow, I cleaned it up a bit and made a card.  All those errors were exhausting though!  LOL.

My mission was to use the Alcohol Ink Air Blower, since it was a new tool in my stash that I hadn’t used yet.  I had aspirations to share some fabulous technique with you and even attempted to record a video… but I hit a few bumps along the way.  The first of those being that I have no idea where my alcohol inks are right now.  Once I gave up on finding them (I’ve got an inner ear infection right now and “looking high & low” just makes me dizzy!) it occurred to me that I could try blowing some of my spray inks!

I selected my Dina Wakley Gloss Sprays since they are less absorbent than some of my others and I knew they would move around on the papers well.  It’s been a while since I played with them, so I had to re-learn a few things (like how they don’t work too well for smooshing two papers together to transfer ink!) but I finally started to figure them out and came up with this.  I’ve also got a whole pile of backgrounds that are ready to be transformed another day!

For this card, I simplified and skipped the color blending- working with just the Lemon Gloss Spray.  I poured a small puddle on a piece of white Cardstock and used the blowing tool to spread it out into a splatter design.  I was planning to use the Twiggy HUGS I had die cut from metallic orange card stock, so I knew yellow was a good choice! Once the paint was partially dried, I added some splatters of the Magenta Gloss Spray on top.  You can see where the colors blended together in some spots giving a bit of orange to the design.  These sprays really pop, and give off more gloss depending how thick they are painted!

I die cut a large stitched rectangle panel so I could mount it onto a white card base.  When I played around with the placement of the word, it just didn’t seem like quite enough (even with the addition of the sentiment duo by Heffy Doodle). Then I remembered the stitched circle from the Picket Fence Slimline die set, and decided to turn it into a shaker card.

This is where I had more of a hot mess… as I’m sure you can see by all the wrinkles (aka texture) in my shaker window!  I wanted to do a simple pocket style shaker, so I reused some packaging from one of my clear stamp sets.  I got the brilliant idea to seal the edges with my hair straightener (since I haven’t been using it on my hair with all the humidity lately!) and if I was a bit more patient it probably would have been a brilliant idea.

  • What I did right: place the plastic pocket between pieces of paper so that the plastic wouldn’t melt onto my straightener.
  • What I did wrong: forget to turn down the heat once it finally warmed up.

I doubt I need to say much more than that… since you can clearly see that things got a little too hot and got all wrinkled up on me!  So much for straightening, eh? LOL

I was pretty tired of the mess I was making at this point, so I decided to just go with it and share my lessons learned with you!  I did manage to keep it together when I stamped my sentiment on vellum and left it overnight to dry.  (I used Picked Raspberry Distress Oxide Ink).  I finished it off with some sequins and a touch of Studio Katia bling, and overall I like it.  Maybe I’ll try it again and work out some of those wrinkles… If nothing else, I hope my hot mess makes you smile!

Inky hugs,

Tara


Tuesday with Tara {take 309} blowing hugs Read More »

Free Shipping Anywhere In Canada