Scratch-N-Stamp
Search

Checkout

Keep up with Sales, New Products and other events at Scrap `n Stamp. Sign up for our newsletter now!

What's New

Hot Deals


The Crafters Workshop

Glitter Stripes

Hi all… It’s Nancy E here, back to posting once in a while on the Scrap ‘n Stamp blog.  I’ve been creating, but I haven’t felt up to trying to do the posts for my Design Team duties with the team… so I’m happy I was able to get something done for them in January!  In fact, this is my second post for them this month!

My card is very clean and simple… and honestly I think it needs a little something… but I sat with it for days and had no inspiration….  so that’s the card you get today LOL!

What I want to show you with this card, is how important it is to burnish your glitter if you are using it….  I LOVE the Be Creative Tape with glitter…. and the backing of the tape is perfect for burnishing the project.

To create the stripes, I started with a strip of cardstock and then put a strip of the Be Creative tape, then another strip of cardstock and so on.  I could have done one large strip of the larger Be Creative tape, but then I was worried that my strips of glitter wouldn’t be even.  So I switched it up to use the skinniest tape instead.

This photo was taken after I covered the project with the silver glitter.  It was everywhere!  I should have used my anti-static tool on the cardstock before pulling off the backing of the tape… but I didn’t.  So instead, I used the Be Creative Glitter Magnet to remove the glitter from everything except the tape.

In this photo you can see that I started burnishing the glitter.  What this means is that you rub the glitter with your finger (or in my case, I used a piece of the backing from the tape and my bone folder)… this makes the individual pieces of glitter lay down flat, allowing the most amount of shimmer to show on the card.  If you don’t burnish, your glitter won’t look nearly as shiny and shimmery. In the above photo, the two lines of glitter at the bottom of the photo have been burnished and you can see that they are more shiny than the top two lines.

Items Used:

*Cardstock:  Neenah Solar White 110lb; assorted blues from my stash

*Images (and die):  Hero Arts Eat Cake All Day

*Ink:  Versafine Clair Nocturne

*Etc:  Be Creative TapeBe Creative Glitter Magnetfoam tape; Nuvo Pure Sheen Glitter

*Tools:  bone folder; Gemini Jr

Glitter Stripes Read More »

Rainbow Bliss Art Journal

Hello and Happy Monday. I hope you all had a lovely weekend, filled with lots of crafty fun.

I am back on the blog with an art journaling layout. I have to admit it’s not exactly my favorite, there are parts I love and well, parts I wish I could redo. But I thought I would keep real with you all and share it anyway.

For this project I cracked open a new journal. I decided I would try out the black 8×8 Dylusions journal. I just wanted to do something a little different

I started out by covering both pages with a light layer of white gesso to prime the pages. As you can see there was more than just the white gesso on the page, you can see the streaks of gold (Glint- Dina Wakley paint). Before I started the actual layout, I used the page as a place to apply my excess paint from another project onto.

I really had no plan for this, it just kind of came together (sort of) lol. I pulled out all my paint and let loose. I really felt like doing a rainbow, so that is what I did. I just went to town applying the paint with my fingers, rubbing it into the page, trying to blend the colours together ever so slightly without losing each of them.

In between the layers of color, I would go in with a damp baby wipe and a Dylusions stencil to try and add a little texture, and slightly blend the colors together.

As you can see I did not get a great blend on the colours but I really like how vibrant everything stayed. If I could go back and rework this I totally would but I had to do this in stages in between caring for my twins, so needless to say things dried before I could get back to it. I decided to continue on and see what would come of the design.

I pulled out a few stencils from my stash, which I have linked to below, and my Tim Holtz blending tool with a clean sponge and got right in there. The first stencil I used was the Spring Medallion from TCW and some white gesso and added this to the corners, top, and bottom of the page. Really just wherever I thought it would look good.


Once I was happy with the first set of stenciling, I rummaged through my stash to pull out things I thought would look good together. I stenciled in some stars and some texture, going in with white gesso, black paint and then the glint paint. Now that I had the stenciling where I wanted it, I watered down some of those same colours and splattered them onto the page. For the white I pulled out my Sharpie paint pen.

I set that aside to dry and then hummed and hawed over what I was going to do next. Rummaging through all my stash, staring at things for a long time, flipping through the collage collective several times, even going as far as ripping something out. I really was in a bit of a funk and was not sure how I was going to complete this page at all.

I pulled out some old vellum sentiments I had from my scrapbooking days, as well as some Jane Davenport napkins and decided to collage those onto the background. From there I felt something was still missing so I stamped out some of the hearts from the Collafewd hearts stamp set from Dina Wakley Media. I stamped them onto some collage paper using Archival Black ink and collaged them onto the page as well. I realized quickly that I did not add enough of the gel medium to the back of the collage paper and because of that, you can still see some of the tissue paper. To finish it off I added some sentiment or rather phrases sticker from a Tim Holtz collection.

In the end, I did use the collage collective, I just didn’t use what I had set my sights on at first. I trimmed out this girl and added her to the bottom corner of the second page. Once more adding the same collaged hearts just to tie it in together and adding a little sentiment, which I notice is not straight at all, so yeah not happy about that. Lol

I really hope you got some inspiration and enjoyed the crazy little journey I took you on. Its been a little nutty as of late and the page perfectly expresses my state right now, ie a little all over the place.

Have a Beautiful week ahead

~Nancy


Rainbow Bliss Art Journal Read More »

One Stencil, Three Ways

ONE STENCIL, THREE WAYS

Boy, do I love getting a lot of use from my crafting supplies! Hello there – it’s Deb here, and I’m posting today for the Scrap ‘N Stamp Design Team.  I really hope you enjoy today’s project, because it’s not just 1 project, but 3 different techniques for using one stencil. In this case, it’s one stencil, three ways – three different techniques to be precise.  I love using stencils, because of their versatility. Depending on the stencil, it can be the focal point, or a background. It can be subtle, or in your face. You can use the entire stencil, or just part of it. So enough talk – let’s get on with the fun! I have kept the pictures in this post to the most important ones, but if you’d like to see more of the steps involved, you can head over to my blog post for more visuals.

STENCIL WITH INK & BLENDER BRUSHES

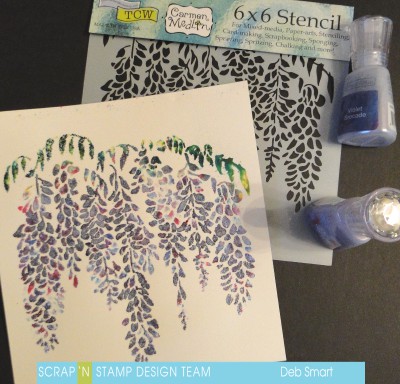
This is probably the quickest, and most common way to use your stencil. I chose the beautiful Wisteria stencil from The Crafters Workshop. It’s a full 6″ X 6″, so you have the choice of what type of project to create. I chose to use the full stencil, but then cut down the panel to create a card front.

To do the stenciling, first cut a panel of white cardstock to the same size as the stencil. Hold the stencil in place with some Thermo Web Purple Tape around the edges. Next, apply the ink with the Picket Fence Studios Life Changing Blender Brushes.

One Stencil, Three Ways

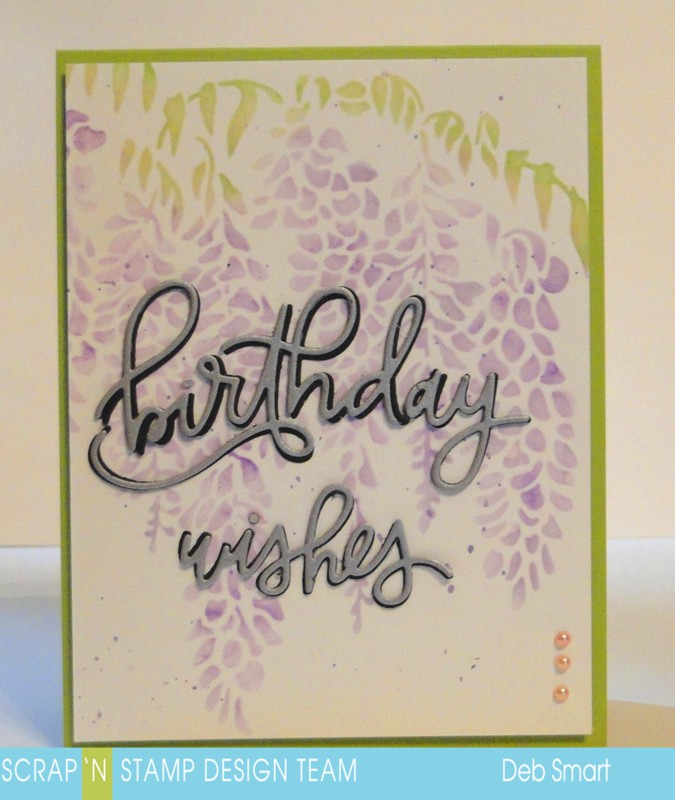
Above, you can see the card front finished, with a die cut added. I shared this card on my own blog last week; you can read more about it in this post.

STENCIL WITH NUVO SHIMMER POWDERS

Now this technique is lots of fun – and a bit messy! There’s more pictures for this technique on my own blog, so you get more of an idea how to do it. First, because the Nuvo Shimmer Powders are highly pigmented powders that are activated by water, you need to get your work space set up. Put down a craft mat, or something to protect your work surface. Because  you’ll be adding water, you don’t want the water to seep under the stencil. Follow the directions on a temporary re-positionable spray adhesive; spray it on the back of the stencil, and wait until it is tacky.

Cut a panel of watercolour paper to size, and then lay the stencil, tacky side down, over the paper. (just for good measure, I also put Purple Tape around the edges, but it wasn’t necessary). Next, sprinkle the Nuvo Shimmer Powders over the stencil. I used two different colours; Lilac Waterfall and Violet Brocade. Alternate placement of the powders, to mix up the colours.  Once you’re sprinkled on some powders, lightly spray with water. The photo below shows the powders reacting to the sprayed water. I know – it looks like a hot mess at this stage!

Stencil with Nuvo Shimmer Powders

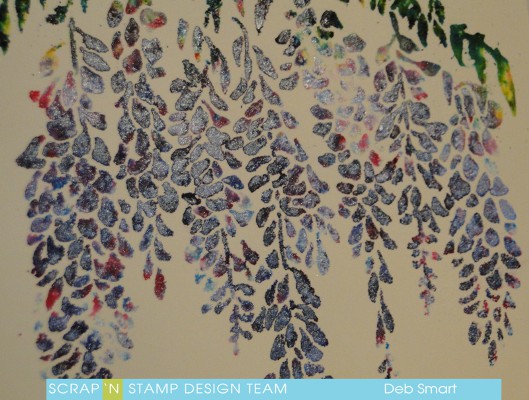
You can see in the photo above that the shimmer powders are a mixture of colours; not just a flat one shade. You can add more powder, and then more water, to areas where you may have missed, or where you want more colour. The photo below shows the powders now dried, and the stencil removed. Note – you don’t have to wait for the image to be dry, before removing the stencil. And the great part is that the temporary adhesive has blocked the water from seeping under the stencil, so you can still see the individual petals.

One Stencil, Three Ways

In case you’re wondering where the shimmer is – I took this next close up photo, just so you can see it! Even so, the photo doesn’t really do it justice. In person, it’s gorgeous!

Gorgeous Nuvo Shimmer Powders

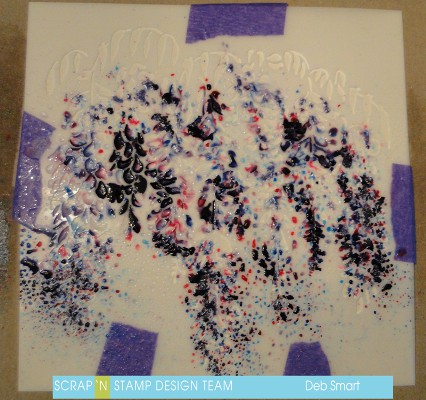
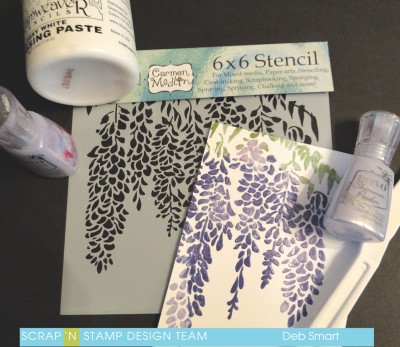
STENCIL WITH EMBOSSING PASTE & NUVO SHIMMER POWDERS

I guess technically, this is a 3rd and 4th way to use the stencils! You can use embossing paste as it is, but I wanted to add colour to mine, so I added the same Nuvo Shimmer Paste as I did in the technique above.

This is another technique that can be a bit messy; I try my best to set up my area to control any out of control paste! First, I got out two large pieces of wax paper – yup, from the kitchen cupboard! Next, I used my palette knife to put some of the white embossing paste on each piece of wax paper. The reason I used 2 pieces is that I wanted to use both the Lilac Waterfall and the Violet Brocade Shimmer Powders, without getting them mixed together.

Sprinkle one of the shimmer powders onto one of the pastes, and the other one onto the other paste. Use your palette knife to mix them up.  ( I have a photo of this step in my blog post).

Once you have your powder and paste mixed up, apply them one at a time on top of the stencil. Hold your palette knife like a regular knife, and apply it like you’re buttering toast. It’s that easy!  Apply the paste in different areas, so that you can see the two different colours. If you want extra ‘high’ texture, build up the paste. For a lower profile texture, skim the palette knife over the paste, skimming off any excess sitting on top of the stencil.

I was so excited to see the results that I forgot to take a picture before removing the stencil! So sorry about that! But below, you can see the result, with the stencil removed.

Stencil with Embossing paste

FINAL CARD

I decided to create a card front using the embossing paste panel that I created. I trimmed it down just a bit, and added a panel of light purple cardstock behind it.

One Stencil, Three Ways

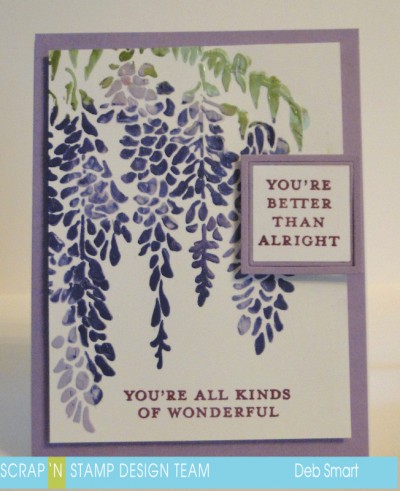
The sentiments are from the Concord & 9th Everyday Bouquet set. They are stamped in Seedless Preserves Distress ink; one onto a scrap of white cardstock, the other directly onto the bottom of the panel. The top sentiment is die cut using the matching Everyday Bouquet Dies; they include the cute double frame, which is die cut in the same cardstock as the panel behind.

I do hope you’ve enjoyed today’s post, and are inspired to look at your crafting supplies with new eyes! By using different products, you can stretch your supplies and your crafting dollars. Not to mention, coming up with amazing new projects to share with your friends!

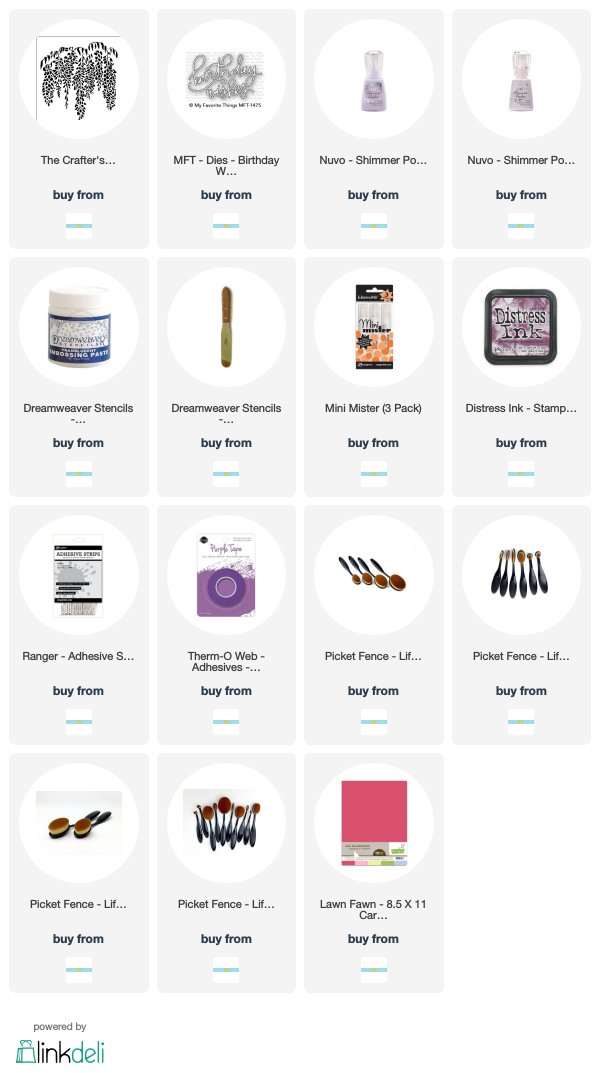
All supplies are available through Scrap ‘N Stamp. I’ve included links for you, below.

Compensated affiliate links are provided where available, at no cost to you. 


One Stencil, Three Ways Read More »

Free Shipping Anywhere In Canada