Scratch-N-Stamp
Search

Checkout

Keep up with Sales, New Products and other events at Scrap `n Stamp. Sign up for our newsletter now!

What's New

Hot Deals


card making

Color Layering Fuchsia

COLOR LAYERING FUCHSIA

Hello stamping friend! It’s Deb here, for the Scrap ‘N Stamp blog! I hope you’re looking forward to a great week. We in the Design Team have some great projects to share with you. I’m happy to be here to start your Monday off right. I hope that you were able to take advantage of the recent ‘Bundle Up & Save’ sale on select stamp & dies bundles, at Scrap ‘N Stamp. I sure did! Today I have a couple of cards to share with you that I made from one of the bundles I purchased, called Color Layering Fuchsia by Hero Arts.

CLEAN AND SIMPLE

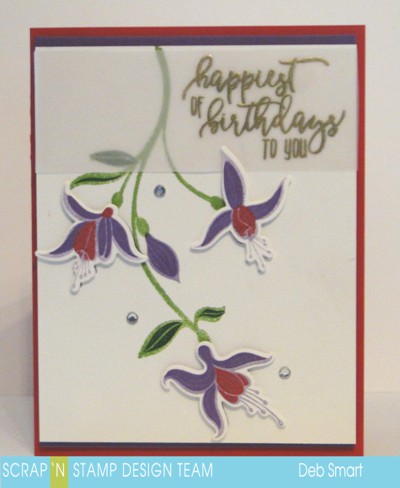
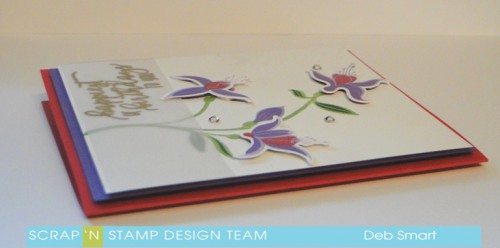
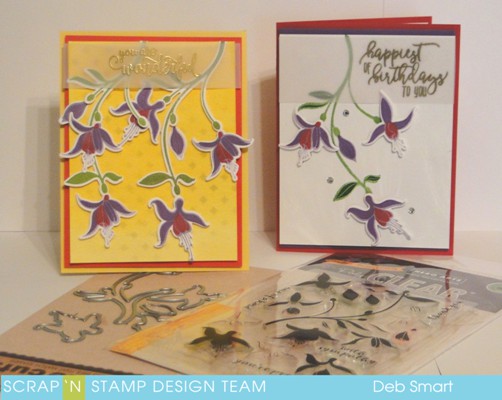
For my first card, I kept it fairly clean and simple. A nice bright white background, and one stem of the fuchsia flowing down the middle.

Color Layering Fuchsia

This stamp set is incredible! When they say ‘color layering’ they mean it! Each flower has at least 4 layers to it, and there are extra layers that you can add to the leaves on the long stem. Because these are photopolymer stamps, it’s easy to see exactly where to layer the next colour. However, if you’re a little timid, you can set up the stamps in your stamp platform, and that stamp that way.  I’m still working on adding to my ink collection, so I used ink from my stash on hand.

CARD FRONT DETAILS

First, stamp the long stem directly onto the panel of white cardstock. I used Mowed Lawn Distress ink. Add in the shading to the leaves in a darker green.  Stamp the layers for the small bud directly onto the cardstock, as shown. For the other flowers, stamp them onto separate white cardstock. I stayed pretty true to real fuchsia colours, using light and dark purple, and a dark pink.

After stamping the flowers, use your die cutting machine and the coordinating dies, to die cut the flowers. Attach them onto the panel, using foam squares.

Chose a sentiment that you want – I happened to grab one from my stash, that is old – and stamp it in Versamark ink onto vellum cardstock. Cover the ink with Gold embossing powder, and then set it with a heat tool. I chose to stamp onto vellum so that the pretty flowers wouldn’t be covered up by the sentiment.

Finally, I layered the front panel onto a dark purple cardstock, and then onto a dark pink card base.  Then I added a few rhinestones from my stash, for a little bit of bling.

Color Layering Fuchsia

MORE FLOWERS TO ENJOY!

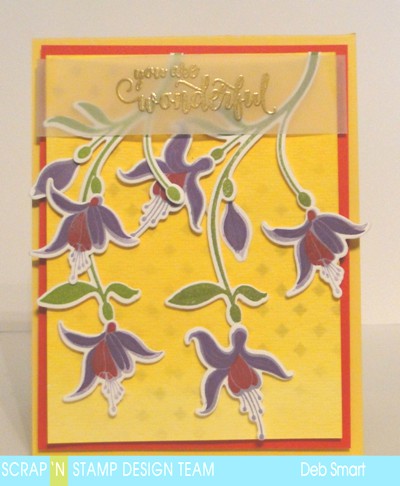
For this next card, I added a second stem of fuchsias, and created a background with ink and a stencil.

Color Layering Fuchsia

I may have gotten carried away with the number of flowers – but they’re so pretty! I love to have a real basket of fuchsia at my front door, during the spring & summer.

 CREATING THE BACKGROUND

I originally started with a patterned paper background, but decided that it was too busy; it competed with the flowers. So, I put some ink onto one of my clear blocks, and created a wash background with a wet paintbrush on white cardstock. I kept the yellow darker at the top of the panel, and lighter at the bottom.

After the panel had dried, I took a stencil from my stash (I really need to add new stencils to my arsenal!) that is a trellis pattern. I held it in place over the watercoloured panel with purple tape, and applied a medium gray ink. I applied the ink randomly; I didn’t want a solid background.

I repeated stamping the sentiment onto vellum cardstock & embossing it in gold, as I did on the first card. This sentiment is from the Sentiment Collection by Penny Black.

PUT IT TOGETHER

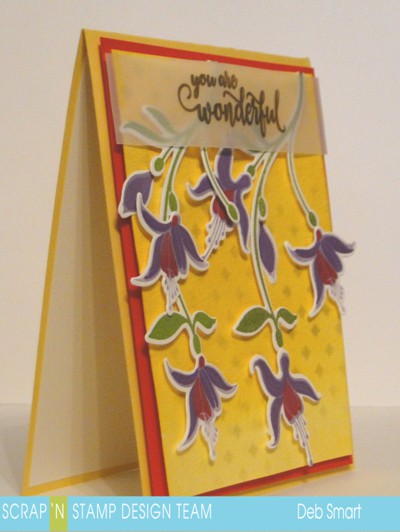
For this card, all of the flowers as well as the long stems were stamped separately, and die cut. Attach them to the front panel with foam squares, and add the vellum sentiment with liquid glue (it won’t show when it’s dry).

Attach the front panel to a layer of bright pink cardstock, and then onto a yellow card base. I used foam tape to attach the layers together.

Color Layering Fuchsia

THANKS FOR VISITING!

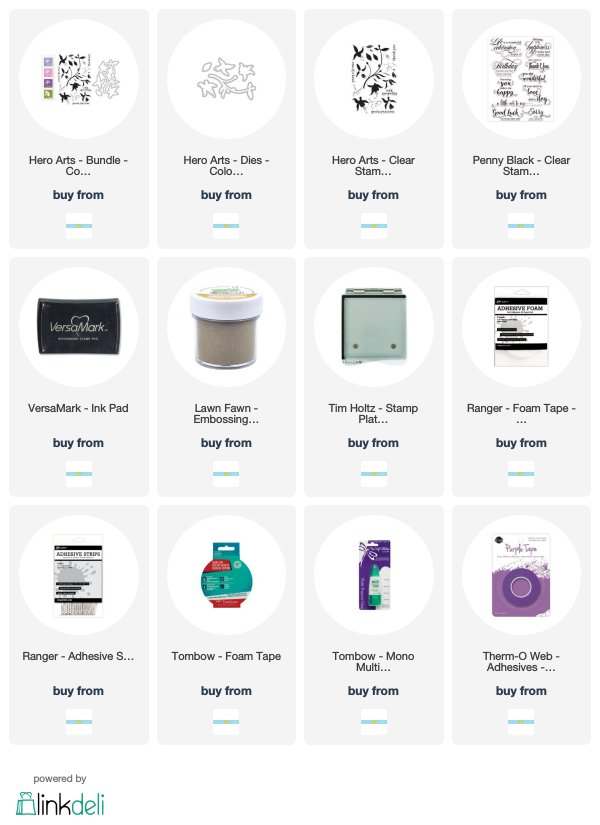
I hope you’ve enjoyed seeing my projects today! Please leave a comment, and let me know what you think. The supplies available from the Scrap ‘N Stamp online store are listed below for your convenience. The Color Layering Fuchsia set is available as a Bundle (both the stamps & dies together), as well as separately. Have fun shopping, and creating!

Color Layering Fuchsia

Compensated affiliate links are used where possible, at no cost to you. All products used are personally purchased, unless otherwise noted.


Color Layering Fuchsia Read More »

Christmas Thanks Card!

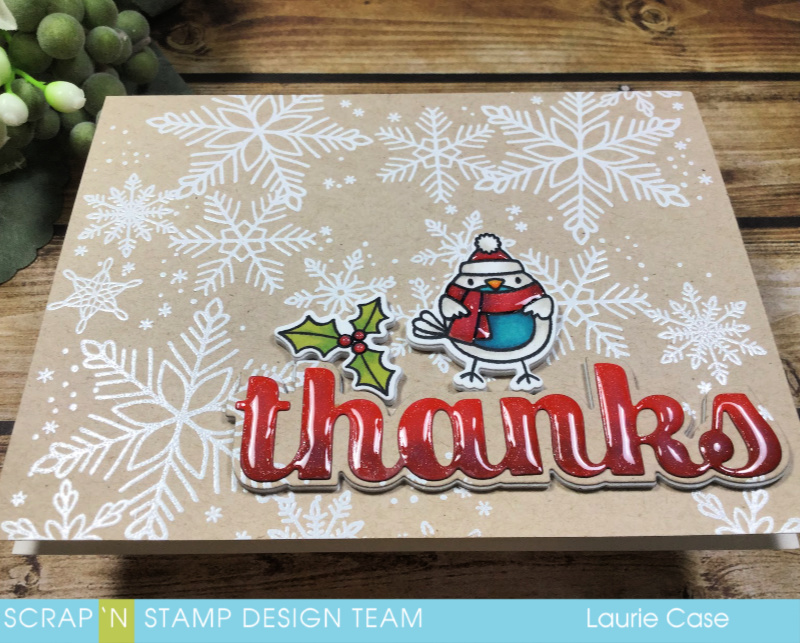
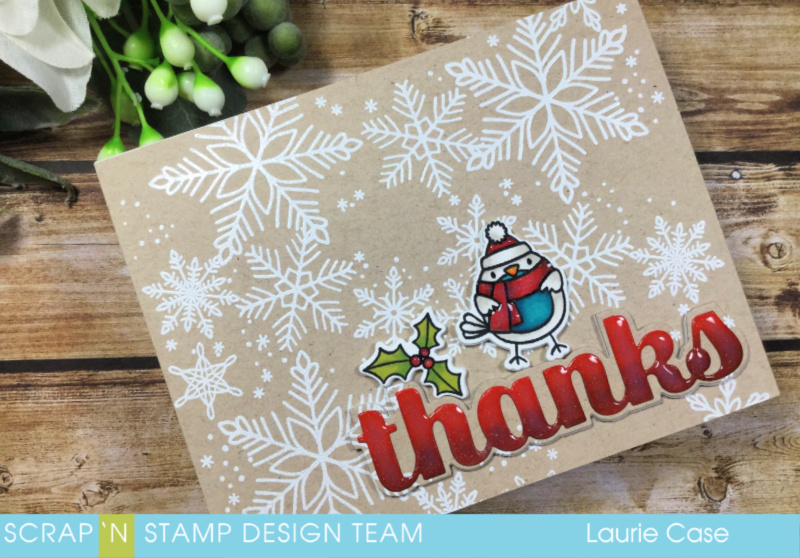
Hello friends and welcome back!! Today, I made a Christmas thank you card. This card was easy to make although certainly not very quick and something you’d want to mass produce..although you defiantly could if you had the time!!

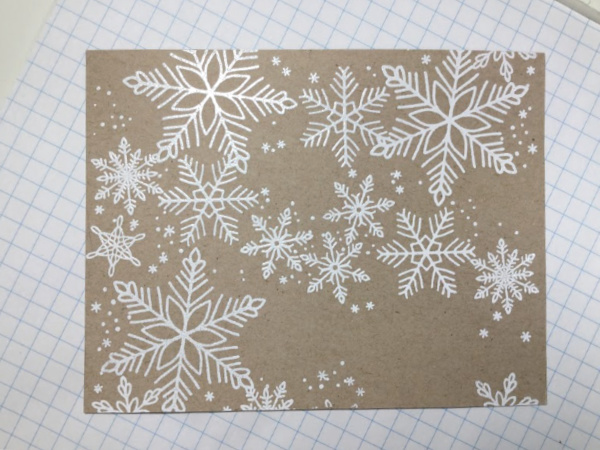
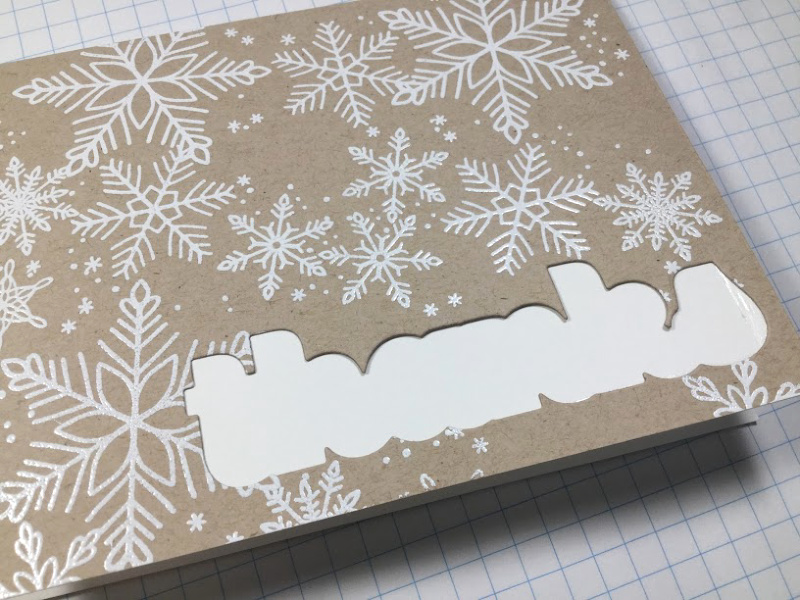
I started by white heat embossing the Snowflakes Turnabout stamp from Concord & 9th onto a kraft card panel. I stamped it three rotations and embossed it all at once.

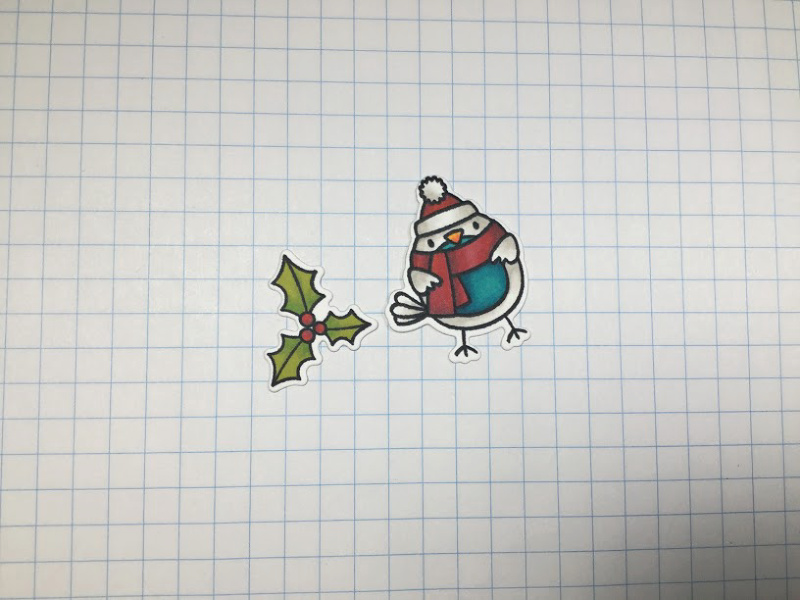
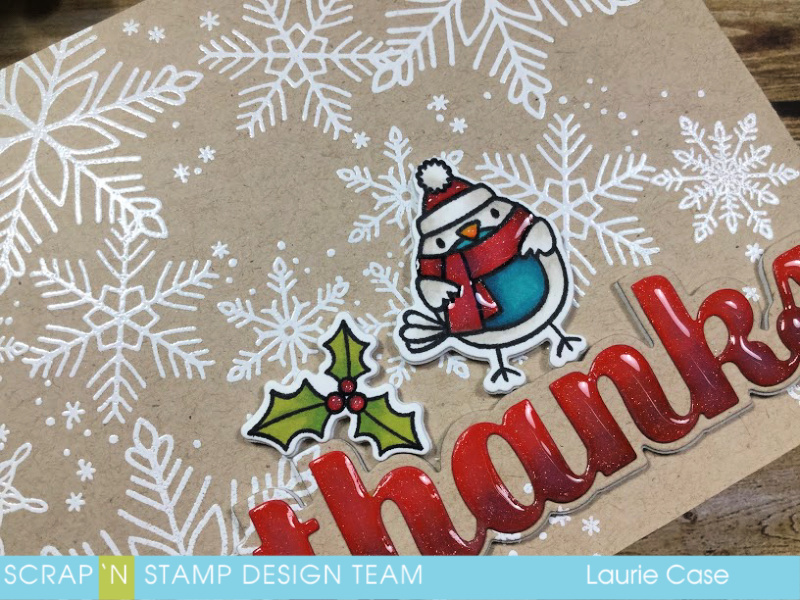
The cute little bird and holly image come from the Tweet Holidays Stamp set from My Favourite Things and was coloured with alcohol markers. This is one of my fave winter stamp sets this season!

I wanted the sentiment to be quite large and bold so I chose the Big Thanks Sugar Script Die from Birch Press Designs. I cut word out of white cardstock and used red shades of alcohol markers to give it colour.

I cut the outline portion of the die directly out of the heat embossed background then adhered the kraft panel to a landscape, white, top fold card base.

Before puzzle piecing the positive piece onto the card base, I die cut it once again, this time out of craft foam.  And to make sure everything was evenly popped up on the card, I die cut the bird and holly image out of the foam, as well!

I love the all the dimension!  I adhered the coloured thanks die onto the popped up outline and perched the bird and holly on top.  Of course, that large thanks die was screaming out for glitter and shine so I brushed some Wink of Stella Clear Shimmer Pen over top as well as a generous helping of Nuvo Crystal Glaze!!

Don’t you just love the shine? In fact, I loved it so much I added it to all the red bits on the card!!

This card was super fun to make and I hope you enjoyed it!!

Wishing you all a very Merry Christmas and a Happy and Healthy New Year!!

Until next time…

Laurie


Christmas Thanks Card! Read More »

Thinking of You Card – Concord & 9th Lily Stamp Set

Thinking of You Card – Concord & 9th Lily Stamp Set

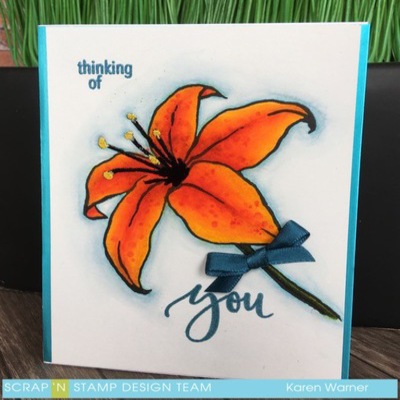
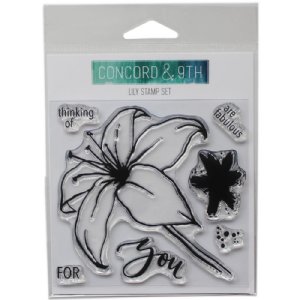
Today’s card is a Thinking of You card  using Concord & 9ths Lily Stamp Set .  Nothing screams “Thinking of You” quite like Concord & 9th’s Lily Stamp Set.

The lily  stamp   has wonderful  line art,   thereby encouraging  this stamper to go wild (so-to-speak) with my own interpretation of the flower in terms of colour, shading and texture.

I  placed Concord & 9th  Lily Stamp on Tonic’s Tim Holtz Stamp Platform and inked the stamp with  Memories Black Dye Ink Pad.   Pressing the Stamp Platform  on to Strathmore Bristol Smooth Card Stock  for a crisp clear image.

Allow  the impression to  air dry completely before  using Zig Clean Color Real Brush Markers .

Colouring Technique:

I layered the  markers in stripes of colour. The  lightest shade around the petals edges working darker toward the centre of each petal. All five petals were coloured the same way, the only exception was when  a  section of a flower petal   fell behind  a petal that was in front. In order to add depth ,  a darker shade  was added  the the portion behind and a lighter shade to the area  in front. This makes  a cast shadow .

Where the colour stripes  were  side by side , the lighter of the two markers was used to blend the line. Making sure to clean the brush tip frequently. Once this was finished,  the solid image stamp and dotty pattern stamp  (both in the Lily Stamp Set) were inked with Zig Clean Color Real Brush Red Marker and stamped onto the freshly blended flower image.

The flower stem was coloured in the same fashion as the flower by adding stripes of colour , with the darker shades laid on the left hand side. The lighter,   on the right of the stem. The area  between each stripe was blended with the lighter shade of the two, making sure to clean the tip frequently.

The stamped image was outlined very lightly with Zig Clean Color Real Brush Marker in No.036 – Light Blue. This colour was pulled out farther with No. 302 Haze Blue. An aqua brush with a fine tip spread the ink out a smidgeon further , essentially fading the line.

This was set aside to  air dry.

Added Touches:

Once the ink was  dry “Thinking of ” and “You”   stamps were inked with VersaMark Watermark Ink Pad and stamped onto the front panel. Seth Apter Embossing Powder – Deep Sea was dusted over the freshly stamped words and melted with a heat tool. VersaMark Watermark Pen was applied to the flowers Stamens. Stampendous Embossing Powder – Topaz was applied to the flower Stamens  Anther and Nuvo Embossing Powder – Jet Black was applied to the Stamen Filament. A heat tool was used to melt the embossing powders .

A small bow was tied with ribbon from my stash. The ribbon closely matched  the melted  embossed sentiment  colour. The ribbons tails were trimmed and  attached to the stem, just below the flower with a Glue Dot.

Finishing the Card:

Tonic Craft Perfect Mirror Card in Silky Sky was cut to  (14 cm  x 10.8 cm)   5-1/2″ to 4-1/4″ and adhered to a side fold portrait card  front with Be Creative Tape 5mm

The Zig coloured  panel was  trimmed to (14 cm x 10.2 cm)  5 – 1/2″ x 4″ , ensuring   the image  stayed centred. Be Creative Tape 5mm  was applied to the back of the  panel  and  adhered to the mirror card layer on the card front.

A (14 cm x .6 cm  ) 1/4″ x  5 -1/2″  strip of  Tonic Craft Perfect Mirror Card in Silky Sky  was  attached to the  inside card base , vertically to the   right hand  side edge with liquid adhesive.   A white card stock  panel for the inside card base was cut to (14 cm x 10.2 cm)  5-1/2 x 4″ and stamped with Hero Arts Ink. This was  attached flush to the score mark  with Nuvo Deluxe Adhesive.

Zig Clean Color Real Brush Markers Used in Flower:

Petals ( light to dark):

No. 050 – Yellow, No. 052 – Bright Yellow, N0. 070 – Orange, No. 023 – Scarlet Red, No. 020 Red.

Stem (dark to light):

No.044 – Deep Green, No. 043 Olive Green, No. 046 Mid Green, Scant No. 051 – Lemon Yellow.

Shading:

No.036 – Light Blue, No. 302 Haze Blue

This card in now complete.

Here is a video of the colouring process:

https://youtu.be/pDKCcMnEBKQ

Thank you for stopping by. Until Next time – xo Karen

Thinking of You Card – Concord & 9th Lily Stamp Set Read More »

Free Shipping Anywhere In Canada