Scratch-N-Stamp
Search

Checkout

Keep up with Sales, New Products and other events at Scrap `n Stamp. Sign up for our newsletter now!

What's New

Hot Deals


Chala

Harvest of Blessings

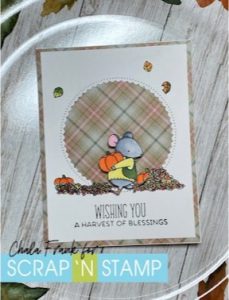
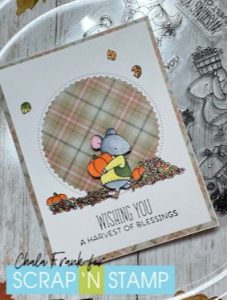
Happy Saturday Crafters!  Chala here today and I am happy to share a super easy and fun card to send you all a Harvest of Blessings!

I suffer from “new release desire”.  I want all the new products!  So while I was sitting there deciding what I wanted to do for today’s card I looked around my craft room at ALL the supplies I have and am really so thankful to have a bountiful collection!  I realized there are so many stamps that I have not used in a while or I have not used yet at all!  This is a perfect time to revisit and appreciate what I already have!

I pulled out an older My Favorite Things stamp set called Harvest Mouse.  I remember seeing this set for the first time and I fell in love with the sweet images.  But it was one sentiment in particular that made me want to purchase this set.  It was the sentiment “Bushel and a Peck”. My Grandma always used to say “I love you a bushel and a peck and a hug around the neck”.  This brought back so many warm and fuzzy feelings.  She has only been gone now for about 4 years….and lived to an amazing age of 108!  I am so blessed that she lived so long and got to see all my kids be born!  But…I digress!  I am not using that particular sentiment today, but the “Wishing you a Harvest of Blessings” as it ties in nicely with our Facebook Challenge word for today – Harvest!

Growing up in Saskatchewan harvest time was busy!  Farmers spending hours upon hours i the fields trying to get crops off.  Women in the gardens bringing in the fruits/vegetables of their long summer labour.  Now that I live in a big city I fear I have lost the appreciation from where our food comes from…until this year when my husband decided to take over the task of the garden.  It was a job his dad enjoyed and since he passed we wanted to ensure the garden was still a place full of growth and his memories.  My husband started the seeds in our bonus room front window (yay…) and then transplanted the little plants into the garden once they had grown enough and he was sure frost wouldn’t kill his little babies that he nurtured for 3 months…in my bonus room.   Now, we anxiously await when he will let us harvest the two little pumpkins that he managed to grow!  lol!  So, when I saw the little mouse with the pumpkin it reminded me of my sweet husband’s efforts.

I stamped the little mouse, leaves and pumpkins in Memento Tuxedo Black ink and did some quick Copic colouring.  I then fussy cut out the little images with my EK Success Cutter Bee Scissors.

I scavenged my Die collection and found and inside out scalloped die that I thought would work well to create a focal point for my card.  I also pulled out a beautiful plaid pattern paper and thought that would look great behind the die cut circle as a background.

I used my favourite Fiskars Sure Cut Trimmer to trim the circle scalloped panel to 4″ x 5 1/4″ layered it onto of the patterned paper trimmed down to standard A2 size panel.

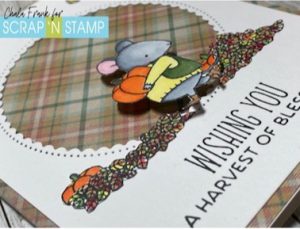
I adhered all the little images (except the mouse) down with Gina K Connect glue.  For the mouse I wanted him to stand out a bit and used some Foam Squares which gave him the perfect amount of dimension.

The sentiment was stamped with….can you guess?….my favourite ink for sentiments Versafine Clair Nocturne Ink.  To ensure I got my sentiment straight and stamped legibly I used my Hampton Arts Stamp Perfect.

All that was left to do was to adhere the panel onto an A2 side folding card with an adhesive tape runner.

I really love how simple but cute this card came out!  I challenge you to look at your craft supplies and be thankful for every item you have.  Pull out some old forgotten sets to remember why you wanted them in the first place and then USE THEM!  lol!

Thank you so very much for spending this time with me today.

I wish you and yours a very happy and blessed Thanksgiving weekend!

~Chala

Harvest of Blessings Read More »

Apple of my Iris

Happy Funday Sunday!

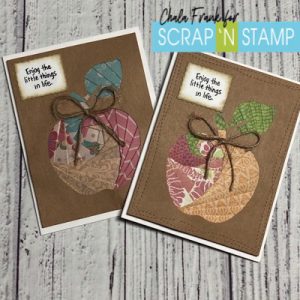
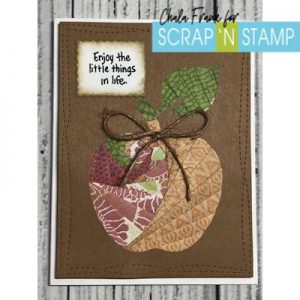
Crafting is the apple of my iris….and the theme for today’s Blog Post!  I decided to combine the Facebook Challenge word of the day “apple” and the older technique of “iris paper folding” to tackle a common crafters problem…. what to do what all your patterned paper!

I have been doing some craft room cleaning and reorganizing and during this process I have come across a lot of patterned paper that I have purchased over the years with good intentions to use and…..well, I still have it!   So, I decided I was going to finally use these papers and the iris paper folding technique is a fun and easy way to do this!

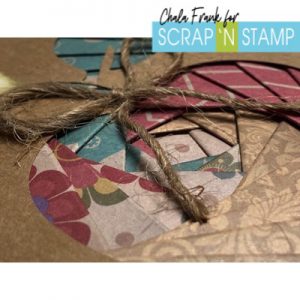
The first thing you want to do is to search on the good ‘ol inter web for an iris folding pattern that you like.  You can choose from a square, triangle and there are even apple specific templates.  I decided to use a square template as I like its versatility with different patterns and that I could use four different colours.  I printed the template out and laminated it so that I could reuse it.  This will be our guide on where and how to line up each strip of paper.  The next thing to do is pick out a die cut pattern.

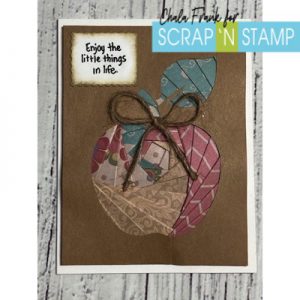
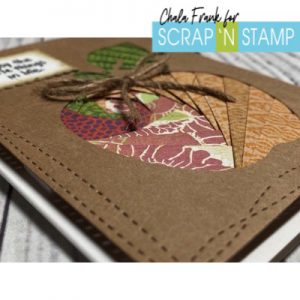
I was enamoured with the new Lawn Fawn Stitched Apple Frames and thought they would work so well with this technique to create a fun fall card.  In fact, any shaped die would work well with this technique!  Unfortunately, I wasn’t able to get this die in time for this post, so I pulled out my Silhouette machine and found a digital cut file that would work and cut the apple out from some kraft cardstock measuring 5 1/2 ” 4 1/4″ (standard A2 size panel).  we will be using the negative cut out portion and I will save the die cut apple pieces to use on another project.

I then pulled together some of the patterned papers that I thought would work well with together and that would look good under the apple.  I cut these papers into strips measuring 1″ wide.  The length of the strips of paper depends on how large your image will be.  I then score and fold each strip of paper in half at the 1/2″ mark.

Now the fun begins!  You will want to turn your negative die cut panel piece so that the “good side” is face down on top of the template.  If you are using the square template, you can move it around to get the best position for the iris.  Once I found the position I liked, I taped the panel down onto the template with some Thermo -Web Purple Tape.

The template I am using already is numbered and colour coded.  I will assign a colour to each patterned paper. Now I just start adhering the paper pieces following the number and colour order.  For this particular die I won’t be started at the number 1, I will have to look for the lowest number and then follow numerical order from there.  You will want to adhere the strips of paper so that the folded edge aligns with the template line (towards the iris).  I trim the strips to the length needed and adhere them down to the edges of the panel.  I am using a double sided adhesive tape runner to do this, however, you can use clear tape as well if you like.

Once you have worked your way around and have adhered all your strips you will be left with a square (or triangle if you are using that template).  For this, you can leave it open or you can adhere any colour of paper to cover the opening.  I chose to use one of the pattern pieces I have already used, but you could also use foil or glitter.

I then trimmed down any pieces that over hang the panel.  There is a bit of bulk to this panel so I thought it was best to adhere the panel to the card base was with some double sided foam tape.

I die cut a scalloped rectangle and used a sentiment from Stampendous Life Words stamp set and VersaFine Clair Nocturne Ink.  I also did a little inking on the edge in Frayed Burlap Distress Ink and a finger dauber.  The last thing I added was a twine bow and I adhered that with some Glossy Accents.


For my second card I just switched the pattern papers and die cut the panel with the My Favorite Things Wonky Stitched die.

I really like how both cards turned out and I am looking forward to using up more of my papers on future card projects.

I hope you have an amazing week full of creative energy!

~Chala


Apple of my Iris Read More »

It’s in a Book!

Happy Monday!

As the weather turns cooler, I am spending more of my time inside.  Which leads me to my two favourite activities, crafting and reading!  Today we are creating something a bit different…..here’s a hint…It’s in a Book!

If you guessed bookmark, you’re right!  I love to be able to add special elements to my cards that double as gifts.  I have added other things like necklaces, bracelets, brooches, earrings, etc. into my cards that the recipient can remove and use.  I think it is a very unique way to actually gift give.

We are back to school in my house and the birthday invites are starting to come in and I am beginning to think about teacher gifts, etc. I thought this was a good way to bump up my emergency gift cupboard.

There are three bookmark sizes we will be using today, 2″x6″, 2″x7″ and 2.5″x8.5″,

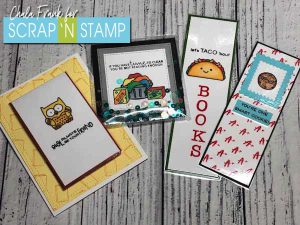
The first one we will make is actually a card with a removable bookmark.  The card size is a standard A2 size card and the bookmark size is 2.5″ x 8.5″.  This is a great size if you want to ensure maximum paper usage.

I dug through my stamp inventory and found a TON of images that would work perfectly.  Any smaller image is going to work great if you want it to have a focal point.  Although, you can use background stamps as well for a more abstract look.  I pulled out some Taylored Expressions and Lawn Fawn images.

I like to plan my layouts by roughly stamping my ideas onto a scrap piece of paper to see how they will look and it helps me if I am doing complex stamping that require masks.  Once I like an idea, I can then go ahead and stamp them out onto the cardstock.  I will then save that scrap layout piece for future reference.  Currently, I am saving these with the stamp set….but, I think I might either create an idea book or perhaps a digital binder to save space….it’s a work in progress. Lol!

https://youtu.be/b0OeJ4cl7bU

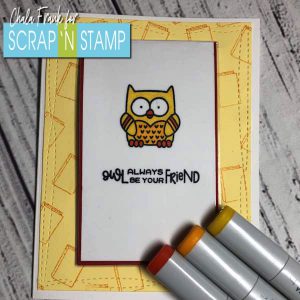
I want to start on the bookmark first.  I score the bookmark at 4 1/4″.  The bookmark will be woven into the card front…but we will get to that in a bit.  I then stamp the owl and coordinating sentiment from Taylored Expressions Punny Notes stamp set with Memento Tuxedo Black ink and set it aside to ensure it dries completely before Copic colouring.

I then move onto the card panel.  I found a tiny book stamp from the Teacher Lady stamp set from Ellen Hudson and used that to create a custom stamped background using  Distress Ink on some yellow cardstock.  To help me create an evenly spaced stamped background I like to use a T- square ruler.  I then cut that panel with the MFT Wonky Stitched Rectangle Die to add a bit of interest.  I attached this panel to a standard A2 size card panel.

I did simple colouring of the owl in the following Copic colours:  Y15, Y17, YR18 and because the Copic bled through a bit I backed the bookmark onto some coordinating coloured cardstock.  I wanted the bookmark to hold up well so I then ran it through my laminator and attached some thin magnets onto the inside fold.  This will help hold the bookmark in place on the page.  You will want to burnish that fold and you may want to even place something heavy onto of it overnight to really reinforce the fold and to ensure it will lay flatter on the card.  It will lay down nicely the more it is used in a book, so if it pops open a bit, don’t worry!

Now we need to create slits in our card base to weave the bookmark through.  *Measure the size of your bookmark again if you have laminated and backed onto cardstock.  You will want to create slits a few millimetres longer than the width of your bookmark so it slides nicely.  I cut two slits horizontally and parallel to each other in the centre of my card.  Although, you could offset it to onside or another.  To create the slits in the card you can use a straight edge and a craft knife or a Fiskars Surecut Trimmer.

Once your cuts have been made you will insert the back flap of the bookmark into the front of the card’s top slit and then back out towards the front of the card through the bottom slit.  You should be able to connect the magnets together.  If you want you can add a sentiment onto the inside of your card and then write a note to the recipient letting them know of the surprise gift with the card.
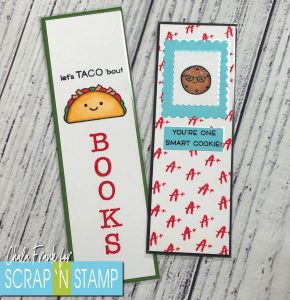
My next bookmarks are super simple.  I pulled out my Lawn Fawn Year Nine (Taco) Stamp Set and the Smart Cookie stamp set.  Check your Lawn Fawn stash as their images are perfect for bookmarks!

For the Taco stamp set I used the 2″ x 7″ bookmarked and the “let’s taco ’bout” sentiment and the taco stamping in Memento Tuxedo Black ink and Copic coloured (E34, E35, Y23, YR02, R08, YG17).  I wanted the full sentiment to read “let’s taco ’bout  Books”.  I didn’t have a ready made “book” sentiment that I could easily use…so, I pulled out an alphabet stamp set and created the “BOOKS” sentiment with that.  I stamped it vertically with Distress Ink and I like how it filled the bookmark.  Again, I layered this onto some coordinating coloured cardstock and laminated.

I did pretty much the same thing with the Smart Cookie stamp.  Using another smaller image from the Teacher Lady stamp set  and my T-ruler and creating a custom stamped background.  I then found some scalloped rectangle dies and layered the image onto coloured cardstock and backed the entire bookmark onto black cardstock and laminated.  This time I added some Nuvo Shimmer Pen onto the cookie before laminating to add some sparkle!
My final bookmark is a shaker bookmark.  It is somewhat similar to the first one that you can add it to a card.

I found used my square stitched dies and some images from the Loads of Fun stamp set from Lawn Fawn.  I found a cute sentiment from the Bedtime Stories stamp set from Clearly Besotted that says “If you have time to clean you are not reading enough”.  I did some masking on this one to give the effect that the laundry soaps were infant of the basket and some simple Copic colouring.  I layered the stamped images onto grey and black cardstock.

To create the shaker I am using a clear heavy weight sheet protectors (I got mine from staples) and my We R Memory Keepers photo FUSE tool.  I have to admit I haven’t used this in a while so I had to relearn how to use it and which tips work best.

I place my square image into the protector and then trimmed it leaving enough material to fuse together around the edges and taking into account that I also wanted to add sequins, etc. inside.  I sealed the bottom and sides leaving the top open.  I then added some Picket Fence Spiked Ocean Water sequins and some Studio Katia bubbles and then sealed the top and carefully trimmed up any excess material from the edges being careful not to trim too close that I reopen the seal.

Now we need to create the element that will hold the bookmark to the page.  I cut a piece of cardstock that measured 5 1/2″ square and cut on the diagonal to create triangles.  I then used my scoreboard to score at 2 3/4″, turned and flipped the triangle and scored again at 2 3/4″.  This basically fold the tips of the longer edges of the triangles in to create a smaller square.  I then used Scor-tape and adhered the flaps down onto the top left corner of the back of the shaker piece with the opening of the square element piece being on the lower right hand corner.  (Sorry, I know this is confusing…the video will help!)
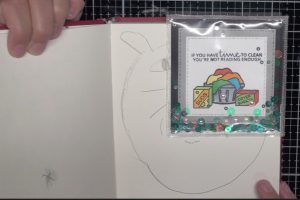
Now when you flip it over to the front you should be able to slide the bookmark onto the top right hand corner of a page of a book.  The one thing I didn’t do, but will do for next time is laminate the element piece that holds the bookmark onto the page.  I think it would hold up better that way.
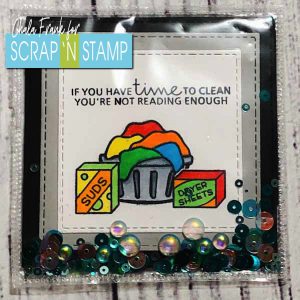
If you want, you can then add this shaker bookmark onto a card front.  Keep in mind though when you create your slits they will need to be on a diagonal with the slits closer together.  For this bookmark I would need to make my slits angle from the top left down to the lower right of the card.

I hope that today’s blog has inspired you to look at your stamps in a way that you can create fun bookmark cards or quick and easy bookmarks.  I know I will be creating a ton of these to go in Christmas cards for my kids’ friends as well as Valentine cards and I have a few special jewellery items that I will be giving as gifts for birthdays that will be fun to incorporate this way.

May your week be full of crafting!

~Chala
It’s in a Book! Read More »

Free Shipping Anywhere In Canada