Scratch-N-Stamp
Search

Checkout

Keep up with Sales, New Products and other events at Scrap `n Stamp. Sign up for our newsletter now!

What's New

Hot Deals


christmas in july

Warm & Feathered Hugs – Freezin’ Season

Helllllloooooo! Guess who’s back? It’s Chala! I am hoping to cheer up your mundane Monday by continuing to celebrate Christmas in July!

It’s funny to think about cold weather right now…only because we have really just started having summer weather here. None the less, I did manage to get in the spirit to make this sweet card using My Favorite Things – Warm & Feathered Hugs stamp set. I absolutely LOVE every single image in this set. Also, the sentiments are perfect for not only Christmas cards….but, Winter themed cards that I can send to my friends who don’t celebrate Christmas. Today’s card is a card that can be just that!

MFT – Warm & Feathered Hugs

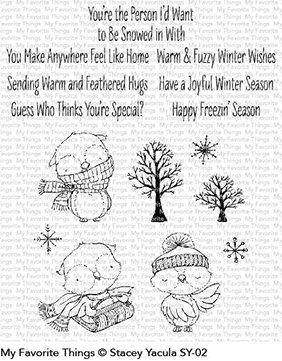
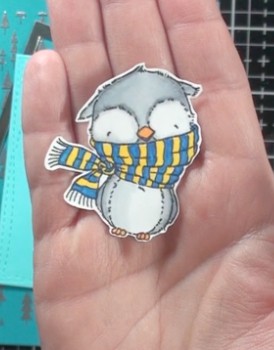
To start I am going to stamp the little owl with the scarf with Memento Black Tuxedo ink onto some smooth Crafter’s Companion white cardstock. I have chosen this type of ink and cardstock because they both work well for Copic colouring. I will set this stamped image aside to give the ink some extra time to dry and to think about how I want to colour him.

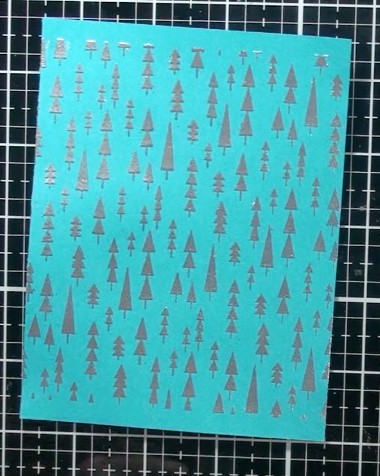
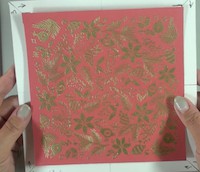
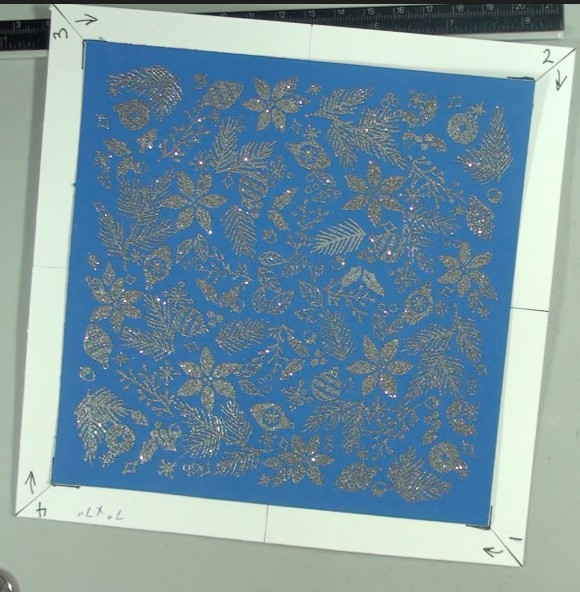
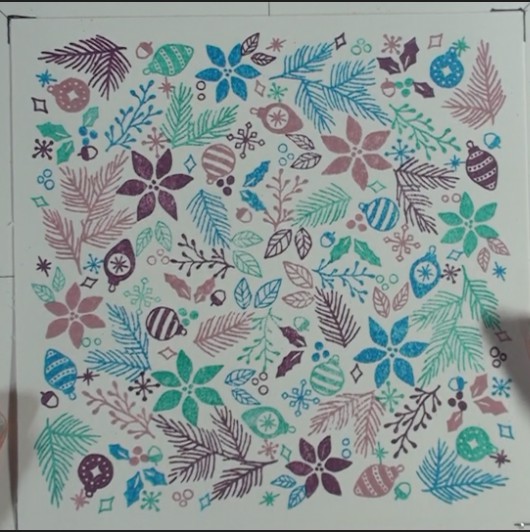
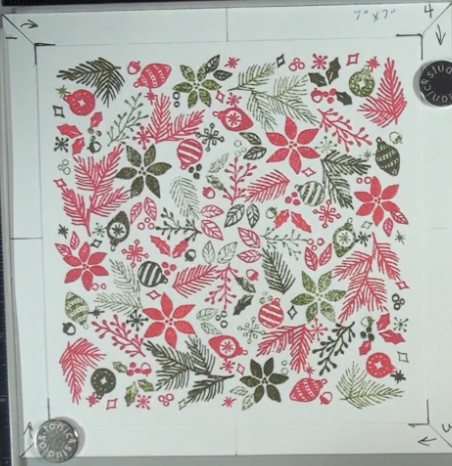
I was searching through my stash of cardstock and found a piece that I must have stamped up the last time I was making Winter cards. I thought why not use use this on the card! (To make this panel I had cut a standard A2 size panel from some cardstock similar to Lawn Fawn’s Peacock colour and then I used a stamp called Mod Trees and my Versamark ink and silver embossing powder.)

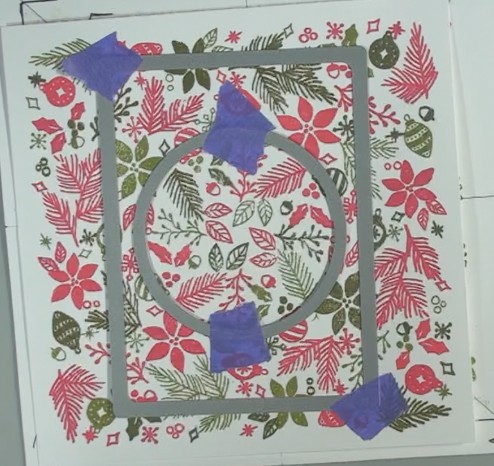
I then picked some light blue cardstock similar to Lawn Fawn’s Mermaid cardstock secure it with some Thermo-Web Removable Purple Tape and die cut that with my Gemini Jr. using the 3rd largest size (2 3/8″ x 3 5/8″) MFT Wonky Stitched Rectangle Stax Die.

I also used this same die and cut a piece from some silver mirrored cardstock similar to Tonic – Mirror Cardstock in Frosted Silver and trimmed the outside edge to make a frame that would fit around the mermaid coloured piece.

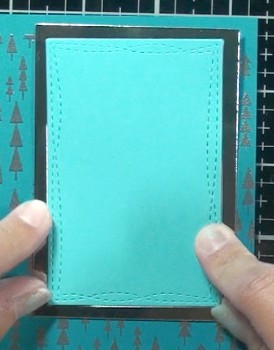
I start to plan how I want the layout of these pieces to be on my card and I decide that I want the silver frame to be offset at an angle to the light blue cardstock.

Now that the layout is planned out I can move on to Copic colouring that cute little owl. The colours I use are: C0, C1, C2, C5,YR04, Y08, B18 & BG02. Once he is all coloured up I will fussy cut him out. (If you don’t like to fussy cut you can get the coordinating dies!) I am getting better at my Copic colouring! Practice, Practice, Practice! I am pretty happy with how he turned out!

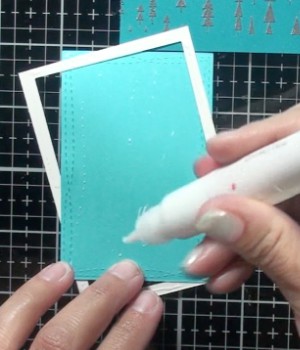
Now it is time to assemble all the pieces. I start by using liquid adhesive to glue together the wonky stitched rectangle and the silver frame.

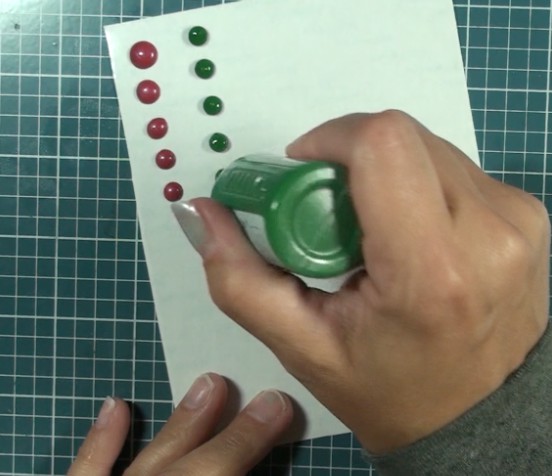
I then glued these pieces onto the tree card panel that I had found in my stash. I then adhere the owl onto the blue cardstock and add some snowflake sticker embellishments and adhered with my glossy accents. I also add two clear Sparkletz droplets.

I will let the embellishments dry for a bit and then come back and adhere that panel to my A2 card base with a tape runner.

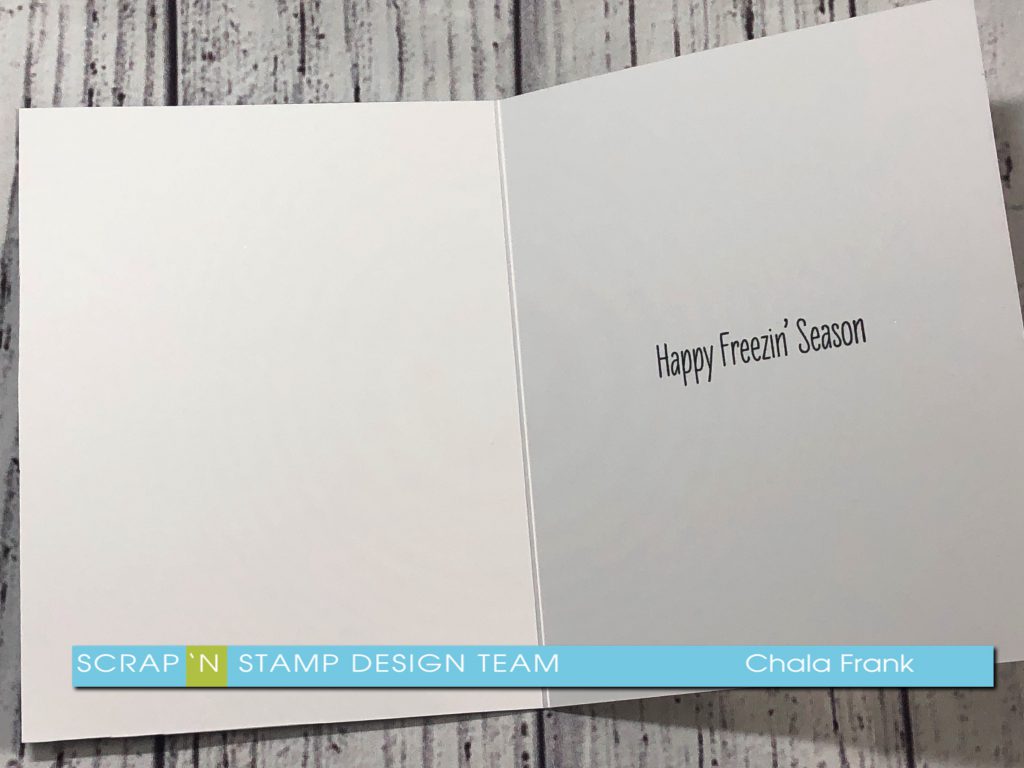
I decided that I would keep the front as is and put my sentiment on the inside. I couldn’t resist using the “Happy Freezin’ Season” sentiment that comes with the stamp set. I pulled out my Stamp Perfect and my favourite sentiment ink VersaClaire Black Nocturne ink. I first stamp the sentiment down onto some clear packaging just to make sure that it is straight and looks good. The last thing you want to do is spend all that time on your card only to stamp your sentiment crooked!! 😫 Trust me, I have done it! The last thing I do is add some Clear Wink of Stella to the owl’s scarf and my Winter Freezin’ Season card is complete!

Share a photo of your card on the Scrap’N Stamp Facebook Challenge Page wall and get your name entered to win a $50 gift certificate to Scrap’n Stamp! You’ve got until July 31st to post. Make sure to hashtag it for another chance to win #SNSChristmasinJuly. Winner chosen by random draw. One entry per day.

I hope you enjoyed today’s card! Remember to head on over to check out my YouTube Video and hit the subscribe button and notification bell to catch all my crafty creations! Leave me a comment to let me know how you like my fun themed intro for this video!

https://youtu.be/TJXO6vY64HU


Happy Crafting!

~Chala, xoxox

Additional materials used:

Warm & Feathered Hugs – Freezin’ Season Read More »

Deck the Halls Turnabout from Concord & 9th

It’s Chala and I am back with another turnabout stamp from Concord & 9th. I thought I would even embrace the “Christmas in July Challenge” as well from the Scrap’N Stamp Challenge page! Make sure you head over there to check out what others have created as well as share your cards (one entry per day until July 31) for your chance to win a $50 Scrap’N Stamp Gift Card!

I am using the Deck the Halls turnabout stamp. This stamp is gorgeous! The details and images are perfect to mass create cards for the holidays and that is exactly what I am going to do today!

Using the jig I created for the July turnabout blog hop and my Tim Holtz Stamp Platform I start off by using Versamark Watermark ink and stamp it onto 6″ x 6″ red cardstock and heat emboss with gold embossing powder. Gold and sliver embossing powders are one of my recommended must haves craft items! So, if you don’t have some….get some! I treat the cardstock with an antistatic powder bag, stamp and heat emboss with my heat tool each time and then turn my jig. I will continue this process for the full 4 turns. I will also do the same process with Silver Tinsel embossing powder. To see the stamping, please watch the YouTube video. Here is the final result of the stamping.

I set these two pieces aside and grab some distress ink cubes. I want to create some stamping with different colours to show you the full capabilities of this stamp and to create some non-traditional Christmas Cards! The colours I use are Victorian Velvet, Seedless Preserves, Peacock Feathers, and Salty Ocean. I ink up the entire stamp with the first ink, stamp it down and turn. Remember to clean your stamp off well each time. I will then pick the next colour, ink up the stamp, stamp it down and turn. Repeating this process two more times. Again, remember to clean your stamp off in between each colour. I will do the same process again, this time using Festive Berries, Forest Moss, Candied Apple and Peeled Paint. Here are the amazing results.

Now I can begin to create cards out of the fabulous backgrounds. I will start with the last background I created. I use my stitched rectangle dies along with my stitched circle dies taping them down with some purple tape and running those through my Gemini Jr.

I can now create two cards from these pieces. I start with the rectangle piece and attach it to some green cardstock. I will then pull out my Big Joy Sugar Script die and cut the outline from vellum and the “joy” from red cardstock. I will apply a few dabs of Tombow Mono glue to the back of the “joy” sentiment and let it dry a bit. This glue dries reposition-able and I can then attach it to a scrap length of card stock to create a handle so I don’t burn my fingers when I heat emboss. Check out my video for this technique! I will then apply Versamark ink onto and add clear embossing powder. I will do this process twice giving it a nice shiny look! I set that aside to completely cool. I will adhere the Vellum and the “joy” sentiment down in the open circle portion of the card. I also use some left over liner paper from my large score tape roll and with my Nuvo crystal drops in Autumn Red and Woodland Green I create my own embellishments that look like enamel dots. I will set those aside for several hours (Ideally, 24 hours) to set.

While those dry, I will move onto the next card, using the circle portion that we die cut, I attach some ribbon I had on hand running vertically down the left side of an A2 size panel and will secure it with Be-Creative Scor-tape and then adhere the die cut circle on top. I die cut two “Merry Christmas” sentiments, embossed one with gold glitter embossing powder and stack them together with liquid adhesive. I realize that it didn’t fit how I originally had planned so, I turned the panel horizontally and adhered the sentiment underneath, I will add some of those embellishments that we created with Nuvo drops later. Years ago my mom created some amazing poinsettia embellishments. They are actually made out of a piece of bread and glue, then she painted them. I am hoping to show this technique on my personal blog closer to Christmas…so stay tuned!! I thought these poinsettias would work perfect for these two cards. Here are the two finished cards. I still need to finish creating cards with the first one I stamped…but, I ran out of time and steam! lol!

Now, this is a pretty lengthy post and I have several cards that I created out of these panels….so, I am going to jump ahead and show you the other finished cards. However, if you want to see the process, go ahead and click on the YouTube video to check that out! For the next two card I used my Silhouette machine to die cut the sentiments as I didn’t have any on hand that would fit. I added some sequins to embellish the blue card and kept the red one simple by trimming the 6″x6″ panel into strips so that I can create even more cards!

The next cards were created last year…but I wanted to share them with you again as they are more non-traditional in nature and to show you that with this stamp set it is really fast and easy to create sets of cards!

I hope that this post has inspired you to find your Christmas in July spirit and to get your own Turnabout stamp set! Remember Concord & 9th is our featured brand of the month! Take advantage of coupon code CCD15 to save 15% off Concord & 9th turnabout stamps as well as their new products at the Scrap’N Stamp Store! NOTE: This coupon code is only good for the month of July!

Enjoy the rest of your week!

https://youtu.be/5HC2up9zybs

~Chala, xoxoxo

Deck the Halls Turnabout from Concord & 9th Read More »

Christmas in July BLOG HOP!

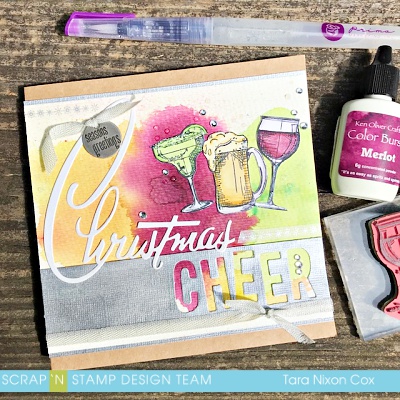
Welcome to our CHRISTMAS IN JULY BLOG HOP!  We are so glad you’re joining us here today and can’t wait to share the creative fun the team has been having… for the first time, our blog hop does not include a product challenge.  Instead, each member will be sharing a Christmas project using whatever products they choose from the SNS online store!

Flash Sale : Effective today, when you spend $100, you will receive $25 off your order!! Incredible savings! Use code CJ25 at checkout. Promotion ends July 25th!!

This should be a lot of fun, so let’s get started!  If you get lost hopping along the way- please check back here for the full list of links in todays blog hop!

Here’s the list:  starting HERE with me!

Be sure to leave comments along the way… each of us will be giving away a Christmas Embellishment Package!  7 winners total will be announced next Saturday!

And now for my card… I almost hate that it’s first, because I’m pretty sure it’s completely unlike the rest you will see on this hop!  I went very non-traditional, using mostly Tim Holtz products…

I also used products from one of my other fave artistic guys, Ken Oliver.  I decided to use Color Burst to color my beverages as well as creating a coordinating background.  I primarily used the Earth Tones set, and selected this combo of drinks because together they are sorta Christmassy colors PLUS they happen to be fave bevies of choice in our house 😉  Since I didn’t have the Caribbean Brights Set (it’s next on my wish list!) for the lime greens, I mixed together the dark green & Lemon yellow and it turned into a pretty great margarita green!

Each of my glasses had additional shading added with watercolor pencils and some Zig Wink of Luna pen added as well to finish them off.  The large Christmas word is by Tim Holtz and the CHEER was created using the 1″ alpha.  I am super excited to see more of these alphas coming up as new products this fall- I love creating my own sentiments with these!  I also love that you can use both the cut out and the negative space they leave.  I lined mine up a bit un-even to tie in with the theme here 😉

I finished it all off with some ribbon & a word charm as well as a tiny bit of snowflake washi tape… and of course some bling to make it all a bit more festive!

Hope you enjoyed a peek at my first non-traditional Christmas card of the year… I kinda have a thing for creating these.  I love using non-seasonal stuff to make my holiday cards!

Don’t forget to leave comments along the different stops on today’s hop!   Have FUN!  The link to your next stop will be added to the bottom of this post so you don’t have to scroll back up unless you want to!


Inky hugs,

Tara


Materials Used:

Tim Holtz mini blueprints strip BEER

Tim Holtz mini blueprints strip WINE

Tim Holtz mini blueprints strip COCKTAILS

Tim Holtz mini blueprints DRINKS set

Tim Holtz 1″ alphanumeric die set 

Tim Holtz Retro Merry Christmas dies

Color Burst Earthtones & Brights

Zig Wink of Luna Pen


Next STOP on the Christmas in July HOP: Laurie Case


Christmas in July BLOG HOP! Read More »

Free Shipping Anywhere In Canada