Scratch-N-Stamp
Search

Checkout

Keep up with Sales, New Products and other events at Scrap `n Stamp. Sign up for our newsletter now!

What's New

Hot Deals


clean and simple

Clean and Simple With Birch Press

Happy Wednesday Everyone! I am here today, playing with a die set from Birch Press, showing that you can keep these very busy and intricate designs clean and simple. As an added bonus, if you visit my personal blog on Friday June 28th) you’ll see another card using the leftovers from the card I’m sharing here today.

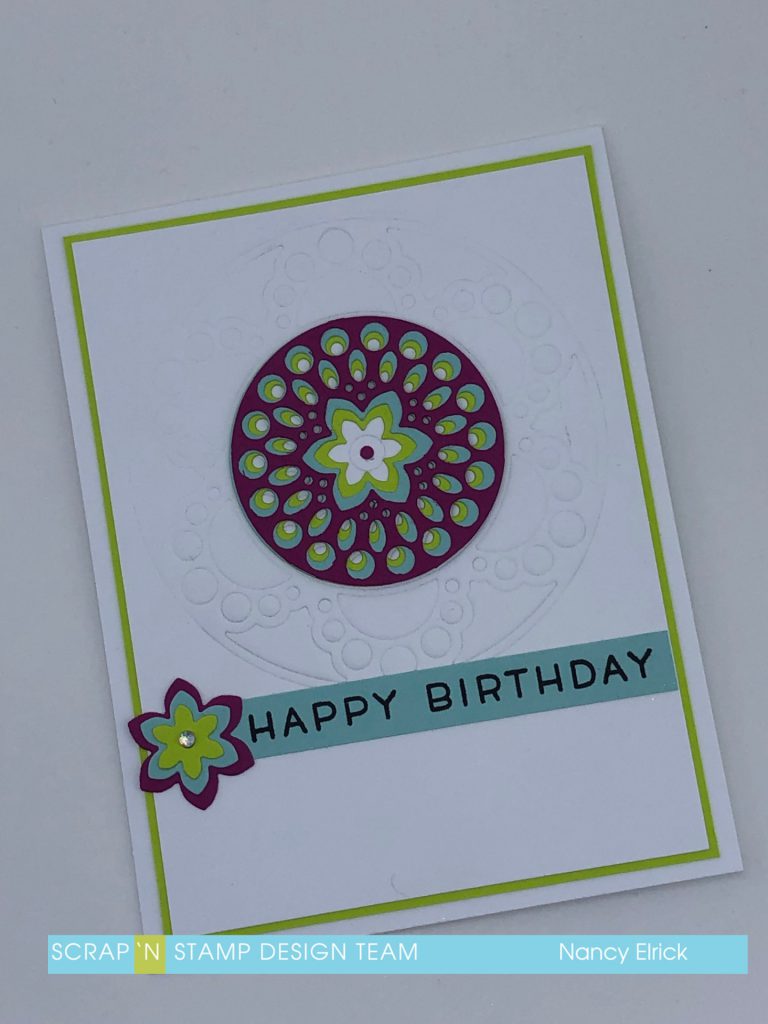
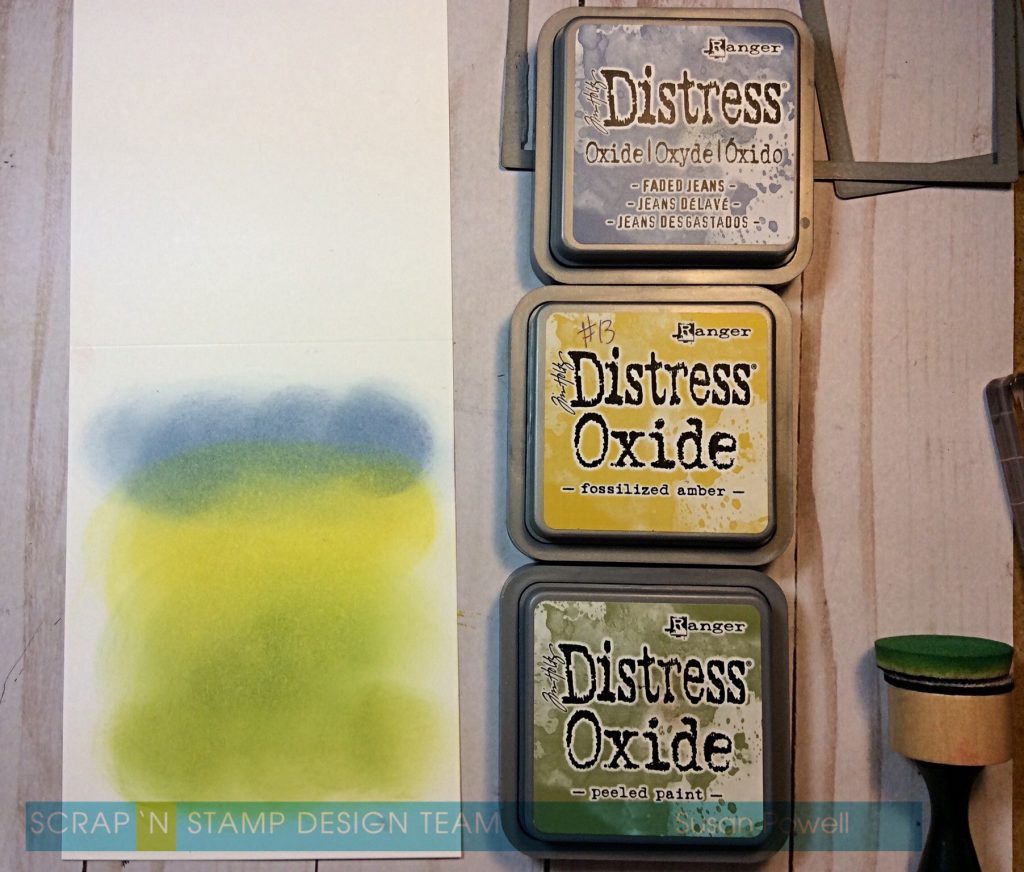
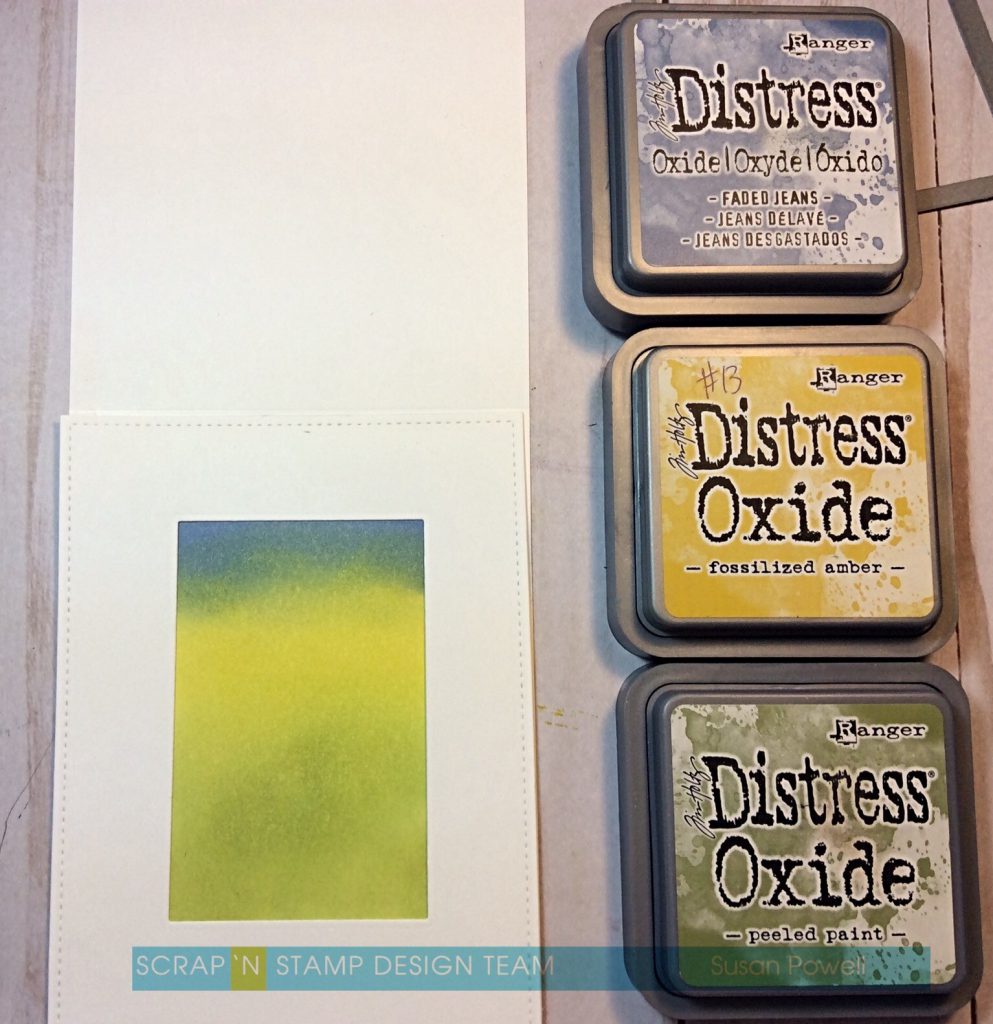
I had some fun trying some different colours to put together for this card… I wanted something bright and fun so I used a deep purple/pink colour, a light blue and a lime green along with black and white.

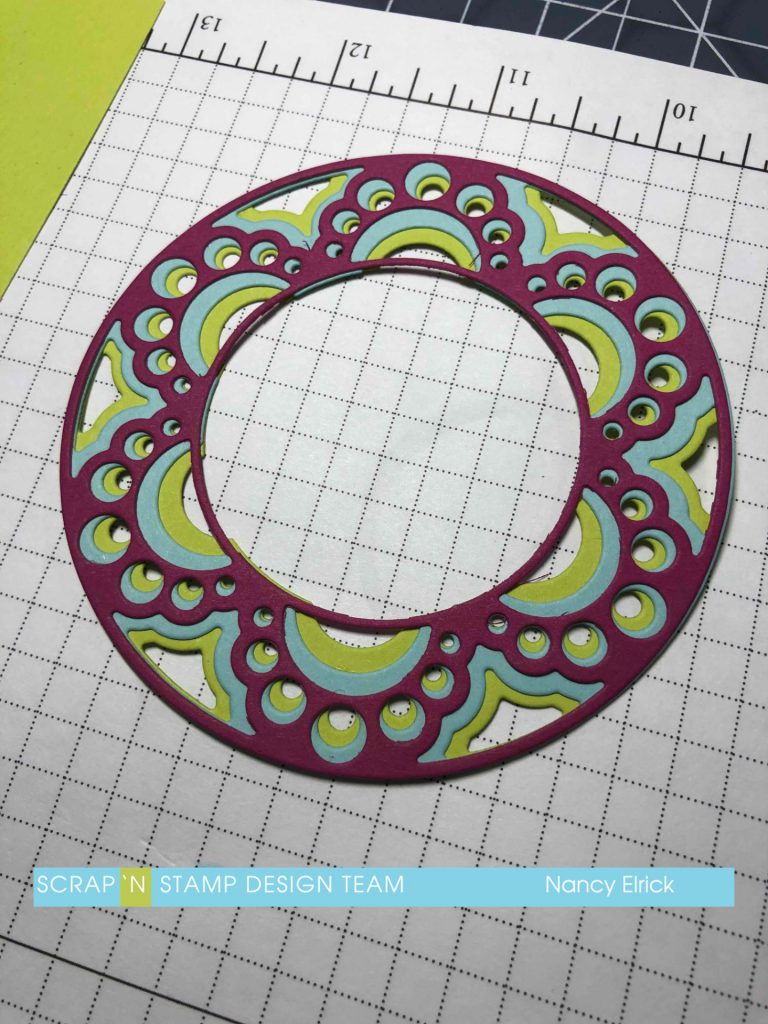
While the Birch Press layering dies seem expensive, you have to remember that there are three dies in each set… and in many cases, the centres are cut free from the outside ring of the design and you can interchange them with other sets. I didn’t do that with this card… I used the entire Bali die, but I only used the cut out portion of the centre ring. I cut each layer out of a different colour of cardstock. I put all of the layers together using liquid glue to allow for a little time to play with the layers before they stuck together completely to ensure I could get the layers as close to perfect as possible.

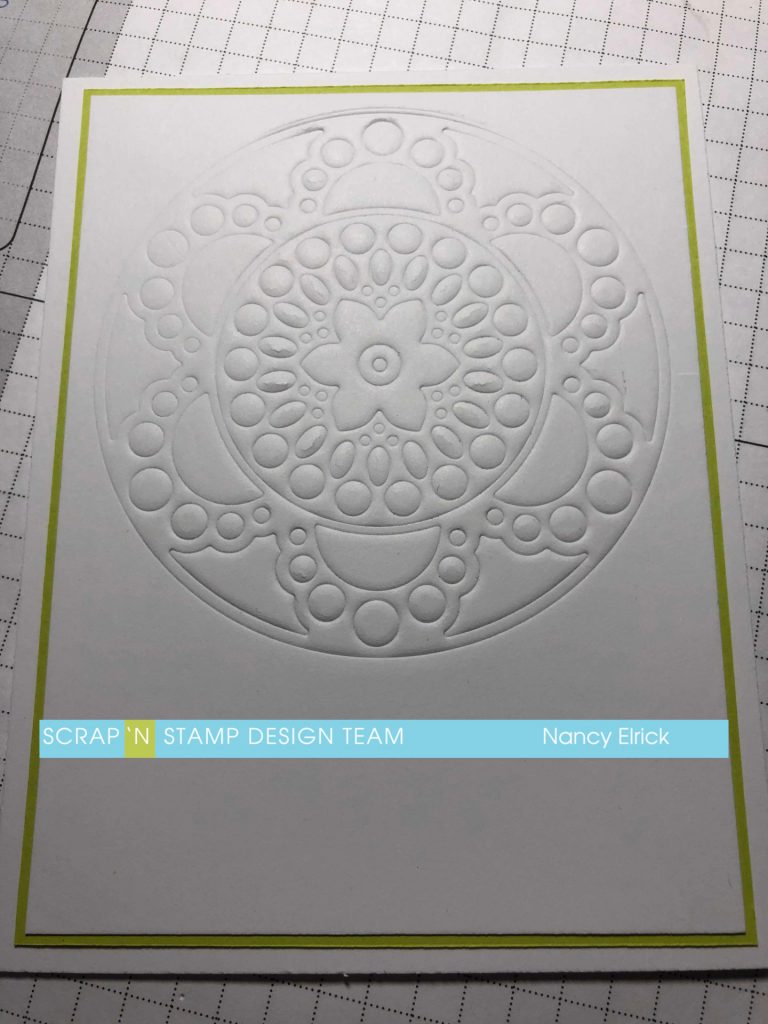
I set aside the colourful ring and grabbed the Bali A die and put it through my die cutting machine with the embossing mat. This embossed the image in to my white panel instead of cutting it out. I then layered a piece of the bright green cardstock behind my white layer leaving a 1/16″ border on all sides and then layered it all on to a top fold white card. I then added the colourful ring to the centre of the design, lining it up as best as I could. I added a small dot of cardstock in to the centre of the design for a little more interest.

To finish off the card, I stamped the Happy Birthday sentiment from Lawn Fawn Simply Sentiments in black VersaFine Claire ink on the blue coloured cardstock and cut it in to a strip. I put it on the front of the card, added flower centres from the Bali die layered together and topped it off with an iridescent gem.

This is a little sneak peek of the card that will be on my blog on Friday… I’ll hope you will pop by to see what I did with it….

Clean and Simple With Birch Press Read More »

Thank Ewe!

Hi Everyone. It’s Susan with some Thank Ewe cards to share with you.

Some days you have cards you have to make but you’re not feeling well so what do you do? When that happens to me which it did this past week, I make simple cards. And while you’ve got your supplies out why not make a few? I made 5 and it probably took me all of 30 minutes to make them. I think they’re really cute and when you’ve got a great stamp set like the one I used – Tim Holtz Funny Farm set – you can’t help but make cute cards.

The trick to clean and simple cards is to do the following:
1) use minimal supplies
2) have a lot of ‘white’ space – or one color
3) have a main focus
and of course…
4) keep it simple
I added a bit of texture to the card above on the left with some embossing paste – it looks like sheep wool – or at least it’s supposed to haha
The card on the right has the simplest of simple coloring with my prismacolor pencils.
The card in the middle has zero coloring but uses the inside piece of the chunky blue frame from the card in the first pic popped up with some craft foam and the sentiment is also popped up with some craft foam.

To make the big chunky frames I used the largest and the second largest dies from the Large Stitched Rectangle Stackables from Lawn Fawn. The pic below shows how I positioned them. I ran them through my die-cutting machine and…

…you get two pieces you can use. The big chunky frame and the smaller piece that I used as well.

To add some color I used Faded Jeans, Fossilized Amber and Peeled Paint Distress Oxide inks. I used a blending tool to add the ink. It looks like a mess in the pic above but when you add the chunky frame it cleans it all up. Check out the pic below.

And now I have 5 thank ewe cards I can send out.

Happy Stamping

and thanks so much for visiting!

Shopping list

Below is a link to all the goodies I used, just click on the picture to be taken to where you can purchase the product. I use affiliate links when possible which means I earn a small commission at no additional cost to you.Thank you for your support.


Thank Ewe! Read More »

Orange You So Awesome Encouragement Card

Orange You So Awesome Encouragement Card

Hello Everyone. Thank you for stopping by. Todays  project is an encouragement card;  Orange You Awesome .

Concord & 9th’s stamps and die are unique. They steer away from cutesy , or  child like characters and  focus on different innovative designs.  They have won numerous  awards for their  designs.

I used   Orange You Sweet Stamp Set and Orange You  Sweet Dies to construct this delightful card.

Ink to Paper:

Memories Black Dye Ink Pad was used to  stamp all of the images.  Orange rims first  and   then pulp section  stamps  inside  the rim. Both sizes were stamped  and  multiples of each  on  white card stock. Black and orange card stock sheets  from Bazzill Premium Paper  (100 sheet)  Pack  were trimmed  a smidgeon larger than the two piece  Awesome die ( from my stash).  A few oranges in both sizes were  cut with Orange You Sweet Dies. A press of the button and the images were cut  with  Crafters Companion Gemini Die Cutting Machine.

Sentiment Strip:

“Orange You So”  was stamped with Memories Black Dye Ink Pad on the edge of white card stock and trimmed to a .25 ” x 5.5 ” strip. MFT’s Black & White Stripes 6×6 Pad  and Silky Sky  Tonic Mirror Card were also cut into .25 x 5.5 ” strips. The white sentiment strip was shortened to 2.5 “.

 Be Creative 3mm tape  was applied to the reverse side of “Orange You So”  strip and then attached  on top of  Silky Sky Tonic Mirror Card ( this was trimmed to 3″).  The die cut word “Awesome” had  Nuvo Deluxe Adhesive applied sparingly to the back and placed precisely over the black  word shadow die cut. Once dry this was applied   between the layered sentiment and the edge of  last remaining full size strip. (MFT’s  Black & White Stripe strip).

Card Assembly:

Three orange die cuts were formed  into a triangle on the left hand side of a  landscape card front  panel . Once I was happy with the placement they were adhered directly to the panel. “Orange You So Awesome” sentiment strip was applied centre horizontally to the front panel with 3 D Foam Squares  ( low profile).

The front panel was secured to a side fold landscape card with Nuvo Deluxe Adhesive. An inside card panel was trimmed to 4.15 x 5.5″.   MFT’s Black & White Stripes 6×6 Pad    piece of  stripped paper  was trimmed to .25 x 5.5 ” and adhered to the bottom edge of the inside panel. ” I Could Just Squeeze You ” was inked with Memories Black Dye Ink Pad and stamped a tad higher than centre. The inside card panel was attached to the inside card base with liquid adhesive.

Sequins to match Silky Sky  Tonic Mirror  was attached above and below “Awesome” and a small sequin attached above the “e” to form a triangle.

Orange You So Awesome Encouragement card is now complete. Until next time. xo Karen

Orange You So Awesome Encouragement Card Read More »

Free Shipping Anywhere In Canada