Scratch-N-Stamp
Search

Checkout

Keep up with Sales, New Products and other events at Scrap `n Stamp. Sign up for our newsletter now!

What's New

Hot Deals


Crafting Through the Chaos of Life

Paper Bag Scrap Journal

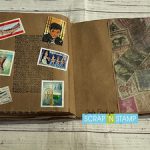
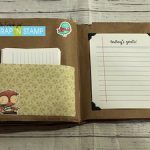
Hey friends!  Chala here and I am back to share a fun idea to use up your scraps!  Today we will create a Scrap Paper Bag Journal.  All you will need is glue, scraps, ephemera and a paper bag.

I don’t know about you guys but I save all my paper bags…..and now I have a fun way to use them up.  I get mine from Sobey’s which are perfect because they are all brown with little to no writing on them.

The set up of this journal is a bit confusing to describe, so I will just include the video below for you to watch.

https://youtu.be/me4y452DkuQ


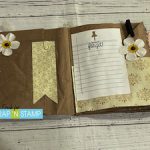
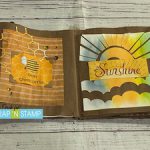
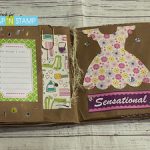
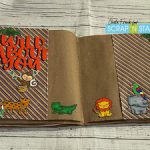
I hope you liked this video and it inspired you to use your scraps and unused craft supplies in a different way!  Here is a look at each of my page layouts:

Wishing you a crafty day!

~Chala

Featured Stamp Sets:

My Favorite Things:  Friends at First Sip, Warm and Feathered Hugs

Lawn Fawn:  Wild for You, Critters in the Jungle

Hello Bluebird:  Wild about You Die

Postage Stamps

Stencils

Paper Bag Scrap Journal Read More »

No Cha-Ching Bling Christmas Cards

Hey guys, I am back to share two “No Cha-Ching Bling” Christmas cards with you.

What is that you ask? Well, I wanted to share a card that had bling without you having to spend any money or break the bank if you need to . Most of the supplies I am sharing you likely already have in your stash!
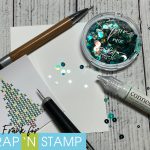
For my first card I KNOW that we all have sequins in our supplies. We have all taken that fateful trip to the dollar store and purchased sequins because we knew they would make great embellishments and you bought every colour and now they are sitting there all lonely wondering when it will be there turn to be used on a card! Here is your chance to use them. Oh – I should probably let you know that the inspiration for my cards today was brought on by two other crafts – cross-stitch and diamond painting. So if you don’t like either…..well, I hope this changes your mind! Let’s start with the first card!

Pull out your sequins, find yourself a fun cross-stitch pattern for inspiration, or free-hand a design you like. My inspiration today is a Christmas Tree cross-stitch pattern I found on Pinterest. I printed the picture out and will actually use it as reference for both my cards today.

I closed my eyes stuck my hand in my sequin drawer (yes, I have an entire drawer for sequins – don’t judge me) and pulled out the Spiked Ocean Water Sequins from Picket Fence Studios.

The next step is very difficult….find your favourite clear drying glue. I say it is difficult because I actually have a few….Glossy Accents and Gina K Connect Glue are my favourite. Gina K won this time as she was the closest at hand.
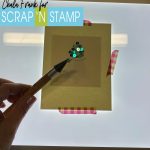
I then just added glue in the shape of the tree and began adhering the sequins keeping in mind which colours and sizes I was laying down to help it look pleasing to the eye. This is made a lot easier by using reverse tweezers, a Jewel Picker and the Tim Holtz Craft Pick. You could be even more particular and follow the cross-stitch patter and match up the colours with the sequins, but because of the ones I picked I didn’t have a large variation in colours…so mine is more monochromatic. Once I was done adhering them down I set that aside to dry very well.

When I was sure everything was dry, I used my Fiskars sure cut paper trimmer and trimmed down the image and backed it onto some coordinating cardstock and adhered to my card leaving enough room to stamp a sentiment underneath with Versafine Claire Nocturne Ink

For the sentiment you can really use any one you like that you think works well with the style of card. I am sure we all have a ton of Christmas sentiments that we can choose from! And that finishes card number one! Pretty quick and simple except for the glue part – LET IT DRY!!!
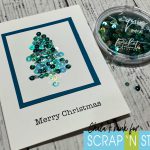
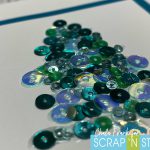
Card two!! This one is more of a diamond dot painting type card…so, it took a bit more patience but was worth it! If you are a girl from the 80s/90s I know you have some hot fix crystals somewhere! lol! Or you can even use jewel embellishments.
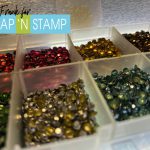
I had some hot fix crystals that I pulled out and used my hot tool to adhere them to the cardstock. This time I followed the cross-stitch pattern a little more carefully…but not 100% Again, if you are using embellishment jewels you can just adhere them with your favourite clear drying glue.
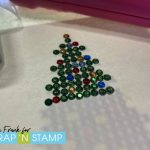
I used a two of the Small Stitched Square Stackable dies from Lawn Fawn and used the smaller of the two to die cut the hot fix crystal tree. I ran it through my Gemini Jr. and was pleasantly surprised to see that all the crystals remained in tact. I adhered that onto the large stitched square that I die cut from some red cardstock and again adhered to a card base and stamped a simple sentiment with the Versafine Claire Nocturne Ink.
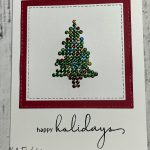
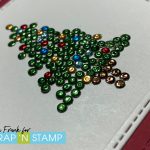
I hope that you enjoyed today’s simple yet beautiful bling cards! Leave me a comment to let me know which card you liked the best the Sequin card or the Crystal Card.

Remember to play along with the Scrap’N Stamp Random Acts of Cardness Facebook Challenge for your chance to win some great prizes!!

Enjoy the rest of your weekend!

Chala xoxo

Images not showing?  Head over to my blog by clicking HERE to check them out!
No Cha-Ching Bling Christmas Cards Read More »

Harvest of Blessings

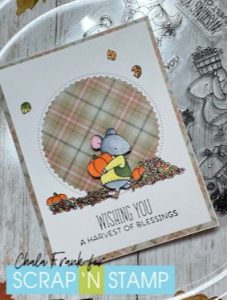
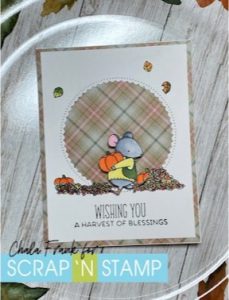
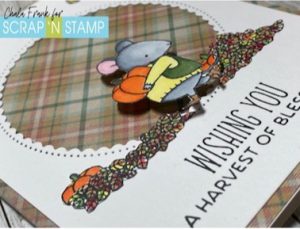
Happy Saturday Crafters!  Chala here today and I am happy to share a super easy and fun card to send you all a Harvest of Blessings!

I suffer from “new release desire”.  I want all the new products!  So while I was sitting there deciding what I wanted to do for today’s card I looked around my craft room at ALL the supplies I have and am really so thankful to have a bountiful collection!  I realized there are so many stamps that I have not used in a while or I have not used yet at all!  This is a perfect time to revisit and appreciate what I already have!

I pulled out an older My Favorite Things stamp set called Harvest Mouse.  I remember seeing this set for the first time and I fell in love with the sweet images.  But it was one sentiment in particular that made me want to purchase this set.  It was the sentiment “Bushel and a Peck”. My Grandma always used to say “I love you a bushel and a peck and a hug around the neck”.  This brought back so many warm and fuzzy feelings.  She has only been gone now for about 4 years….and lived to an amazing age of 108!  I am so blessed that she lived so long and got to see all my kids be born!  But…I digress!  I am not using that particular sentiment today, but the “Wishing you a Harvest of Blessings” as it ties in nicely with our Facebook Challenge word for today – Harvest!

Growing up in Saskatchewan harvest time was busy!  Farmers spending hours upon hours i the fields trying to get crops off.  Women in the gardens bringing in the fruits/vegetables of their long summer labour.  Now that I live in a big city I fear I have lost the appreciation from where our food comes from…until this year when my husband decided to take over the task of the garden.  It was a job his dad enjoyed and since he passed we wanted to ensure the garden was still a place full of growth and his memories.  My husband started the seeds in our bonus room front window (yay…) and then transplanted the little plants into the garden once they had grown enough and he was sure frost wouldn’t kill his little babies that he nurtured for 3 months…in my bonus room.   Now, we anxiously await when he will let us harvest the two little pumpkins that he managed to grow!  lol!  So, when I saw the little mouse with the pumpkin it reminded me of my sweet husband’s efforts.

I stamped the little mouse, leaves and pumpkins in Memento Tuxedo Black ink and did some quick Copic colouring.  I then fussy cut out the little images with my EK Success Cutter Bee Scissors.

I scavenged my Die collection and found and inside out scalloped die that I thought would work well to create a focal point for my card.  I also pulled out a beautiful plaid pattern paper and thought that would look great behind the die cut circle as a background.

I used my favourite Fiskars Sure Cut Trimmer to trim the circle scalloped panel to 4″ x 5 1/4″ layered it onto of the patterned paper trimmed down to standard A2 size panel.

I adhered all the little images (except the mouse) down with Gina K Connect glue.  For the mouse I wanted him to stand out a bit and used some Foam Squares which gave him the perfect amount of dimension.

The sentiment was stamped with….can you guess?….my favourite ink for sentiments Versafine Clair Nocturne Ink.  To ensure I got my sentiment straight and stamped legibly I used my Hampton Arts Stamp Perfect.

All that was left to do was to adhere the panel onto an A2 side folding card with an adhesive tape runner.

I really love how simple but cute this card came out!  I challenge you to look at your craft supplies and be thankful for every item you have.  Pull out some old forgotten sets to remember why you wanted them in the first place and then USE THEM!  lol!

Thank you so very much for spending this time with me today.

I wish you and yours a very happy and blessed Thanksgiving weekend!

~Chala

Harvest of Blessings Read More »

Free Shipping Anywhere In Canada