Scratch-N-Stamp
Search

Checkout

Keep up with Sales, New Products and other events at Scrap `n Stamp. Sign up for our newsletter now!

What's New

Hot Deals


dylusions

Laugh ‘Til You Leak!

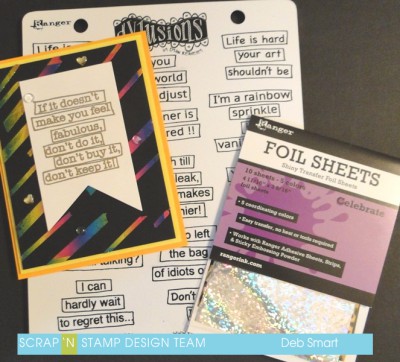
Hi friends! It’s Deb here today, from the Design Team. I thought I’d continue on with our Scrap ‘N Stamp ‘Snarky New Year’ blog hop theme with today’s card! If you missed the Hop, be sure to check it out! Enjoy the snarky humour – it’s all in good fun, of course! You can start at my post HERE. Today’s card is made with the same sentiment stamp set, called Laugh ‘Til You Leak by Dyan Reavely. The sentiments in this set just cracks me up!

LAUGH ‘TIL YOU LEAK

I had lots of fun creating today’s card. Fun, bright colours, stencils & more were all put to use.

Laugh 'Til You Leak!

You’d definitely have to choose carefully who you send this card to – it’s a special sense of humour  that would appreciate it!

CARD DETAILS

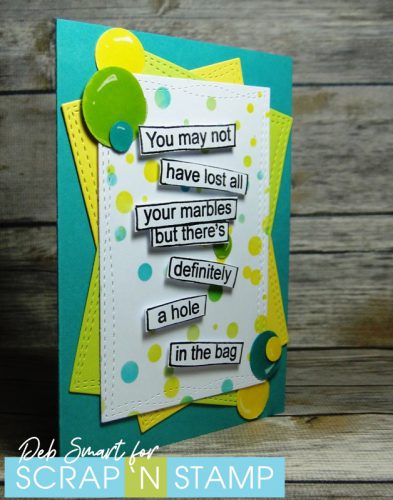
To start, make your ‘extra marbles’, so that they have time to dry. Use small circle dies or punches to create ‘marbles’ in your colour scheme. Create the shine accent with a white gel pen. Next, use Nuvo Crystal Glaze and apply it over the entire circle. Set them aside to dry.

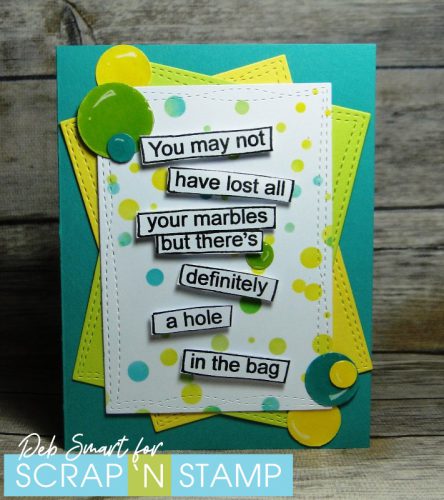
Now, on a piece of white cardstock, use the MFT Confetti Stencil set and apply 3 different colours of ink. My choice of colours is Peacock Feathers, Mustard Seed and Shabby Shutters Distress ink. Use one stencil for the top, and the 2nd stencil for the bottom, to cover the entire panel.  These fun coloured dots are your ‘marbles’!  Next, use the MFT Wonky Stitched Rectangles dies to die cut the stenciled panel, plus 2 more in the same or similar colours to the ink. Create a card base from the 3rd colour.

Use glue or tape to layer the die cut rectangles to the card base, offsetting them on angles. Stamp the sentiment from the Laugh ‘Til You Leak set in Nocturne ink onto white cardstock. Cover with clear embossing powder, and heat set. Next, cut the sentiment apart, and attach the strips to the card front, with fun foam or foam tape.  Once your die cut/punched ‘marbles’ are dry, attach them to the card front – watch out, they’re escaping through the ‘hole’!

Laugh 'Til You Leak!

INSIDE SENTIMENT

Now, with a sentiment like this on the front, you may want to soften the statement with one inside!

Laugh 'Til You Leak!

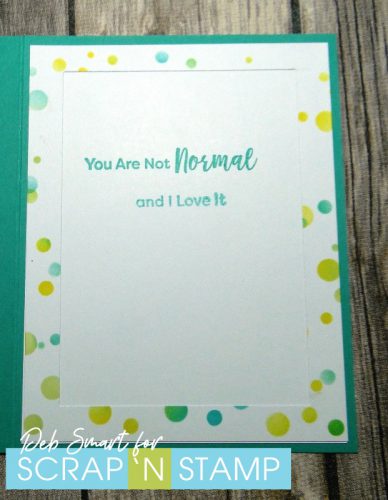
After die cutting the stenciled panel, I used the leftover frame and attached it to a white panel, on the inside of the card. The sentiment is from the MFT Sassy Pants Best Friends stamp set. No one could be mad at this, right?!

I hope that you’ve enjoyed my card today, and seen how snarky doesn’t have to be mean! It’s all about keeping it in good fun, and knowing your recipient. *wink* The products I’ve used for my card are all in the Scrap ‘N Stamp online store – links are below. Have a fun day! Remember you can join in the snarky fun on the Scrap ‘N Stamp Facebook Challenge page HERE. Create your own snarky card, and add it to the page! One lucky winner will be drawn at the end of the month!

Laugh 'Til You Leak!

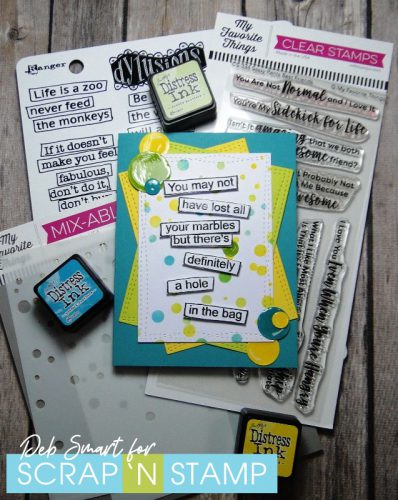
Affiliate links for products used are supplied below, at no cost to you. Using my affiliate links, you help support me in purchasing new products, so that I can continue sharing new projects with you!


Laugh ‘Til You Leak! Read More »

Rainbow Bliss Art Journal

Hello and Happy Monday. I hope you all had a lovely weekend, filled with lots of crafty fun.

I am back on the blog with an art journaling layout. I have to admit it’s not exactly my favorite, there are parts I love and well, parts I wish I could redo. But I thought I would keep real with you all and share it anyway.

For this project I cracked open a new journal. I decided I would try out the black 8×8 Dylusions journal. I just wanted to do something a little different

I started out by covering both pages with a light layer of white gesso to prime the pages. As you can see there was more than just the white gesso on the page, you can see the streaks of gold (Glint- Dina Wakley paint). Before I started the actual layout, I used the page as a place to apply my excess paint from another project onto.

I really had no plan for this, it just kind of came together (sort of) lol. I pulled out all my paint and let loose. I really felt like doing a rainbow, so that is what I did. I just went to town applying the paint with my fingers, rubbing it into the page, trying to blend the colours together ever so slightly without losing each of them.

In between the layers of color, I would go in with a damp baby wipe and a Dylusions stencil to try and add a little texture, and slightly blend the colors together.

As you can see I did not get a great blend on the colours but I really like how vibrant everything stayed. If I could go back and rework this I totally would but I had to do this in stages in between caring for my twins, so needless to say things dried before I could get back to it. I decided to continue on and see what would come of the design.

I pulled out a few stencils from my stash, which I have linked to below, and my Tim Holtz blending tool with a clean sponge and got right in there. The first stencil I used was the Spring Medallion from TCW and some white gesso and added this to the corners, top, and bottom of the page. Really just wherever I thought it would look good.


Once I was happy with the first set of stenciling, I rummaged through my stash to pull out things I thought would look good together. I stenciled in some stars and some texture, going in with white gesso, black paint and then the glint paint. Now that I had the stenciling where I wanted it, I watered down some of those same colours and splattered them onto the page. For the white I pulled out my Sharpie paint pen.

I set that aside to dry and then hummed and hawed over what I was going to do next. Rummaging through all my stash, staring at things for a long time, flipping through the collage collective several times, even going as far as ripping something out. I really was in a bit of a funk and was not sure how I was going to complete this page at all.

I pulled out some old vellum sentiments I had from my scrapbooking days, as well as some Jane Davenport napkins and decided to collage those onto the background. From there I felt something was still missing so I stamped out some of the hearts from the Collafewd hearts stamp set from Dina Wakley Media. I stamped them onto some collage paper using Archival Black ink and collaged them onto the page as well. I realized quickly that I did not add enough of the gel medium to the back of the collage paper and because of that, you can still see some of the tissue paper. To finish it off I added some sentiment or rather phrases sticker from a Tim Holtz collection.

In the end, I did use the collage collective, I just didn’t use what I had set my sights on at first. I trimmed out this girl and added her to the bottom corner of the second page. Once more adding the same collaged hearts just to tie it in together and adding a little sentiment, which I notice is not straight at all, so yeah not happy about that. Lol

I really hope you got some inspiration and enjoyed the crazy little journey I took you on. Its been a little nutty as of late and the page perfectly expresses my state right now, ie a little all over the place.

Have a Beautiful week ahead

~Nancy


Rainbow Bliss Art Journal Read More »

Try Adding Foiling Fun Without Extra Tools!

TRY ADDING FOILING FUN WITHOUT EXTRA TOOLS!

Hello crafting friend! It’s Deb here today, with something new for you to try. Have you been wanting to add foiling to your projects, but you’re not sure about committing to a foiling tool? Well, I  have a great way for you to try adding foiling fun without extra tools! I ordered some of the fun Ranger Shiny Transfer Foil sheets from the Scrap ‘N Stamp online store. All  you need to use them is your cardstock base, some adhesives and a bit of elbow grease.

APPLYING THE FOIL – TAPE METHOD

When I say that these Shiny Transfer Foil Sheets are easy to use, I’m not kidding! First, cut your panel of cardstock. Any colour you want to work with! I started with a white panel, but in the end changed to black. Next, add your adhesive. I used two different widths of Be Creative (Sookwang) Tape; the 1/8″ and 1/4″. I lay them in alternating strips across the panel. Remove the backing from the adhesive strips one at a time, and lay the foil over top of the tape. Rub firmly with your fingers, or use your bone folder, to press the foil onto the tape. Gently peel the foil sheet off of the adhesive; pull slowly in one direction. As you’re pulling off the foil sheet, look at your panel to make sure that the foil has transferred. If you notice that it hasn’t, simply lay the foil back down on top of the tap, and rub more firmly.  If you accidentally lift off the tape and find that an area is without foil, simply lay the foil back down on the tape, and repeat the process – u

sing a piece of the foil that hasn’t already been transferred. The photo below shows how the foil looks once transferred onto the cardstock, and the blank space left on the foil sheet, where the colour once was! I chose the ‘Celebrate’ package of foils to use, as it has a variety of patterned colours.

Try Adding Foiling Fun Without Extra Tools!

CREATE YOUR CARD

When I finished the foiling on the white panel, I like it, but it wasn’t quite the ‘wow’ that I had in mind. So, I repeated the whole process, this time on a black cardstock panel! Don’t worry – I saved the white one to use in another project.  Since this was my 2nd panel, I thought I’d try & be more quick about it – and I lay the entire foil sheet (you get 2 of each colour/pattern per package) onto the taped panel. Well, it did work out, but I can’t say it was much quicker! Because I had my tape beginning and ending in different directions, I had to take more time to burnish the foil onto the tape, as I was peeling off the foil backing. I also had to go back in more places & add the foil onto places where it didn’t stick. So – the lesson in this is – don’t rush! Just have fun and enjoy the process!

Try Adding Foiling Fun Without Extra Tools!

To create the sentiment piece, I stamped the sentiment from the Dylusions Laugh Til You Leak stamp set in Versamark ink and heat set it with gold embossing powder.  Cut banner tails at the bottom, and add it on top of your foiled panel with foam squares. Next, I layered the panel onto a panel of bright yellow cardstock, and then onto a light orange card base. These were from my stash, and unfortunately I don’t remember the names of the colours! I think they were from the Lawn Fawn Rainbow pack of cardstock. Pop them up with foam tape, for extra dimension. To finish off my card, I used some embellishments from my personal stash (we all  have one of these, right? goodies we’ve had for ages, and don’t remember from where we got them?).

GET FOILING NOW!

I hope that you’ve enjoyed this project, which shows you how easy it is to use the Ranger Shiny Transfer Foil Sheets. Be sure to check out the store – there are lots of different colours available! If you’d like to see another technique using these foil sheets and Ranger Sticky Embossing Powder, you can head over to my blog to see it!

Try Adding Foiling Fun Without Extra Tools!

Try Adding Foiling Fun Without Extra Tools! Read More »

Free Shipping Anywhere In Canada