Scratch-N-Stamp
Search

Checkout

Keep up with Sales, New Products and other events at Scrap `n Stamp. Sign up for our newsletter now!

What's New

Hot Deals


Gina K Designs

Tuesday with Tara {take 317} TWO

Happy Tuesday!  Today’s card celebrates the BIG event in our lives last weekend… our grandson turned TWO years old!   I was faced with the challenge of making a card for him that was both creative and simple.  I hope you like what I came up with!

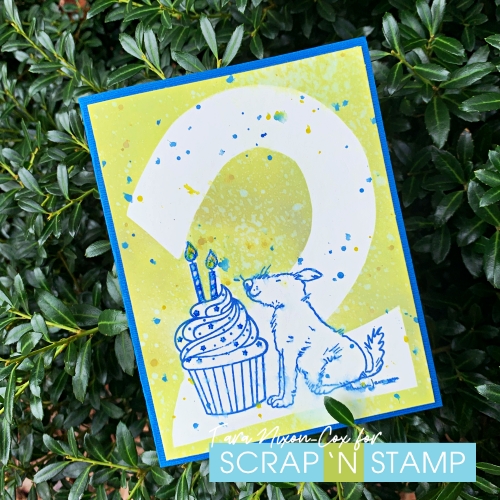
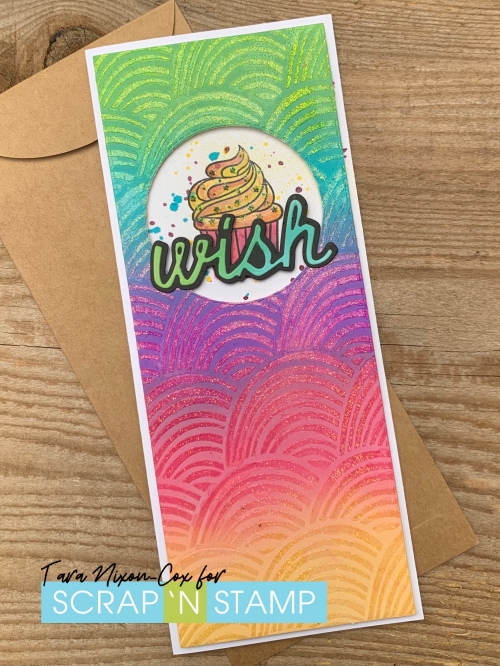
I combined two fun stamp sets for this card- a cupcake by Gina K Designs and a dog by Anita Jeram.  I knew I could add two candles to the cupcake but I wanted something simple with no coloring and I wanted a big number 2 on my card front!  I went with a simple blue & green color scheme- doing my stamping with Prize Ribbon Distress Ink and my ink blending with Twisted Citron.  My blending brush was a bit dirty (oops) so that’s why you see some color variation in the green part of my card!

I started by stamping the cupcake and dog on a panel of Cardstock that I cut 1/4″ smaller than my card front, spacing them so there was room on both sides and beneath the images.  I used another piece of scrap Cardstock the same size and sketched a large 2 on it, then cut it out (trimming and adjusting it here and there until I was happy with it).  I then placed it over the stamped images and used a bit of washi tape and some scraps of paper to roughly mask over the parts of the dog & cupcake that overlapped.  I should have done a proper mask, using a post-it note, or even better a product like Masking Magic… but I improvised with what was on the table next to me 🙂

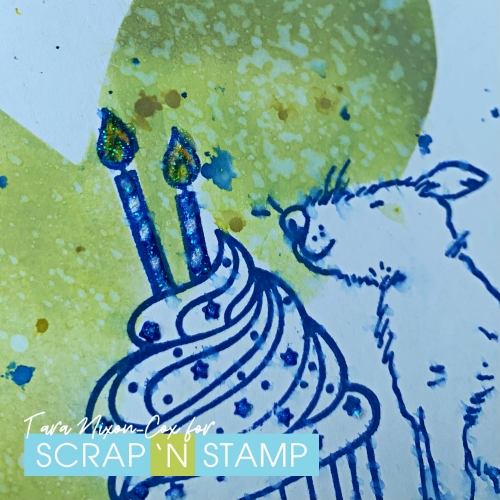
From there, I just gradually added color over the entire background with my blending brush.  Once I was done, I lifted my masks to reveal my design!  In order to add a bit more texture, I splattered some water across the design.  I did forget that I had used water-based ink for my stamping as well… so as you can see, I got some splotches there too.  I decided to embrace it and add some blue splatters too for a bit of a confetti vibe!  A tiny bit of glitter on the candles was my finishing touch after adhering the panel to a blue card base.

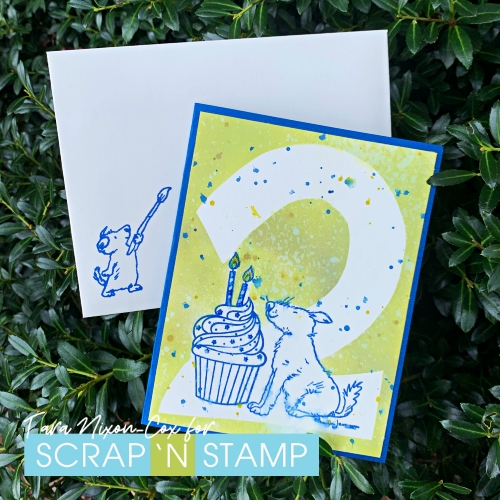
I stamped a smaller pup from the set on the envelope to finish things off.  It turned out to be a pretty fun design, if I don’t say so myself!  The only thing I’d change is next time I would probably use a permanent ink for my stamping so it wouldn’t bleed with my spritzing 🙂

Wishing you a day full of inky fun!

Inky hugs,

Tara

Tuesday with Tara {take 317} TWO Read More »

Butterfly Miss You

Today, for the Random Act of Cardness, I would like to share with you an old technique called Embossing Folder Stamping, but today I have a bit of a twist.

For this technique you will need watercolour paper, I used Fabriano Hot Press. The smooth nature of the hot press paper soaks up the inks easier than a cold press would.

To start I cut my watercolour paper to size. Using a box lined with waxed paper and paper towels I place my 3D embossing folder with the label side flat in the box.

The twist is I am using Distress Oxide Spray in 3 different colours, and spray each of the colours on the flat labelled side of the embossing folder, ensuring good coverage. I then spray my watercolour paper with water on the front and back to avoid warping and it also helps in soaking up the inks, and give the embossing folder a spray. It does not need a lot of water as there is liquid in the spray.

I leave my paper in place for about 35 seconds or so, being sure not to rub the paper, but touch areas of it with my fingers. How long you leave it will depend on what paper you are using. If you use cold press watercolour paper it would require a longer period of time. When I remove the paper I lift it up from the folder being careful not to drag it and disturb the ink placement.

I set the paper aside to dry and using white cardstock I die cut two rows of the butterfly strings. For the first string I coloured using Copic RV69, and styled the butterflies. For row two I coloured the two outside butterflies using RV25.

On the second from the right butterfly I used YR09 and for the second from the left I used RV04. I then styled the butterflies and once done added foam squares to the bottom row, and glued the top row on using Nuvo adhesive.

When the panel was dry I added black acrylic ink splatters, then stamped the sentiment using the Jet Black ink, masking off the “r” which left “you” instead of “your”. I sponged on Aged Mahogany distress ink along with Vintage Photo distress ink around the edges of the card.

To finish up I attached the embossed stamped panel to my Kraft card base. I then added the butterflies across the mid/top of the card. I love how the deepness of the 3D leaves the negative space clean of ink.

Thank you for joining me today. I enjoyed making this card and I hope you have enjoyed it as well.

Following are Affiliate links to the store for the products I have used today, at no extra cost to you.


Butterfly Miss You Read More »

Tuesday with Tara {take 292} Birthday Wishes & Giveaway!

Happy Tuesday!  The birthday celebrations are continuing here on the blog (and also on instagram, so be sure to visit SNS & my personal feed-I’m “msespresso” for more chances to win)!  My card today is a slimline one, featuring the Make a Wish stamp set by Gina K.

Today’s card started with a background I made a couple months ago when I made this birthday card– I’ve used similar colors (but more of them!) and the same stencil & glitter paste.   This panel had a few smudges and imperfections, but it’s still so pretty with all that glitter I decided to use it anyways!  I used the Picket Fence Slimline dies to cut the panel and a circle window out of it.  I placed the die cut panel over my card base (which measures 3.5 x 8.5 inches folded) and stamped the cupcake inside the window with Archival Ink.

The stamp set which includes the cupcake is part of the Present Parade Giveaway, along with a Mini Slim Trifold Template & Dies by Taylored Expressions (together they are worth $48.75).

The mini slim set looks like a ton of fun in a little size- it’s designed to help you make a tri-fold card with die cut windows.  The mini slim cards measure a fun 3.5 x6 inches!  It’s a size I’m definitely going to try out soon!  You can enter to win this great prize by leaving a comment here on this blog post. You can also get extra entries over on Instagram- by dropping a like, comment and a follow on my post featuring this card & giveaway!

Okay… now that you’ve got all the Present Parade Details, let’s get back to my card… Once the ink was dry, I did bit of watercolor with Distress Ink.

I brought in a mix of yellow, pink & purple inks since I planned to add this die cut ‘wish’ word that was in my little scrap bin.  I finished it off with some glitter and then some paint splatters to add to the party vibes!

Since I had some pre-done pieces, this card actually came together pretty quickly… apart from the drying time of my paint splatters 🙂  There’s nothing like glitter, confetti and cupcakes to set the party mood!  I’ll be adding one of the sentiments from the stamp set to the inside to tie it all together.  Here’s another look at the entire card, I hope it makes you smile!  

Be sure to leave me a comment for a chance to win this fab gift in the present parade!  I’d love to know what you prefer at a party… cake or cupcakes?  And if you haven’t yet, check out the rest of the giveaways the team is sharing… and there’s more to come, so be on the watch for them!

Inky hugs,

Tara

Tuesday with Tara {take 292} Birthday Wishes & Giveaway! Read More »

Free Shipping Anywhere In Canada