Scratch-N-Stamp
Search

Checkout

Keep up with Sales, New Products and other events at Scrap `n Stamp. Sign up for our newsletter now!

What's New

Hot Deals


halloween

Tuesday with Tara {take 122}

Happy Tuesday & Happy Halloween!

I sat down in my studio determined to create one more halloween project to share with y’all… and since the ideas playing around in my head didn’t seem like they’d fit on a card, I pulled out my Mixed Media journal by Dina Wakley and opened to a spread of kraft pages that had previously been used as a spot to clean off my brushes… a mix of orange, brown & blue brush strokes in the background became the base for these pages.

Initially, I decided I wanted to paint a pumpkin to use together with the raven dies.  As that page started coming together, I added coordinating elements on the left page so they would have some flow between them, even though they could also stand alone (with completely different focal points).  It’s probably a different way to do art journalling… but I’m kinda new to it, and I think it can be whatever you want it to be!  I used some pieces from the ancestors paper dolls again for the left page…

…and the ravens are a great compliment to my pumpkin (I wanted to try again a technique I’d learned for painting pumpkins!).

I went old school and pulled out stickers for my title (colored stickers can easily transform to black with a marker!).  I added a variety of stenciled bits here and there, some washi tape and bits of gold (paint on the pumpkin and a pen for my journaling).

I’m working on being free with my ‘messy’ script for journaling- I love the look of it and am learning that the best thing is not too think too hard about what it looks like!

The left page, especially, is out of my comfort zone… but that’s kinda the point.  I journaled about learning to enjoy the ‘spooky’ aspects of Halloween with my family 🙂

I hope you have a fabulous & fun spook-tacular day!

Inky hugs,

Tara


Materials Used:

Dina’s Media Journal

Assorted Dina Wakley Paints (including gilt, sky, tangerine, cheddar, blackberry & umber)

Distress Oxide Ink in Walnut Stain

Ancestors Paper Dolls (on sale right now!)

Feathers & Ravens die set by Tim Holtz

Assorted stencils (including Tim Holtz dot fade & latticework)

Assorted stickers & washi tape

Tuesday with Tara {take 122} Read More »

Freaky Friday Blog Hop!

Happy Friday the 13th!  Today we are excited to have another fun Designer’s Challenge BLOG HOP for you, this time we have 8 ladies who have each created a project with the second set of Tim Holtz Paper Dolls ‘Ancestors’ which includes some fun, spooky Halloween type images!  You’ll find the full set of links at the bottom of this post, and each post along the way should have a link to the person after them.  If you get lost, please check back here so you can see ALL the creative projects in our Freaky Friday Blog Hop!
Plus….Who says Friday the 13th is bad luck? Here’s your chance to win! Scrap’n Stamp is giving away a $25 coupon for every stop on the blog hop! So make sure to take a moment and comment on on all the designer’s fabulous work. Winners will be announced HERE & on Facebook Oct 20th and must email Scrap’n Stamp to claim their prize! GOOD LUCK!
I’ve been enjoying getting creative with the Paper Dolls by Tim Holtz, and these new additions add a creepy touch to the mix… there are a few seasonal images included, with costumes and pumpkins, as well as some regular type portraits with creepy expressions!  It’s a nice mix if you want a variety of paper dolls to work with!  I chose to use some of the ‘regular’  images and make a creepy/romantic tag, pairing a couple of single dolls together.
My plan was to create a set of tags that could be attached to treat bags for Halloween- if it happens, this one will go on the one I give my husband 🙂
I started with black #8 tags and Distress Oxide Ink, stamping a background pattern (new Myers by Dyan Reavely) directly on the tag, then applying the same ink through a stencil (birds by Dina Wakley) over it to create my background design (I am not a big Halloween crafter, so chose some ‘neutral’ designs that I thought would work with the overall feel I was going for.  It’s good to have basics in your stash!).  I selected my paper dolls and chose to add a few spots of color to them with Distress Markers.  I didn’t have a perfect match, but wanted a monochromatic look for this tag so went with a similar shade of purple.  The inky puddled a little bit in some places, so I dabbed with a cloth until I got the desired look.
I wrapped some sheer black ribbon with twine to add texture and finished it off with a metal embellishment (this fancy lock is by Prima) and some occasions chit chat stickers.
I created a couple more tags as well, which you can see all together here.   Here’s a shot of the backgrounds I started with…
 … and the set of finished tags:
I hope you enjoyed my simple tag- I can promise you, you’re gonna be blown away by some of the spooky creations coming up in the hop.  Some of the ladies have a ton of fun Halloween themed products and they know how to rock it 🙂  Enjoy, and let us know what you think of the hop!  Remember there’s a chance to win a $25 gc on each blog!  When you’re all done, be sure to stop by the store and pick up some of the products that inspire you!  There’s some great deals today, including many items $13 off!
Freaky Friday Blog Hop
Tara Nixon Cox (you’re starting here!)
Karla Yungwirth
Amber Trubiak
Karen Warner
Nicole Wright
Nancy Frustaci
Niki Stone
Julia Chupik
Inky hugs!
Tara

Freaky Friday Blog Hop! Read More »

Halloween TBT with… Shari from Ain’t that Artsy Fartsy

I am thrilled to introduce  Shari of  Ain’t That Artsy Fartsy. She has agreed to host our TBT’s (Throw Back Thursdays)!  If you can’t wait to see all her wonderful projects make sure to check out her blog.  —Raya

shari

Hello, my name is Shari and my Happy Place in blog-land is called,

Ain’t That Artsy Fartsy.

I’ve been a crafter, in one way or another, since about 1998 after helping someone make  their own, home-made, hand-stamped, wedding invitations – I was hooked and have been creating cards ever since!  I don’t subscribe to any one particular style – I Love It All!  As you peruse my work, you’ll find examples of Clean & Simple, Grungy, Vintage…I’m all over the place and I love to experiment with new techniques.

I am married to my hubbie Don, and we have 3 dogs and 2 cats all nestled together on 12 acres of land located on the gorgeous Pend Oreille River – a place that we call Heaven on Earth.

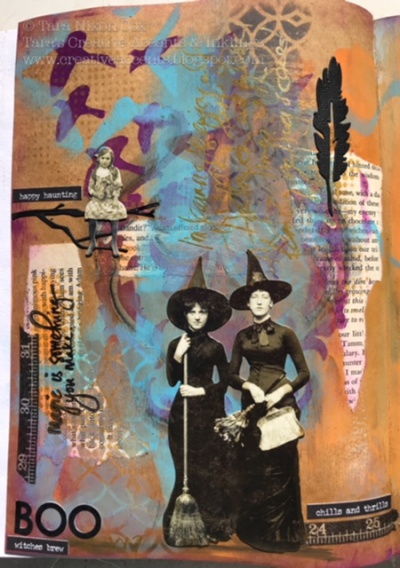
I hope you come back often and find your own Artsy Fartsy inspiration in the creations that I share! So, it being Halloween we thought that this would be a good place to start…..

We all know what Tim’s Tag looks like–

TAG-MAIN

Perfectly patriotic for our July 4th holiday earlier this month here in the U.S.!  I don’t have any of those fun images, but I do have some other seasonal Mini-Blueprints stamps, so I did a 3 month fast forward to Halloween instead🙂

DSC07906

We had Fall-like weather this weekend with stormy skies, thunder & lightning and sporadic downpours of rain–It was fun and put me in the mood for Halloween!

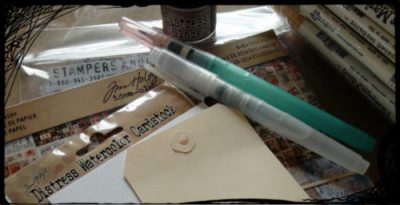
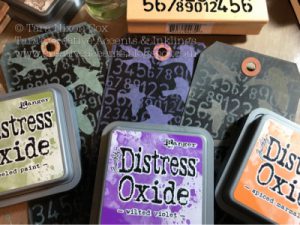
I gathered up some of my supplies to make this month’s tag.

DSC07879

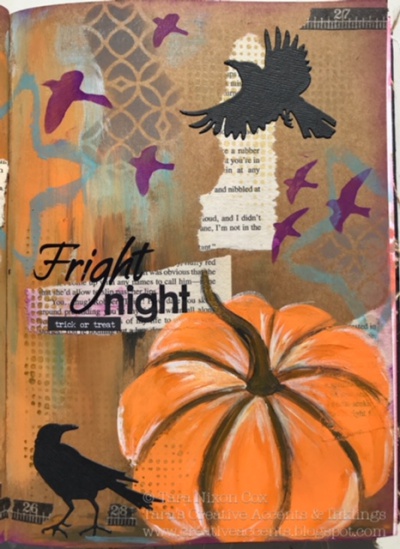
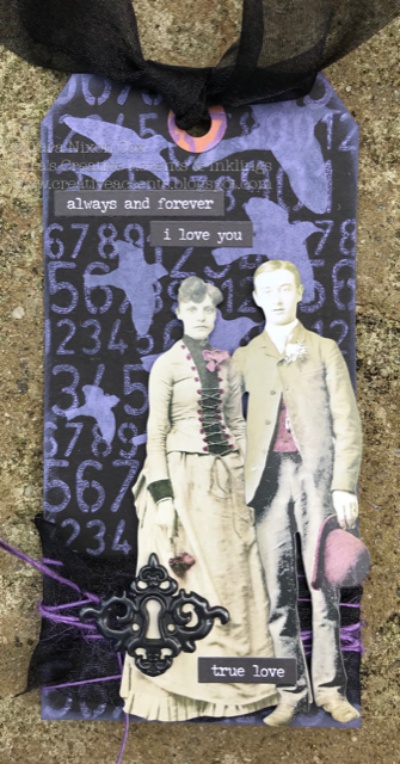
I’m using a jumbo tag for my version that I covered with a piece of this seasonal collage paper stash.

DSC07876

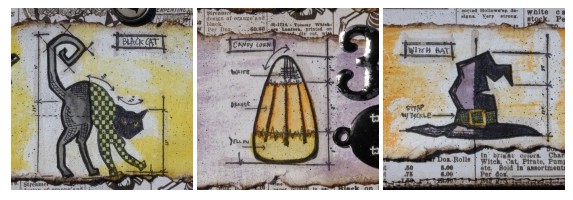
These Halloween images are in the Mini Blueprints #7 set and just like Tim, I stamped them onto Distress WC paper with Jet Black Archival.  These images are a bit tall, so that’s why I’m using a jumbo tag.  I did a quickie placement of the stamps onto a #8 manila tag and realized they wouldn’t all fit.

DSC07878

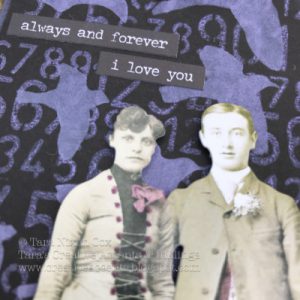
I water colored my images with Distress Markers, then rubbed the Distress Micro Glaze over the images and buffed away.  I used Ripe Persimmon, Mustard Seed & Dusty Concord as my background colors.

DSC07881

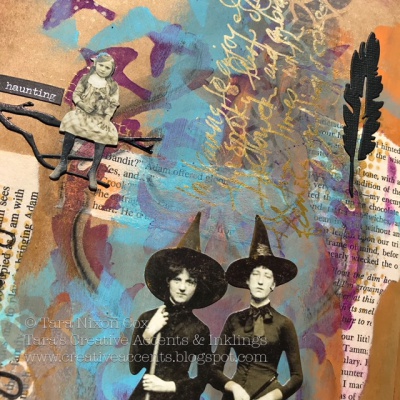
I inked the ripped edges of the images with Walnut Stain DI and adhered onto the tag.  I then snipped off any extra paper and ran through my sewing machine to add that rough stitched border.  I distressed the edges with my paper distresser and inked the edges with more Walnut Stain DI and my ink blending tool.

DSC07882

I’m using Spiced Marmalade & Dusty Concord DMs to ink my seam binding.  This is a great technique for creating a two-toned ribbon!  I LOVE this technique!!

DSC07900

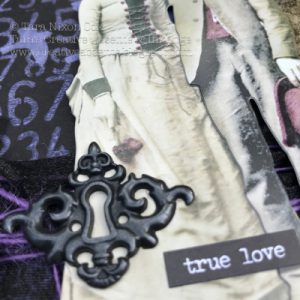
I don’t have the vial labels that Tim used on his tag, but I improvised with one of his enameled tags that I painted with Black Soot DP.  Now, I also ran out of my sheet of black remnant rubs from the Apothecary set and only have the sheet of white rubs left–That’s why I painted the tag black.  Otherwise, you wouldn’t be able to see the words on the white background

DSC07911

I had to get a close-up of this mirrored star.  I love the matte areas where the Black Soot DP settled.

DSC07903

I topped my tag with my colored seam binding, which blended wonderfully when spritzed with water and heat set.  I also stained some cheesecloth with Black Soot DSS and ran that through with the seam binding.  I added a type charm with the letter ‘H’ for Halloween.

DSC07896

I’m headed over to Tim’s blog right now and get this entered, before the clock strikes midnight on the 31st!  Hey–that’s still 3 days away!! I’m ‘early’ for once, not sliding in right under the wire!  WHEW, that feels good!!

Thanks so much for coming by today!  I have a plan to be back before the end of the week with one last July challenge project (due on the 31st), so I hope you come back for that!  Gosh, I hope I can make that!!🙂

Until next time–Stay Artsy Fartsy!!

DSC04507

SUPPLIES I USED:

  • PAPER: Jumbo Manila Tag ; Distress Watercolor Paper (Tim Holtz/Ranger); Seasonal Collage Paper Stash 8×8 (Tim Holtz/Idea-ology)
  • MEDIUMS: Distress Inks, Markers, Paint, Micro Glaze, Spray Stain (Tim Holtz/Ranger); Archival Ink (Ranger)
  • EMBELLISHMENTS: Mirrored Star, Type Charm, Enameled Tag & Mini Numerals (Tim Holtz/Idea-ology); Seam Binding ; Cheesecloth
  • TOOLS: Craft Sheet (Ranger); Heat Tool; Sewing Machine (Kenmore); Craft Scissors; Glue Stick; Air Art Tool (Artworx)
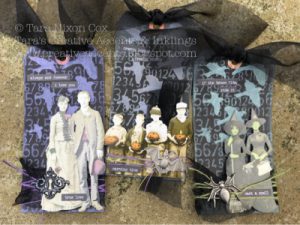
Halloween TBT with… Shari from Ain’t that Artsy Fartsy Read More »

Free Shipping Anywhere In Canada