Scratch-N-Stamp
Search

Checkout

Keep up with Sales, New Products and other events at Scrap `n Stamp. Sign up for our newsletter now!

What's New

Hot Deals


Hero Arts

Simple Stamping – I’m a Puffer for You!

Hello friends!  It’s Chala here for today’s blog post.

Things have been crazy in my world and I got so wrapped up in life and trying to survive that I almost forgot my husband’s birthday!  (Bad wife, I know!)  But this made me realize that creating does not have to be super complicated!  Sometimes we are so enamoured with what others create and the techniques they use that we forget that there is nothing wrong with creating a simple card!  In fact, they are just as beautiful and for me….just finding time for crafting therapy through the chaos of my life is what is important.

So, I am here to share a super simple and quick card with you that received just as much praise from my sweet husband as some of the complicated cards I have created.

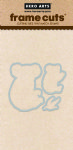
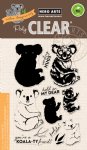
I will be using the Hero Arts “I’m a Puffer for You” stamp and die combo set.

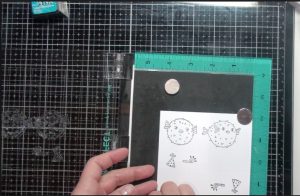
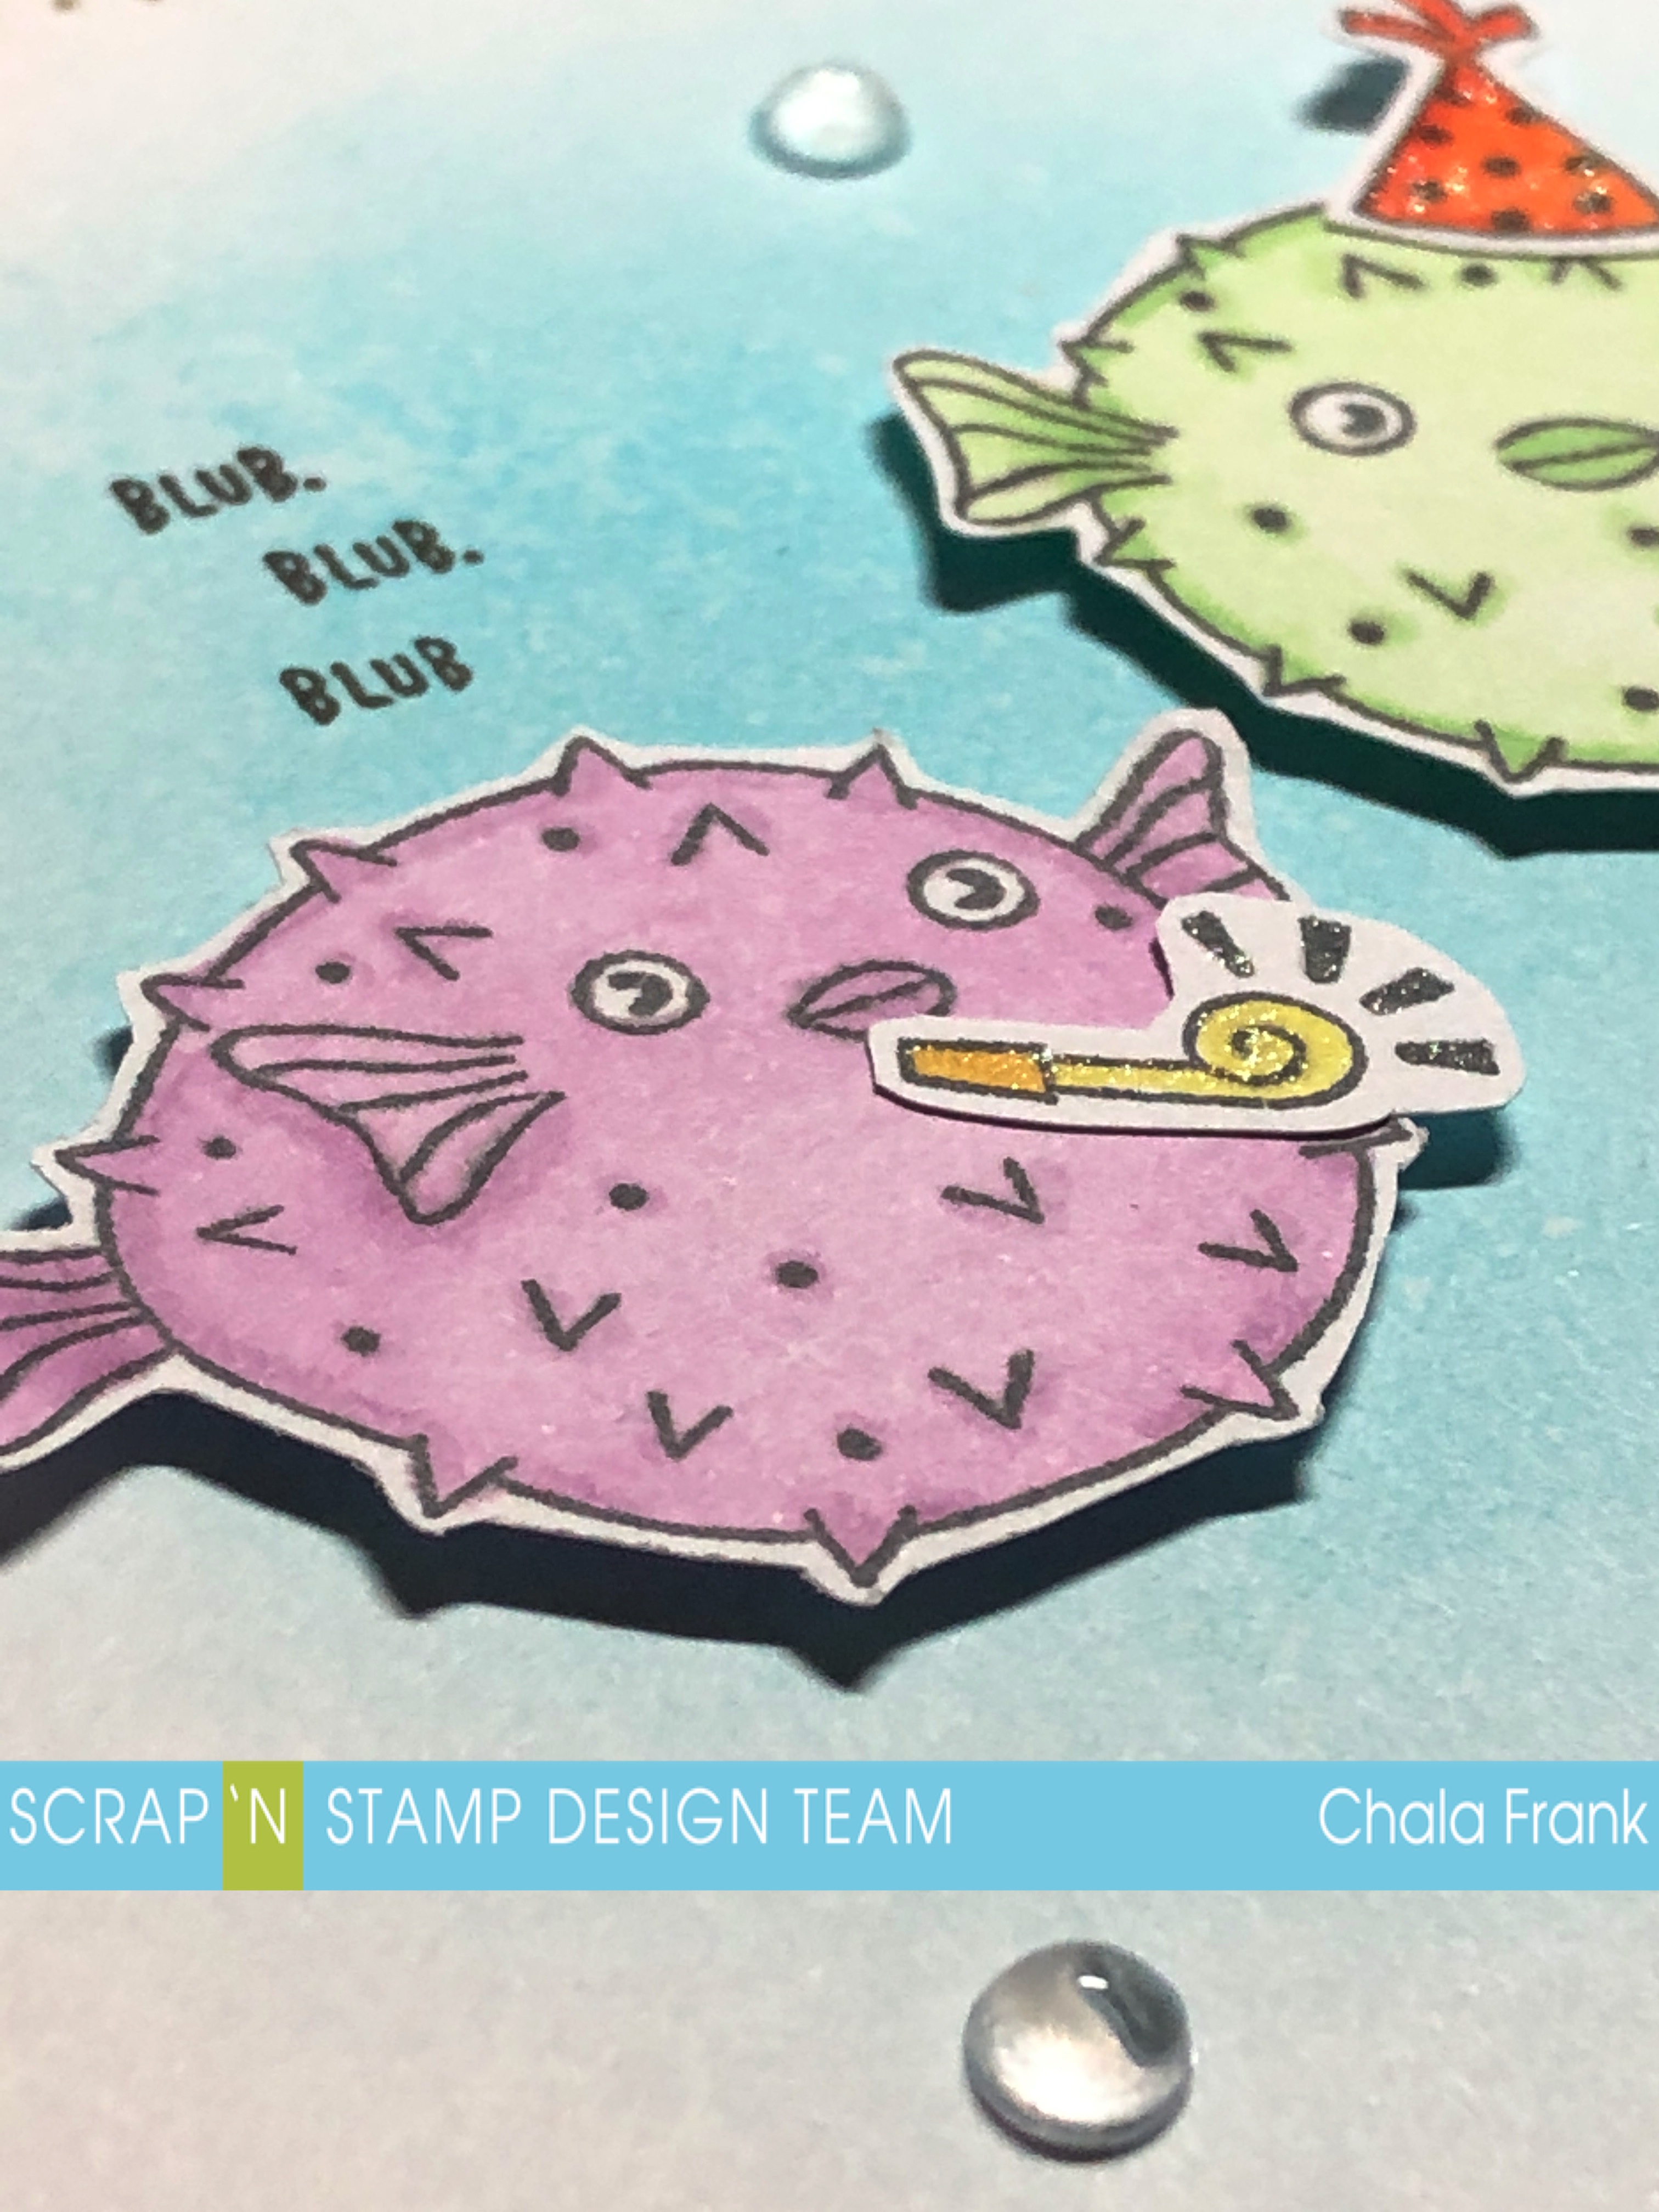
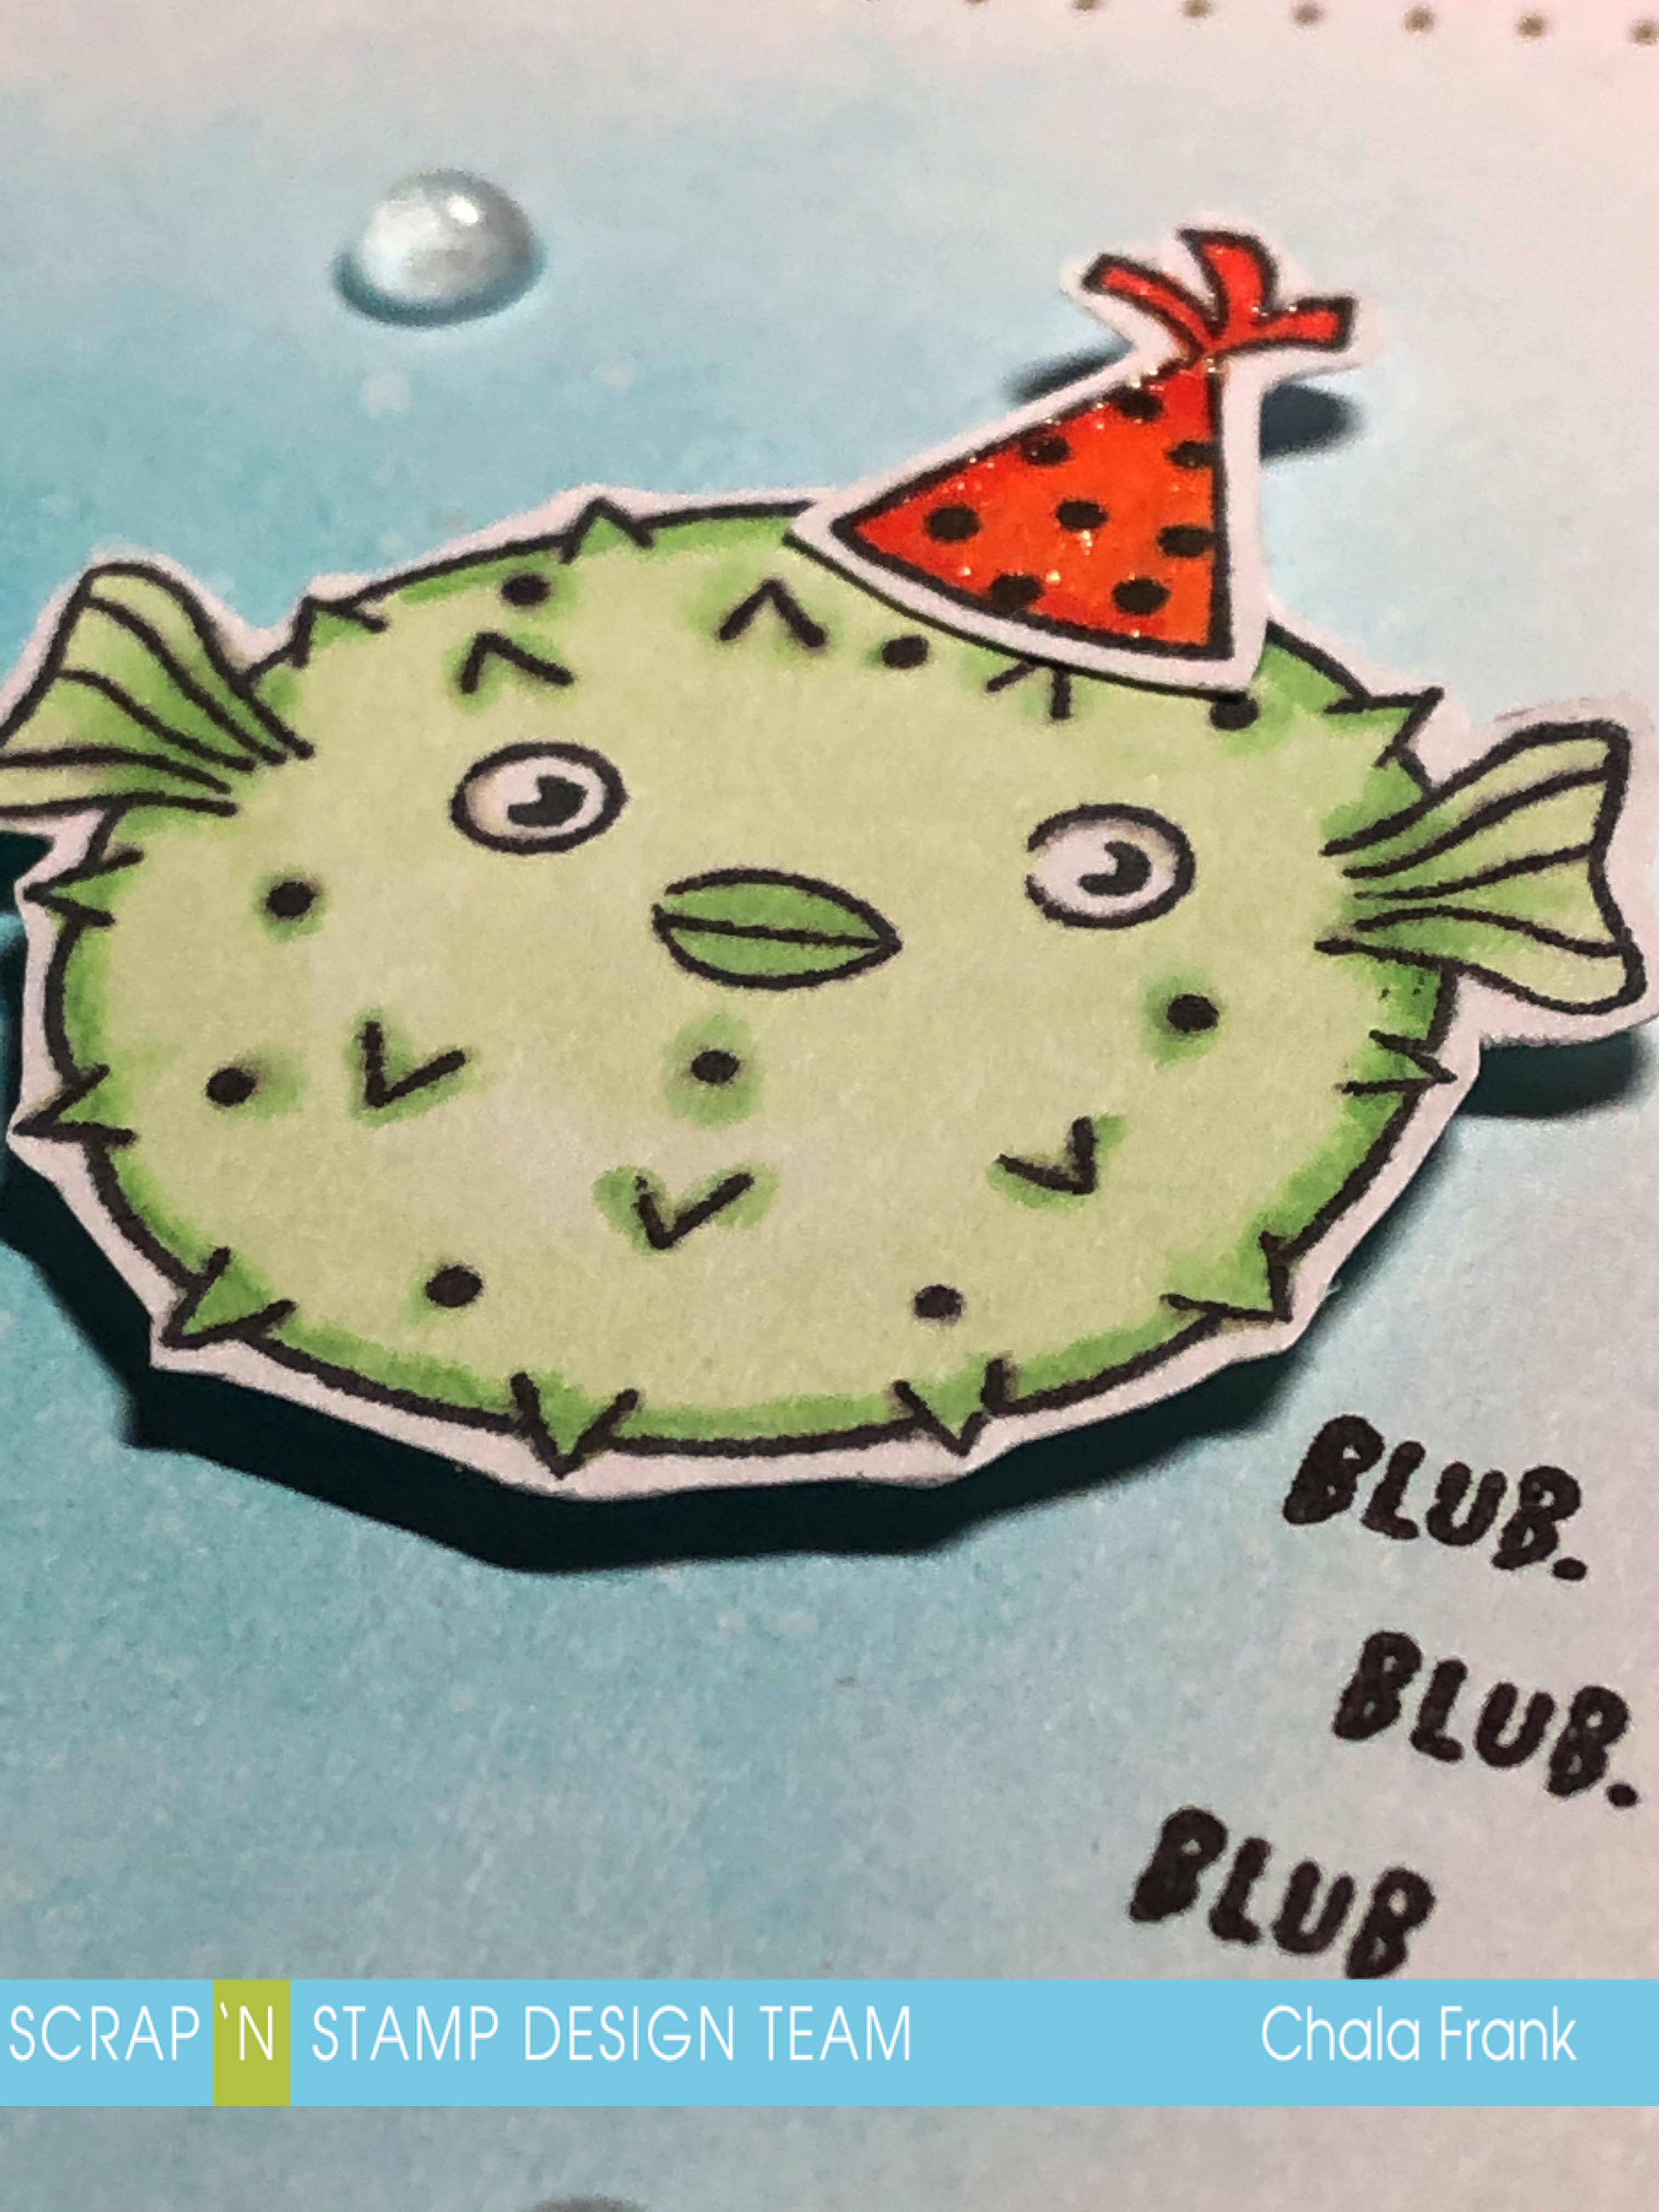
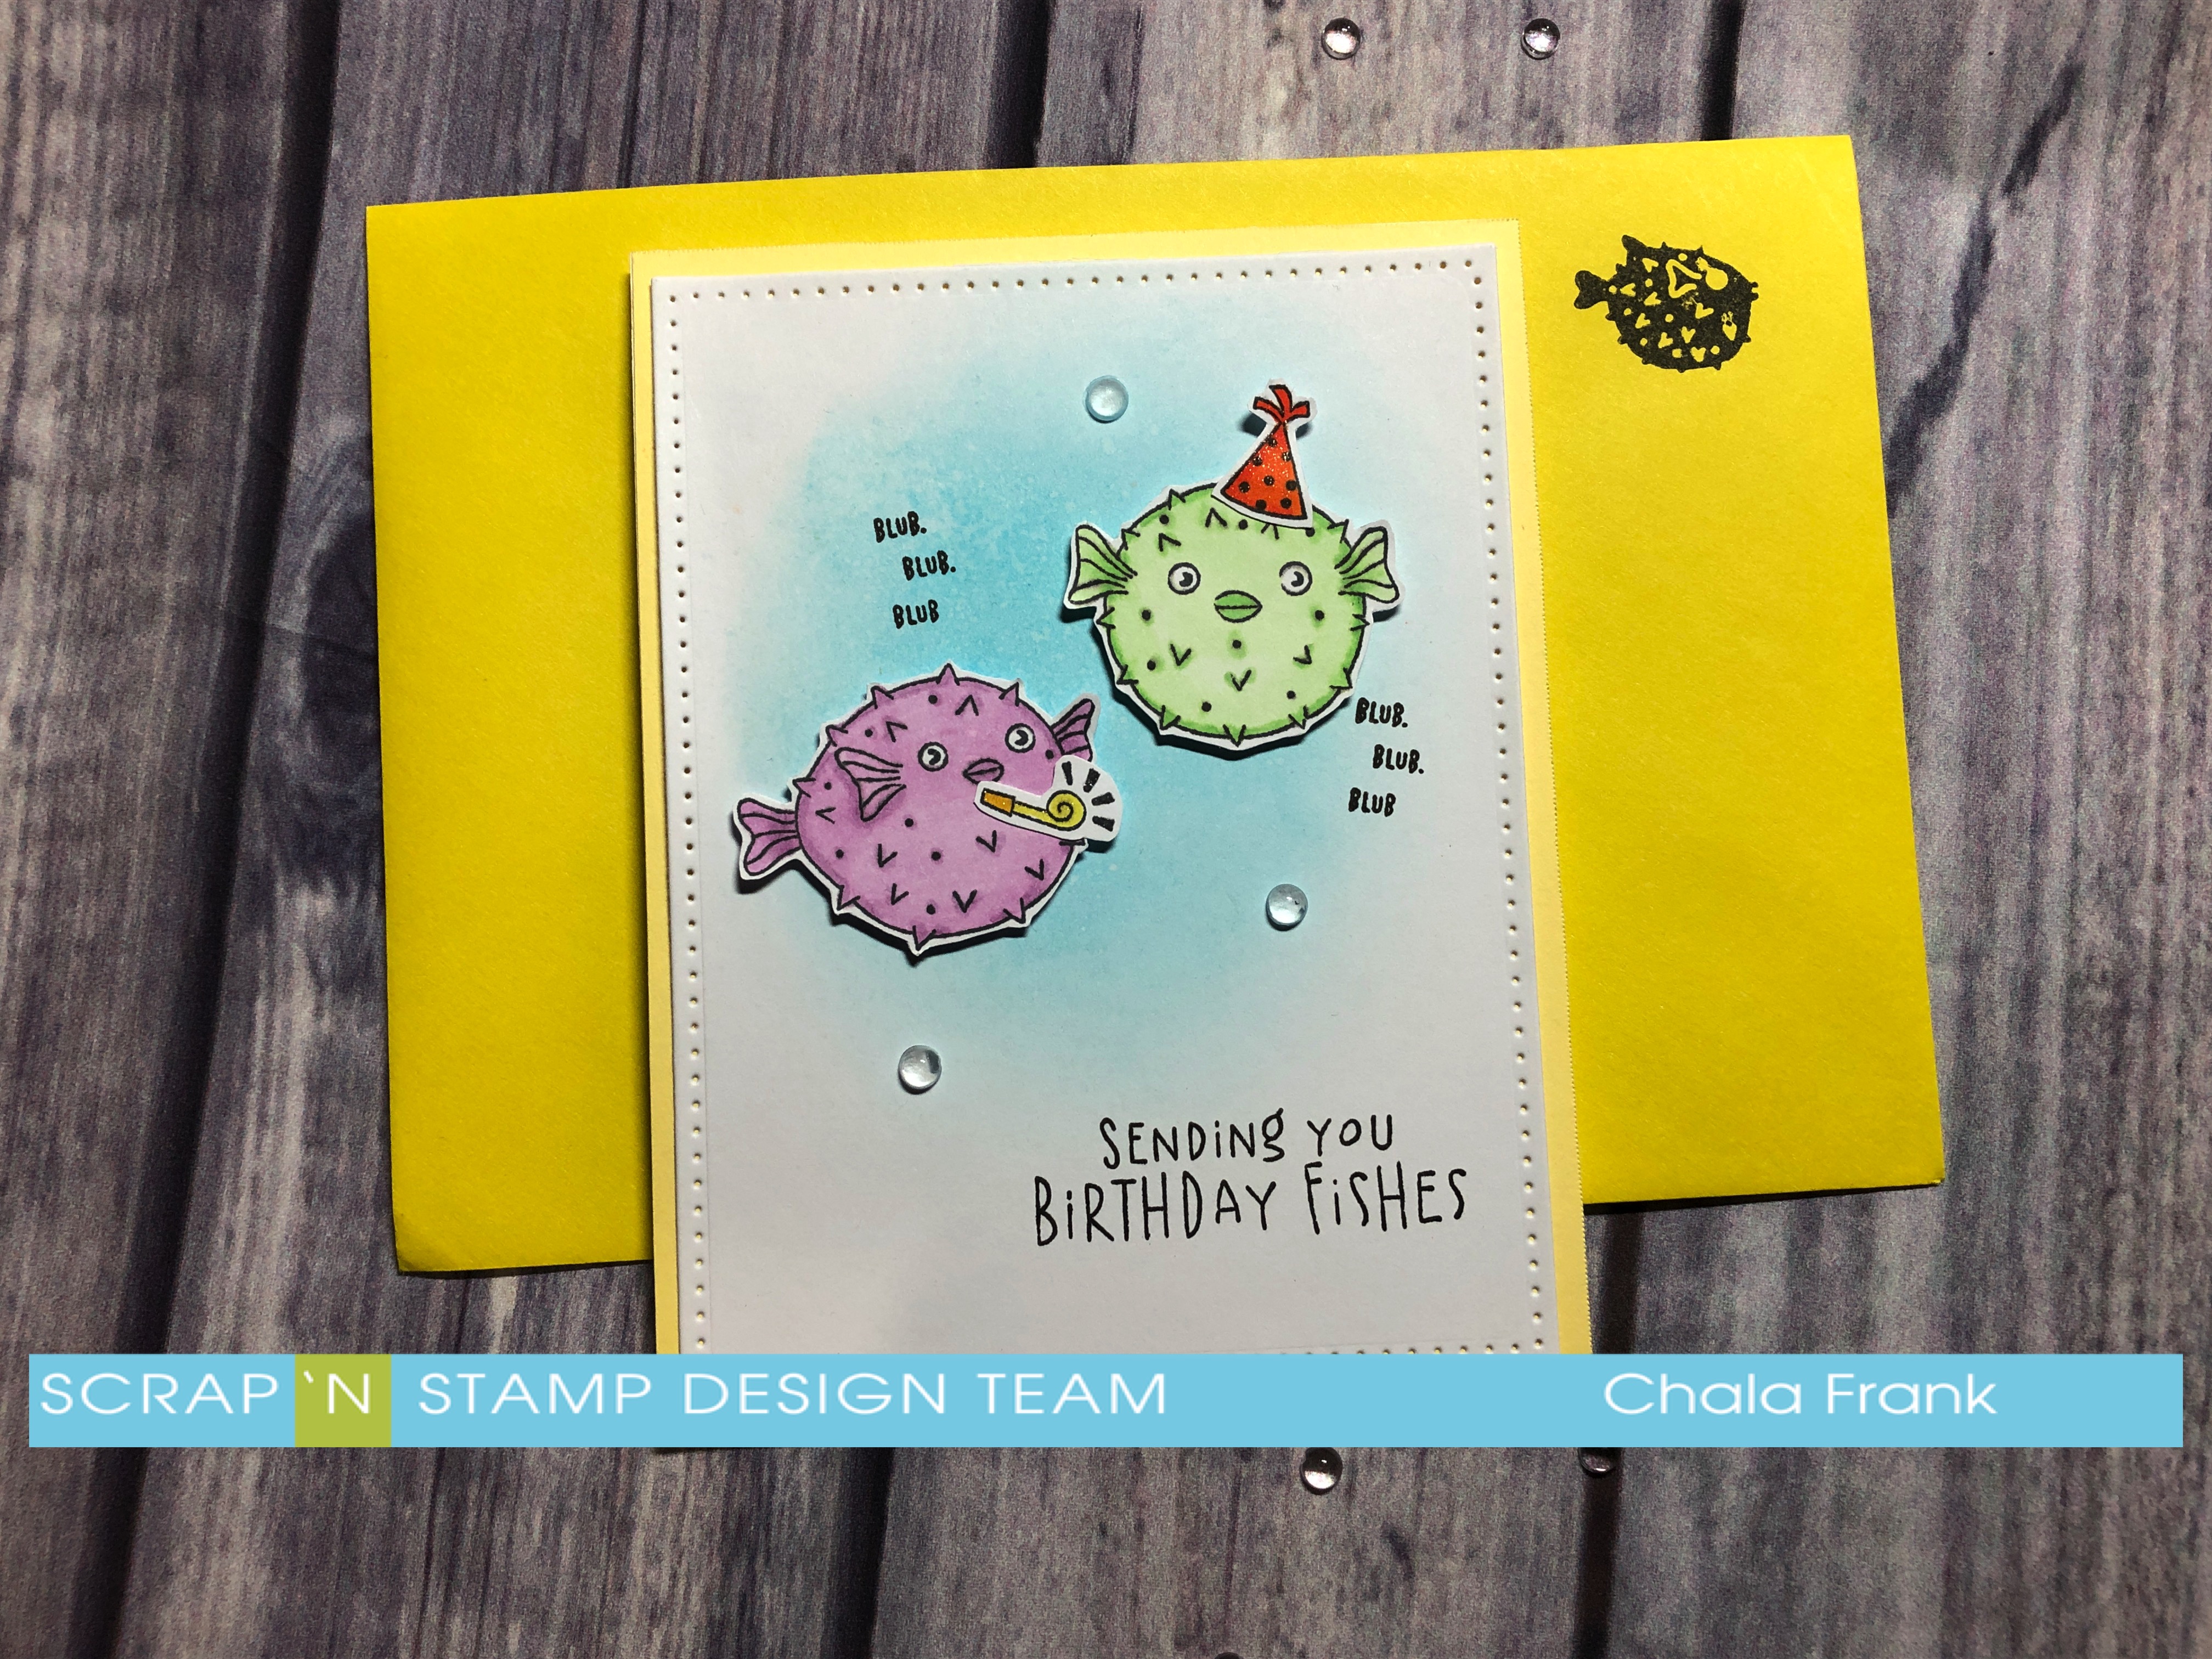
I stamp some of the cute puffer fish images and party accessories with Memento Tuxedo Black  ink onto some white card stock.  I colour the images with my Copic markers and die cut them with the coordinating dies.

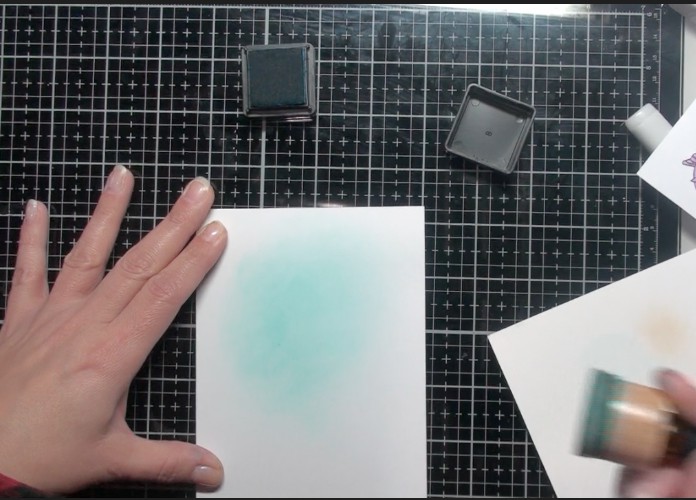
I then wanted to create a super simple ink blended background.  I wanted something that wouldn’t take the focus off the cute little images. To do this I used the Distress ink in Mermaid Lagoon and my ink blended brush and blended the ink onto the middle top portion of an A2 size card base.

I cut an A2 size panel of yellow cardstock and adhered it to a top folding card with my adhesive tape runner. Then I die cut the ink blended panel with the Elizabeth Craft Designs Stitched Rectangle Die that is slightly smaller that the A2 size panel and adhered that onto of the yellow cardstock.

To  add a bit of interest and to give the background an underwater feel I spray it with some water and lift the water droplets up with my microfibre cloth.

I then lay out the images and sentiments that I wanted to use on the inked panel.  I use Versafine Onyx Black ink to stamp the sentiments.  I adhere the party accesories with some liquid adhesive  and pop the puffer fish images up with scotch 3M foam tape.

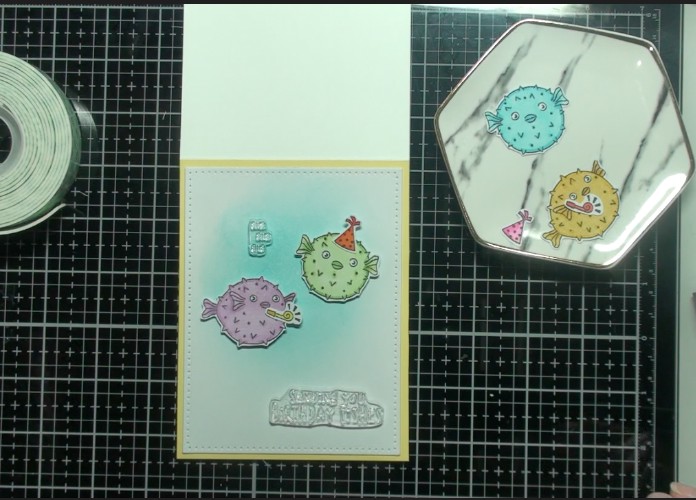
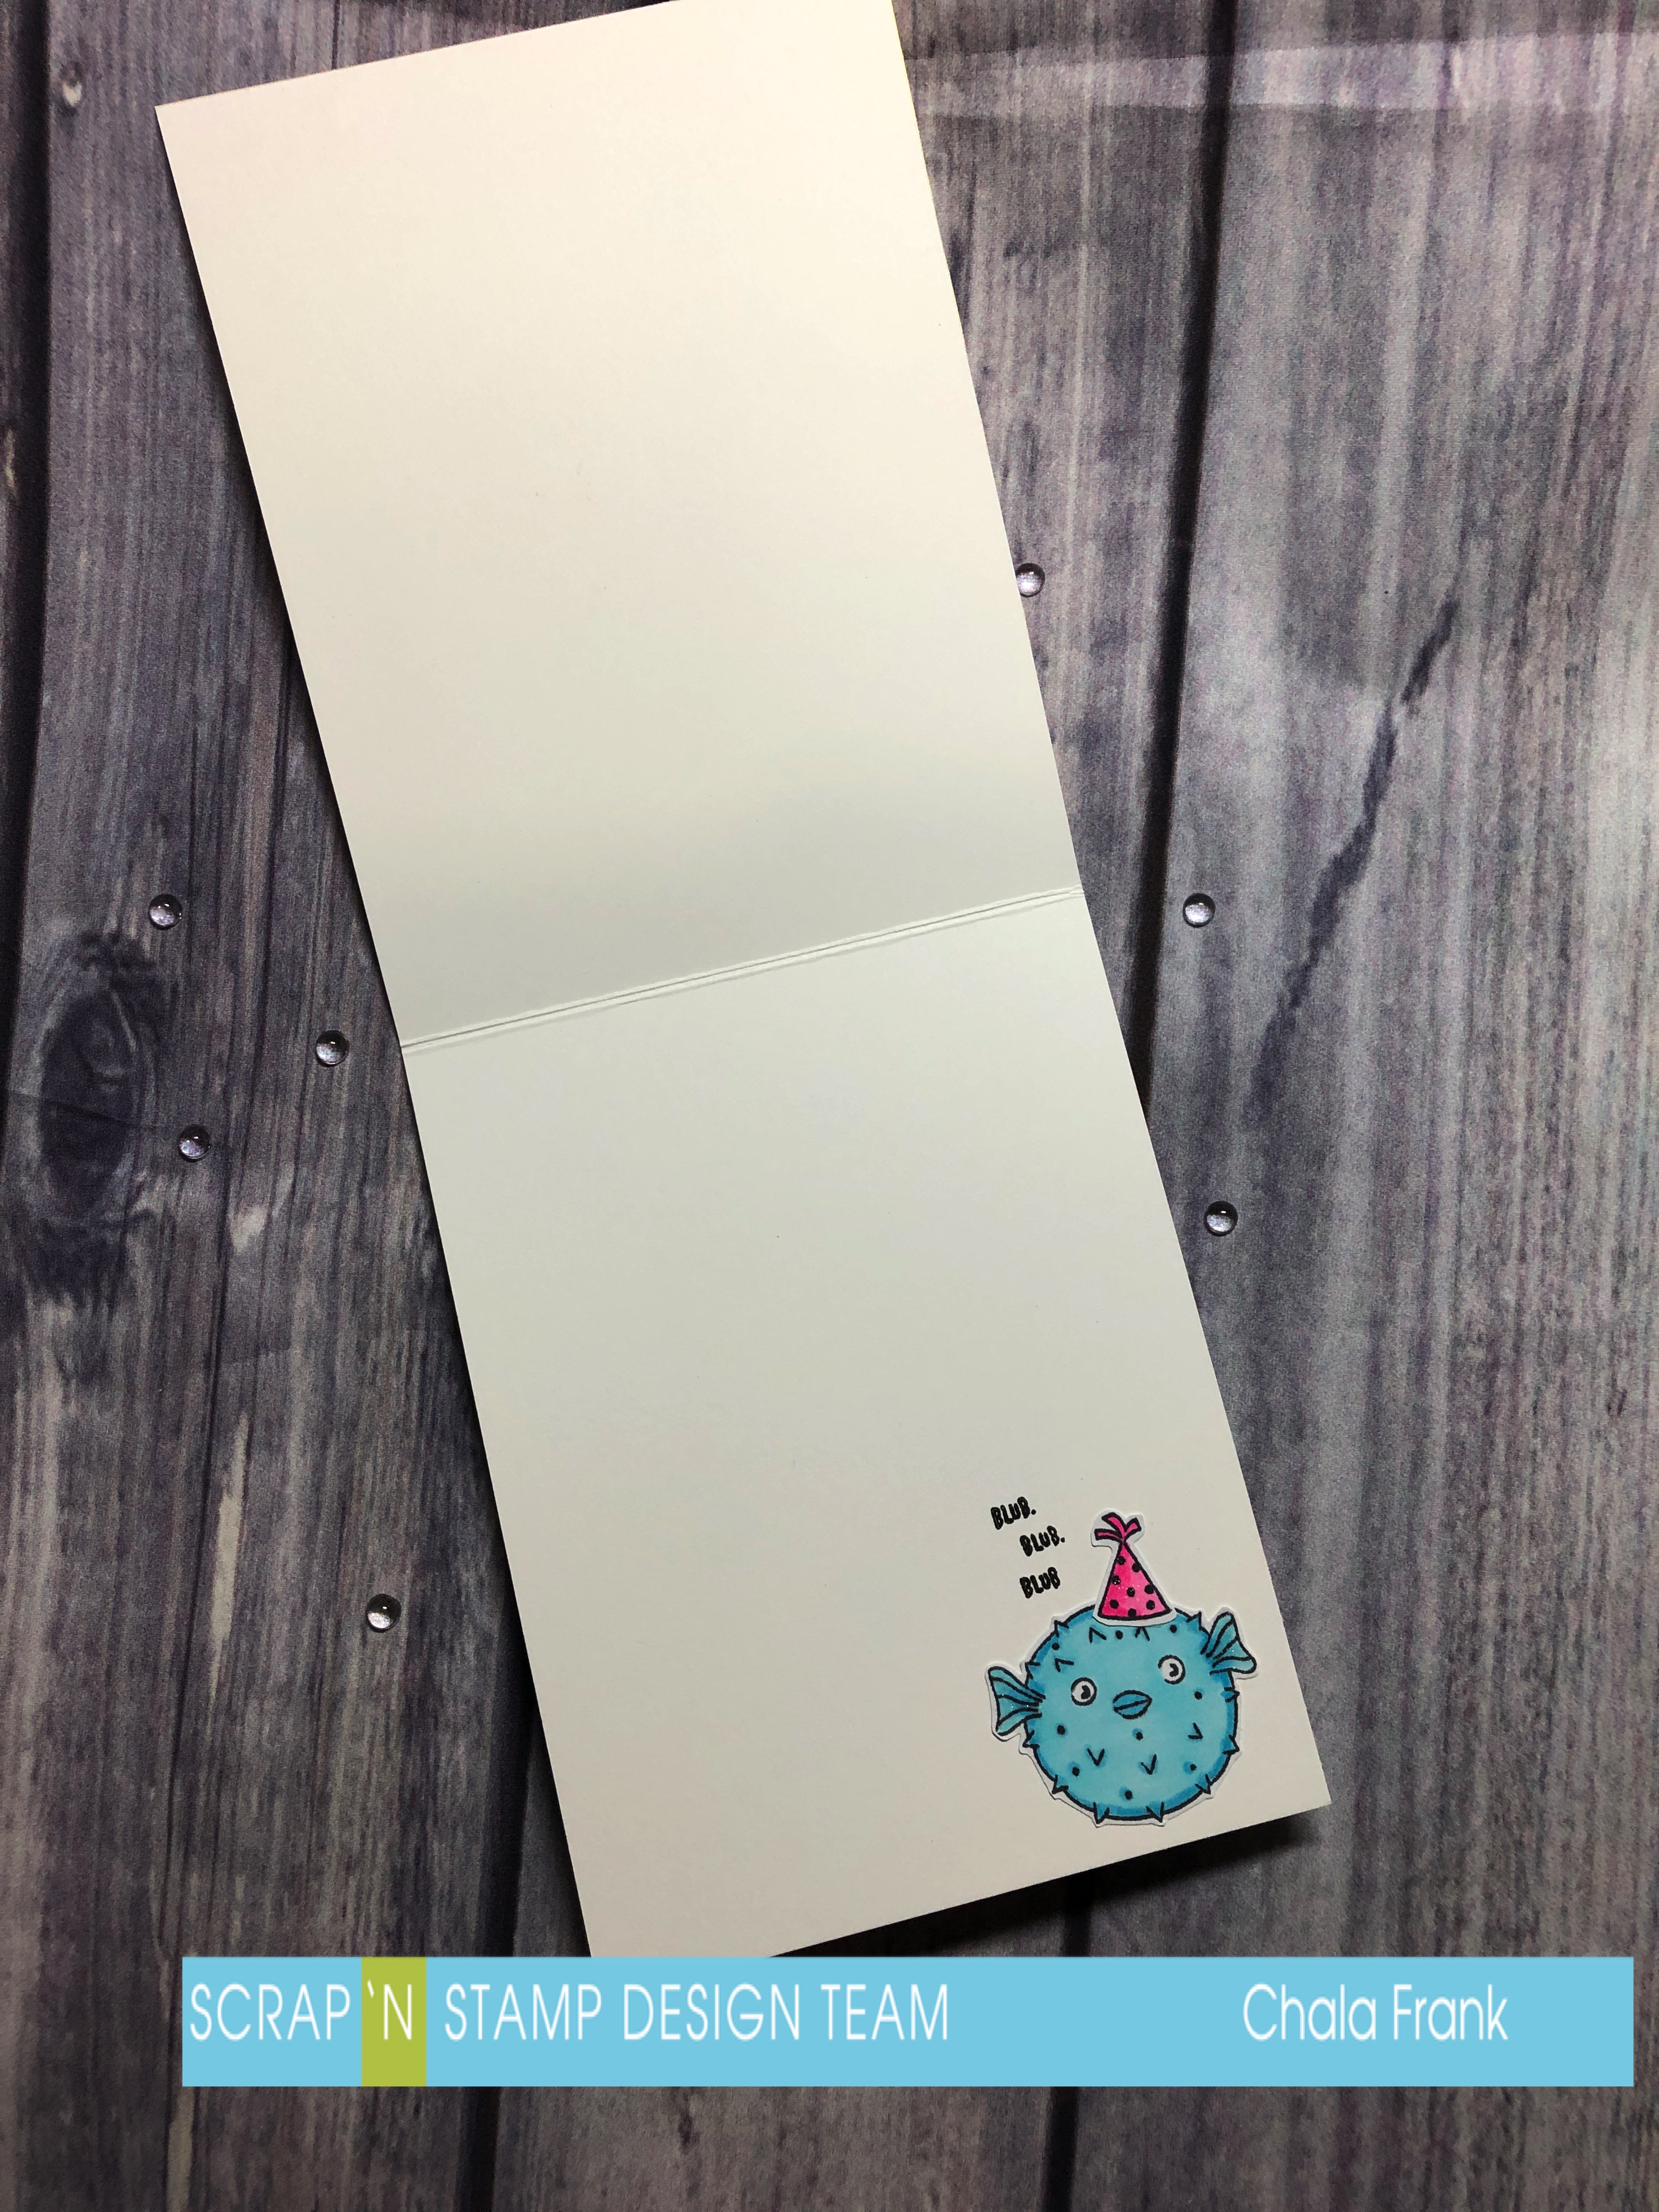
I also add one of the left over puffer die cut images onto the inside of the card and give all the puffer images a coating of clear Wink of Stella (because every card needs a bit of sparkle) and stamp one of the solid fish images onto the upper right hand corner of yellow envelope.

I felt like the card needed a little something special so I added these sparkling clear droplets.  You can also achieve this look by using Glossy Accents or Nuvo Crystal Glaze.  I didn’t have time to wait for those to dry so the sparkling clear droplets were perfect for this rush card!


Here are some photos of the completed card.


Thank you so much for dropping by for today’s blog post.  You can check out the video of how this card came together at my YouTube channel here:

https://youtu.be/6lt9_2ynXkk


Happy Crafting!

~ Chala

Simple Stamping – I’m a Puffer for You! Read More »

Color Layering Fuchsia

COLOR LAYERING FUCHSIA

Hello stamping friend! It’s Deb here, for the Scrap ‘N Stamp blog! I hope you’re looking forward to a great week. We in the Design Team have some great projects to share with you. I’m happy to be here to start your Monday off right. I hope that you were able to take advantage of the recent ‘Bundle Up & Save’ sale on select stamp & dies bundles, at Scrap ‘N Stamp. I sure did! Today I have a couple of cards to share with you that I made from one of the bundles I purchased, called Color Layering Fuchsia by Hero Arts.

CLEAN AND SIMPLE

For my first card, I kept it fairly clean and simple. A nice bright white background, and one stem of the fuchsia flowing down the middle.

Color Layering Fuchsia

This stamp set is incredible! When they say ‘color layering’ they mean it! Each flower has at least 4 layers to it, and there are extra layers that you can add to the leaves on the long stem. Because these are photopolymer stamps, it’s easy to see exactly where to layer the next colour. However, if you’re a little timid, you can set up the stamps in your stamp platform, and that stamp that way.  I’m still working on adding to my ink collection, so I used ink from my stash on hand.

CARD FRONT DETAILS

First, stamp the long stem directly onto the panel of white cardstock. I used Mowed Lawn Distress ink. Add in the shading to the leaves in a darker green.  Stamp the layers for the small bud directly onto the cardstock, as shown. For the other flowers, stamp them onto separate white cardstock. I stayed pretty true to real fuchsia colours, using light and dark purple, and a dark pink.

After stamping the flowers, use your die cutting machine and the coordinating dies, to die cut the flowers. Attach them onto the panel, using foam squares.

Chose a sentiment that you want – I happened to grab one from my stash, that is old – and stamp it in Versamark ink onto vellum cardstock. Cover the ink with Gold embossing powder, and then set it with a heat tool. I chose to stamp onto vellum so that the pretty flowers wouldn’t be covered up by the sentiment.

Finally, I layered the front panel onto a dark purple cardstock, and then onto a dark pink card base.  Then I added a few rhinestones from my stash, for a little bit of bling.

Color Layering Fuchsia

MORE FLOWERS TO ENJOY!

For this next card, I added a second stem of fuchsias, and created a background with ink and a stencil.

Color Layering Fuchsia

I may have gotten carried away with the number of flowers – but they’re so pretty! I love to have a real basket of fuchsia at my front door, during the spring & summer.

 CREATING THE BACKGROUND

I originally started with a patterned paper background, but decided that it was too busy; it competed with the flowers. So, I put some ink onto one of my clear blocks, and created a wash background with a wet paintbrush on white cardstock. I kept the yellow darker at the top of the panel, and lighter at the bottom.

After the panel had dried, I took a stencil from my stash (I really need to add new stencils to my arsenal!) that is a trellis pattern. I held it in place over the watercoloured panel with purple tape, and applied a medium gray ink. I applied the ink randomly; I didn’t want a solid background.

I repeated stamping the sentiment onto vellum cardstock & embossing it in gold, as I did on the first card. This sentiment is from the Sentiment Collection by Penny Black.

PUT IT TOGETHER

For this card, all of the flowers as well as the long stems were stamped separately, and die cut. Attach them to the front panel with foam squares, and add the vellum sentiment with liquid glue (it won’t show when it’s dry).

Attach the front panel to a layer of bright pink cardstock, and then onto a yellow card base. I used foam tape to attach the layers together.

Color Layering Fuchsia

THANKS FOR VISITING!

I hope you’ve enjoyed seeing my projects today! Please leave a comment, and let me know what you think. The supplies available from the Scrap ‘N Stamp online store are listed below for your convenience. The Color Layering Fuchsia set is available as a Bundle (both the stamps & dies together), as well as separately. Have fun shopping, and creating!

Color Layering Fuchsia

Compensated affiliate links are used where possible, at no cost to you. All products used are personally purchased, unless otherwise noted.


Color Layering Fuchsia Read More »

Sending Hugs – Hero Arts Color Layering Koala Bundle

Sending Hugs – Hero Arts Color Layering Koala Bundle

Hello Everyone. Thank you for stopping by. Todays project is a  Sending Hugs Card using  Hero Arts Color Layering Koala Bundle.

Each bundle  contains a  Color Layering Stamp Set,  co-ordinating dies and the necessary ink to layer the stamps with a successful outcome. In most cases four is the magic number. The four inks in this bundle  are  set AF381 Earth Neutrals Dye Ink  (Charcoal, Cup O’ Joe, Wet Cement and Pumpkin Pie). Green Hills from my stash was added , any green would work.


Hero Arts Color Layering Koala Stamp Set and co-ordinating dies are available to purchase separately too.   They are the same stamps and dies available in the combo pack. Hero Arts Color Layering Stamps have clear instructions on how to layer the stamps on the back of the stamp set  packaging . In addition there are photos of each step and the inks used to achieve each step.

Making the Card:

Starting with  the lightest ink and the  solid stamp, working toward  the darkest shade with  the less area to stamp.  The inks were used in this order:  Wet Cement,  Cup O’Joe and finally Charcoal.

The greenery was stamped starting with the branch with  Cup O’ Joe and the greenery in Green Hills. These two stamps were stamped  three times.

Once the ink was dry the images were cut out using the co-ordinating dies.

MFT Die-namics Stitched Tag-Corner Rectangle Stax  cut a frame with Green  Bazzill Premium Card Stock (counting from the smallest die, six and seven were used to make the frame).  Reserving the negative space (centre) for the card. A  1/4 x 5-1/2″ strip  was  also cut and set  aside  for the inside panel.

A white card stock panel was cut to 4 x 5-1/2 ” for the card front . MFT Die-namics Stitched Tag-Corner Rectangle Stax die number six was used to cut the centre of the panel. This will be used later.

Card Assembly:

A white Card Stock card base was cut  to form a side fold landscape card  11 x 4- 1/2 ” and  scored at 5-1/2 ” . Be Creative Tape 5 mm was applied to top and bottom of the card front. Nuvo Pure Sheen Glitter , Green Meadow was burnished into the tape. Removing any excess with a fine brush.

Onto  the card front panel. The  Tag-Corner frame  is adhered to  the outside of the  the die cut centre, essentially framing the centre  of the panel.  The white panel is attached with Be Creative Tape 3mm between the  Pure Sheen Glitter strips. Foam tape is applied to the white card stock centre and placed back  into the front panel. Liquid adhesive is used to  secure  Bazzil Tone on Tone Polkadot frame centre to the popped up centre of the front panel.

Next the images are added to the popped up centre portion. The larger Koala is added to the right hand side with foam tape for added dimension,   the smaller Koala is adhered with Nuvo Deluxe Adhesive  below the ear of the larger Koala. Greenery is tucked into the larger Koala’s Hand. Two Greenery sprigs are attached  to the bottom left hand side of the Bazzill Premium Card Stock.

Sentiment:

Hero Arts Color Layering Koala Stamp Set ” Sending Hugs”  stamp was  inked with VersaMark Watermark Ink and stamp  onto white card stock. Nuvo Embossing Powder, Hot Chocolate was sprinkled over and heat set.   The sentiment strip was trimmed and added just below the larger Koala’s foot (bottom right hand side of the popped up  green card stock centre )

Nuvo Deluxe Adhesive was applied to the bottom   edge of the inside panel. The Bazzill strip that was reserved for later was attached over the  liquid adhesive.  The inside panel was attached to the inside card base.

Finishing Touches:

Beads were added to the eyes of  both Koalas . Nuvo Prickly Pear  Sequins and Sparkling Crystals were layered onto the card front. Nuvo Glitter Gloss was applied to the greenery.

That completes this card. Until Next time – Karen xo


Sending Hugs – Hero Arts Color Layering Koala Bundle Read More »

Free Shipping Anywhere In Canada