Step Up Your Cards with Masking!
No, not the masquerade ball kind of mask – but the kind used in stamping. You can really step up your cards with the masking technique. It takes a simple image or layout, and adds to it without adding extra layers to your project. Hi there! It’s Deb here for the Scrap ‘N Stamp Design Team, and I hope you’ll enjoy today’s technique.
BASIC MASKING
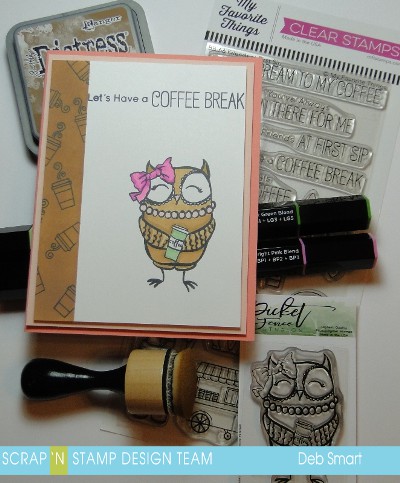
For basic masking, you’re just going to block off an area where you don’t want any ink. For the most basic, we’ll start with just masking off an straight strip on our front card panel. To create your mask, you want to use a low-tack removable adhesive – Thermo Web’s Purple Tape is perfect for this. If you’re hesitant about it tearing your paper, just rub it onto your work surface a couple of times, to remove some of the tackiness. Set up your panel onto either grid paper, or use a ruler for a straight line. Next, use a blending tool and apply ink to the area to the left of the mask. My completed card is below, for reference.

I chose Vintage Photo Distress Oxide ink for a ‘coffee’ feel, and use a Tim Holtz ink applicator for blending it on. With the mask still in place, use the MFT Friends at First Sip stamp set and repeatedly stamp the small coffee cup in the blended area, in Memento Tuxedo Black ink. Be sure to add the little swirl of steam! Once your blending & stamping in that area is complete, gently remove your tape.
CREATE YOUR IMAGE
Use the Picket Fence Studios BFF Owl image, and stamp it to the right of the blended strip, in the Tuxedo Black ink. I chose to colour the owl with my Spectrum Noir Tri-Blend Markers. These markers are great, because they take the guess work out of blending your colours! Each marker has a light, mid and dark tone of one colour. Use the Bright Pink blend for the bow, the Light Green blend for the cup, Pale Pink blend for the pearls & beak, and the Tan blend for the owl. Now, stamp the sentiment from the MFT stamp across the top of the panel. Attach the stamped panel to a light pink panel with foam tape, and then to a card base of darker pink. There you have it! By adding the masked strip, and blending your marker colours, you’ve added extra dimension to your card, without adding more layers!
IMAGE MASKING
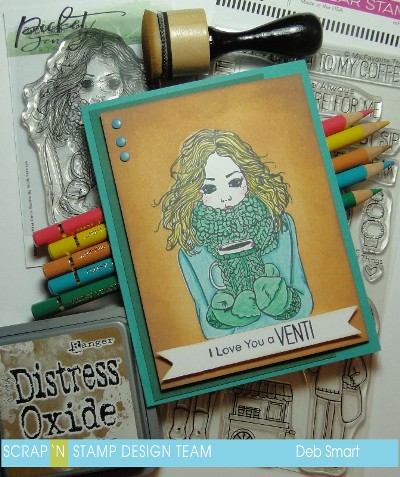
For a more detailed version of masking, first stamp your image onto your card front panel. Now, stamp the image again onto a large Post-It Note. Cut out the image on the Post-It Note, keeping as close to the edges as possible. Place the Post-It Note image on top of your stamped image. With your image covered, use your blending tool to apply ink to the rest of the front panel.

For my card, I first blend on Tea Dye Distress ink, getting lighter towards the image. Next, I add Vintage Photo Distress Oxide ink around the edges, keeping the lighter Tea Dye around the image. This adds extra depth to your card. Once you’re happy with the blending, remove the Post-It Note mask, and colour the Picket Fence Studios Jill Girl. I chose my Faber-Castell Polychromos pencils to colour with, but of course you can use whatever pencils you have, or your markers. Just be sure that whatever you’re using is safe to use with your base image ink, and paper (i.e. if you’re using watercolours, be sure to use watercolour paper and an amalgam ink).
When finished colouring, stamp the sentiment from the MFT Friends at First Sip stamp set in Tuxedo Black ink on a strip of white cardstock. Use your blending tool and add a bit of the Vintage Photo ink to the edges of the strip, so it’s not completely white. Attach the sentiment strip with foam tape along the bottom of the image. Create a card base of teal cardstock, and attach a panel of green/blue to the left side, with liquid glue. Then attach your front panel with foam tape. I had some enamel dots in my stash of embellishments that work with the pencil colours I chose, so I added a few of those in the top left corner.
HAVE YOURSELF A MASK BALL!
Try stepping up your next card with some masking! It’s easy to do, and can be used any time. Plus, it doesn’t require a lot of extra or special tools. I hope that I’ve inspired you to branch out a bit with your creating. Have fun! Thanks for spending some time with me – see you next time!
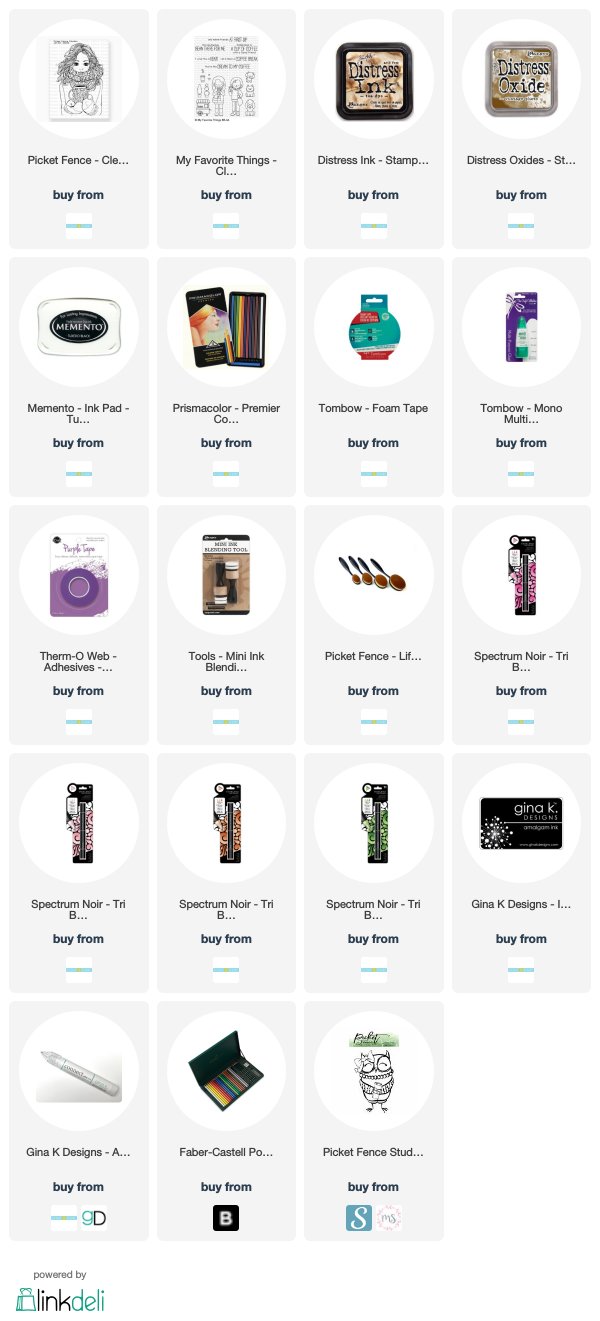
If you’d like to order some supplies for your project, I’ve included links below, for online shopping.
Compensated affiliate links are provided where available, at no cost to you. Your purchase through these links provides me with a small percentage, which helps keep my blog going, to share with you! Thank you in advance!

Step Up Your Cards with Masking! Read More »


