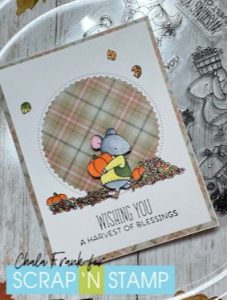
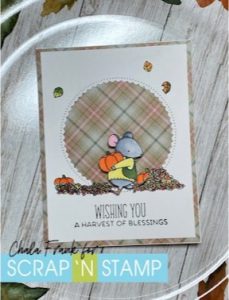
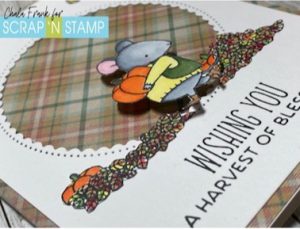
Sizzix Autumn Blessing Card
A few Tim Holtz Skeleton Leaf dies and the Autumn Blessing Stamp from MFT and you have the perfect card for fall. Raya here filling in for Tara while she’s on the move – she’ll be back next month with cardmaking goodness. I chose this card to reshare with you because it uses the same sentiment stamp we used last week.
Tara’s Original Post —-
Happy Tuesday! Today’s challenge word is “campfire” which may have had you wondering a bit… or maybe you are a big Distress Ink fan like me and you knew exactly what to expect- a project featuring the newest Distress color, Crackling Campfire! I’m kinda loving how Tim Holtz is releasing a full set of each color at one time (and thankfully not too close together so my bank account can handle it) as it really lets you play and experiment with the different mediums. I’ve used several on todays card, hope you like it!
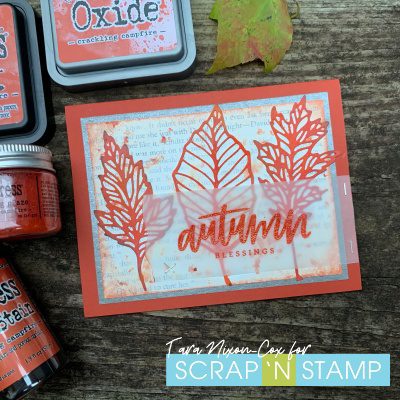
Today’s card also features the gorgeous Skeleton Leaves die set by Tim Holtz. I cut them from a piece of watercolor paper which I had inked up with Crackling Fire Distress Ink, as well as a bit of Fossilized Amber & Carved Pumpkin. Once I cut the leaves, I added a bit more Crackling Fire- both Oxide & Regular Distress Inks, and a bit of brown to add some depth to the edges of the other two leaves.
I took a piece of book print which I had applied a thin layer of white gesso to and trimmed it down to size over a pewter layer. After inking the edges, I splattered a mix of both sprays- the Spray Stain and the Distress Oxide Spray. I was curious to see how they would differ on the prepared surface. I misted it lightly with water and left it for a while… when it still wasn’t dry I misted it a bit more and pressed some tissue paper onto it to life some of the color and help it dry faster. This gave a much softer background than I initially had, and some fun splotchy bits as the inks reacted with water. FYI, most of the lighter spots are from the Distress Oxide Spray, the deeper from the Spray Stain.
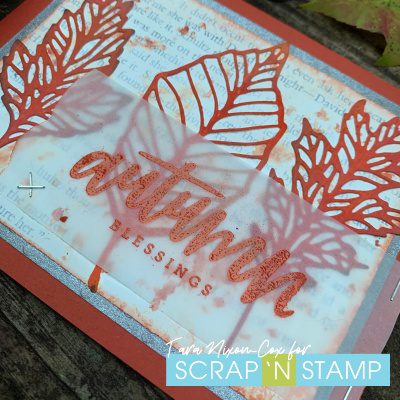
The final element of my card is the sentiment- another one from Autumn Blessings by MFT. I embossed it with the Embossing Glaze over the oxide ink on vellum for a soft finish. A mini stapler (Tim’s Tiny Attacher) ads an easy & fun way to adhere the vellum. I also added a bit of clear adhesive behind the sentiment so it would be hidden.
I hope you enjoyed my first play with Crackling Campfire! You’ll be seeing a lot more of it in the near future… can’t wait to try different color combos with it, it’s such a gorgeous color perfect for autumn!
Be sure to put Friday on your Calendar- our October blog hop is happening then and we’ll be coming at ya with all of our best fall inspiration!
Inky hugs,
Tara
Sizzix Autumn Blessing Card Read More »

 I hope you enjoyed today’s card technique and I would love if you posted what you create over at the Facebook Challenge page!