Excuse me for getting a little bit silly… but we just couldn’t help naming our April Blog Hop, which is all about Polka Dots, a Polka Hop!
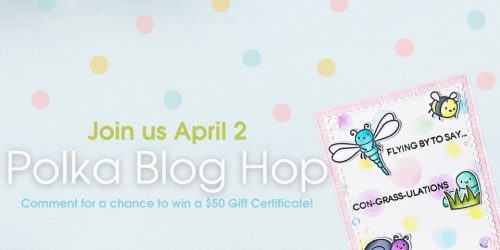
There’s something about polka dots that can’t help but make you smile, so I hope you’re ready for a cheerful blog hop! Please leave some comments along the way and be sure to check back later this month to see if you won!
I actually made two cards to share, both use the same materials but have very different vibes. I’d love to hear which one is your favorite and speaks more to your personal style! Here’s the first card which is very simple, but playful and colorful!
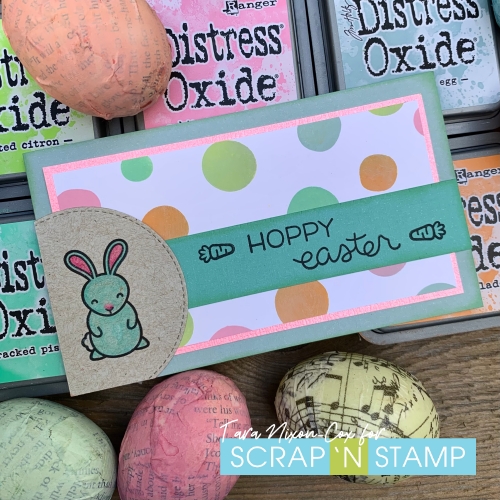
I’m using the Heffy Doddle Dotty Lottie Stencil together with the mini Hoppy Easter stamp set by Lawn Fawn and assorted Distress Oxide Inks. (Twisted Citron, Kitsch Flamingo, Speckled Egg, Cracked Pistachio, Spiced Marmalade). I wanted the star of this card to be the fun polka dots from this stencil, which I taped over white Cardstock and applied color with some Life Changing Blender Brushes. I did one color at a time, inking about four dots per color and it actually worked out pretty balanced for me! This is a really fun stencil, with assorted sizes of dots that are not perfectly round. I love that they are a little bit wonky! (By the way, this stencil is also included as part of the Spring Fling Kit that is new in the store! Check it out!). I chose to use Distress Oxide Ink here because I wanted that soft, opaque, chalky like finish you get when blending with them.
Once I had my background (and set it aside to dry for a bit so I wouldn’t smudge it!) I stamped my bunny and sentiment on some scraps of paper. I chose a light Kraft card for the bunny and a strip of a minty green for the sentiment. Since I had talked about trying the Mini Slimline size recently, I decided this was a good chance…and happened to find a piece of card stock that was the perfect size, ready to go! My card is folded on the left side and is 3.5×6 inches. As it happens, this is exactly the size I cut off a 12×12 sheet of card stock when I am trimming it down to make A2 cards!
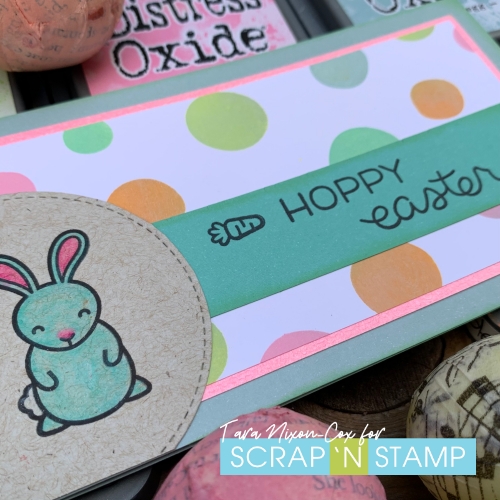
I used watercolor pencils to color my bunny, then blended with a Spica glitter pen for a bit of shimmer that you can’t see here. I also added shimmer in the pink layer between my dots and the base card. I hadn’t stamped the bunny in a spot that allowed me to cut a full circle around him, so I decided on a corner cut and planned my card design around that!
My second card uses the rest of the piece I cut that first bunny out of… together with a dotty background made when I was cleaning off the inky stencil! Isn’t it funny how the cards you make from leftovers sometimes turn into your faves? Or am I the only one that does that?
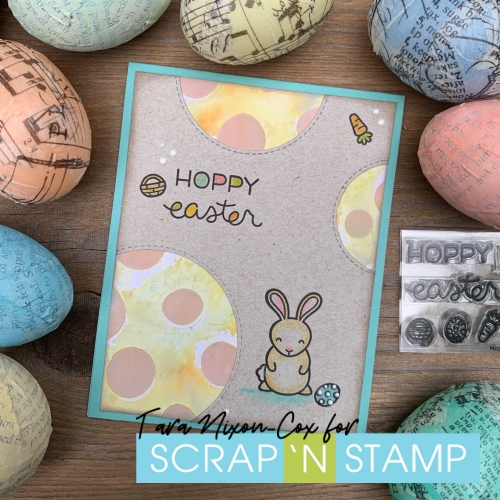
This background though… it started with a spritz on the inky stencil, which I smooshed face down on some white Cardstock. When I lifted the stencil, I liked it, but since there were a lot of white spots, I spritzed again and repeated the smooshing. While the stencil was hanging out there, I pulled out a brush and started applying some ink through it. The colors blended together giving a bit of a brownish hue, so I decided to stick with one color (kitsch flamingo, if you can believe it!) and work with that. There was a bit more brownish blending and some oxidization from the water I’d spritzed… but it had a sort of vintage vibe that I really liked!
The bunny was already stamped in this spot (I typically stamp things I’m going to color twice in case I ruin one of them) so I designed my card around it.
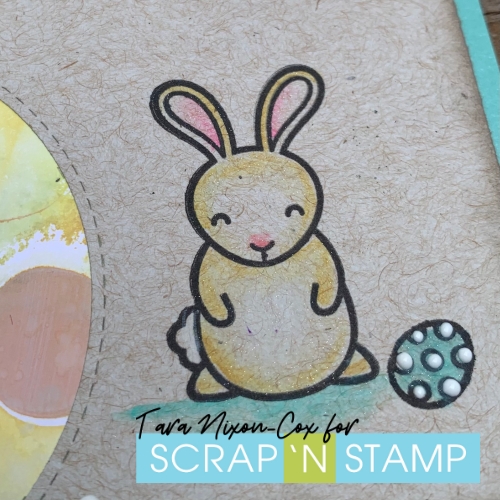
His ears were already colored with a pale pink hue (I cleaned off my wet brush on this image between colors!) so I continued that feel adding a brownish yellow, a bit of white and some blue for the egg and the ground beneath him. I added some Nuvo Dots for a bit of bright white and glossy texture.
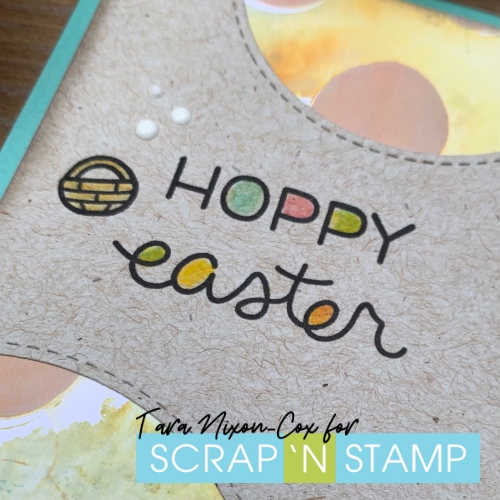
I think I used every stamp in the mini set on this card! (except the exclamation point) and had fun adding bits of color to the words & images. I’m a sucker for anything Kraft, and this soft one gives a nice touch for spring. I really like how it works together with my background which is inky & imperfect. I hope you like it too- but I know everyone’s taste is different, so please let me know which of the two cards is your favorite!
Next up on the hop you’ll pay a visit to KIA– she’s sure to have something fabulous and colorful to share with you!
And here’s the full hop lineup:
Don’t forget, each comment you leave along the hop is a chance to win a $50 gift certificate to shop in the SNS online store! Happy hopping!
Inky hugs & HOPPY Easter!
Tara

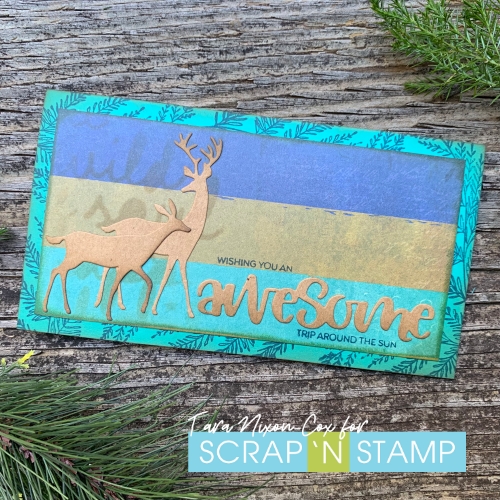
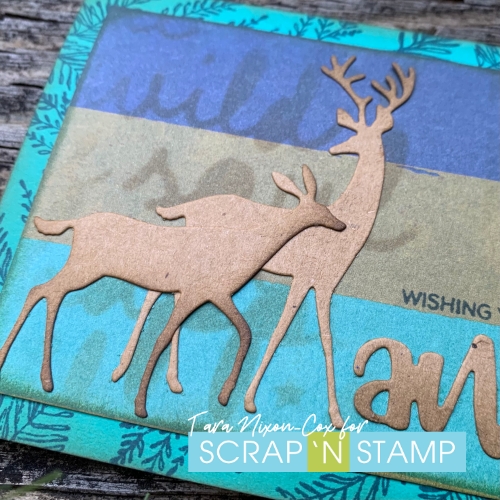 I tried several colors of card base before I settled on this teal color- it wasn’t quite right until I added a bit more brown Distress to soften it. I also tied the layers together by stamping some