Scratch-N-Stamp
Search

Checkout

Keep up with Sales, New Products and other events at Scrap `n Stamp. Sign up for our newsletter now!

What's New

Hot Deals


Nuvo

I’m Dreaming of a White…

… martini? 😀  Today’s Random Act of Cardness prompt on the Scrap ‘n Stamp challenge page is WHITE! Here’s my take on a white card:


I don’t know about you, but some days when the holiday crunch is getting to me, this might just about sum up how I feel. 😀  As a festive card, I wanted lots of sparkle, so I started off with a Picket Fence martini stencil and some moonstone Nuvo glimmer paste. While that dried, I cut the My Favorite Things martini glass from some white glitter cardstock as well as two more from regular cardstock so I could layer them together. I also added a couple of layers to the MFT sassy sentiment, which I embossed with some sparkle embossing powder. I think we all know how tricky shine is to photograph, but this close-up at least gives a hint:


If you’re still working on holiday cards, I hope you’ll consider making a white card of your own, and adding it to the challenge page for a chance to win some Scrap ‘n Stamp spending money! Thanks for checking in today.

I’m Dreaming of a White… Read More »

Puppy Love: SNS February 2021 Blog Hop

Hi!  We are so glad you’ve joined us for our February “Puppy Love” blog hop!  Today’s cards are sure to make you smile and hopefully bring some warm fuzzies your way!

We hope you enjoy the fun twist we’re giving our valentines this year and that you’re inspired to play along with us!  We love hearing what you think about our projects, so please leave us some comments along the way.  You never know,  yours might win you a $50 gift certificate to spend at the SNS online store!

Once again, I get the fun of kicking things off here with my card!  I kept on the trend I started with my last card, working with shades of PINK Distress Ink (can’t wait to add Kitsch Flamingo into the mix!), this time using them to watercolor on some Distress Mixed Media Heavystock.

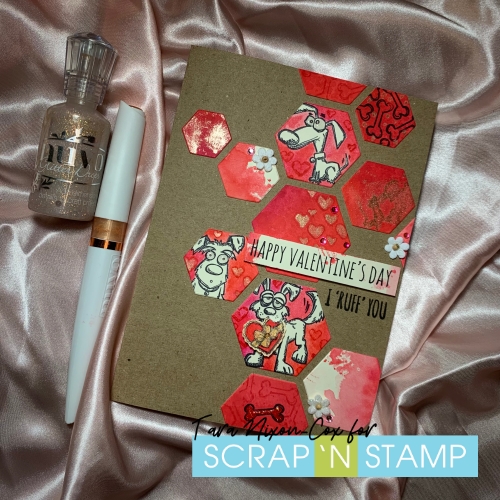
I’ve used some older Tim Holtz stamps that I know are faves of a lot of people, the crazy dogs!  My card features images from the mini cats & dogs stamp set and the Happy Valentine’s Day sentiment from the Crazy Talk stamps.  The hearts & chocolate box are from the mini bird crazy & things set (it’s not in stock, but here’s the larger version if you want to pair it with the original sized stamps).

I started with two half sheets of heavystock.  On one, I did some ink blending & smooshing with a variety of pinks, layering the colors for some fun texture.  On the second I stamped a few dog images in Archival Black Ink, and painted around them with the same mixture of colors, picking up ink that was left on my work surface.  I then die cut a variety of  sizes of hexagon tiles out from both of the papers.

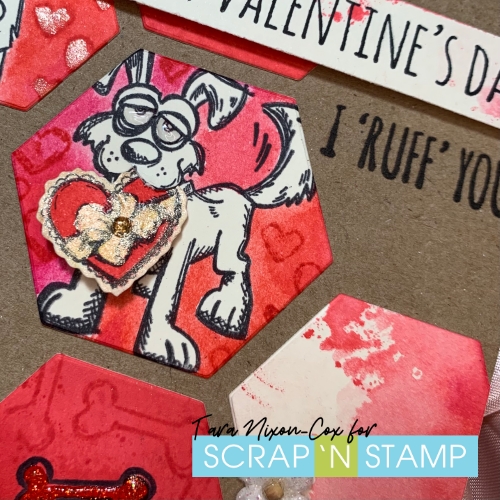
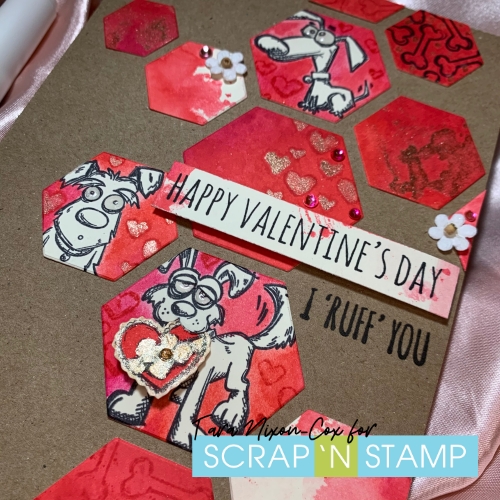
Once cut, I added some details with smaller stamps, some tone-on-tone & some black to mix things up.  A Nuvo Aqua Shimmer Pen was a fun touch to add shimmer to the details.  As a bonus, it also made for some really pretty smooshes for a marbled look on some of my tiles when I ‘mopped’ it up off my work surface!  A few touches of Honey Gold Glitter Drops also added a fun touch.

For finishing touches, I used foam squares under the sentiment and the box of chocolates.  I also added some tiny paper flowers & bits of bling for a bit of texture.  I kept debating whether I should color in the dog images, but in the end I’m quite pleased with the monochromatic look this card has, keeping the images black & white (or cream, in this case).  I hope you like it too!  I’ve got a few extra tiles cut out that I’m hoping to work into another card to share with you soon!

Now that you’ve seen my card, here’s the full hop order!  Next up, you’ll visit Kia… be sure to leave comments along the way for your chance to win a sweet $50 gift certificate at SNS!

Tara (you are here!)
Happy Hopping!
Inky Hugs & Puppy Love,
Tara

Puppy Love: SNS February 2021 Blog Hop Read More »

Do You Wanna Build a Snowman?

I hope everyone is doing well! It has been a beautiful weekend.   It was made better by all the snowfall we have recently gotten…almost 30cm!  The first thing that came to my mind when I saw all the snow was…..Do you wanna build a snowman?  So, that is exactly what we are going to do for today’s card!

I  want to make a car in which the snowman “came together” on the front like you were building it.  I didn’t think I had enough room on a standard A2 size card so I thought I would use a slimline style.  The base for this slimline card measure 7″ x 8 1/2″ and then is scored at 3 1/2″.  I made two bases and I will adhere them together with scor-tape to create a gatefold / trifold type of card.

To create a snowy background I ink blend the two flaps (gate folds) with some Distress Oxide Inks in Faded Jeans, Salty Ocean and I will bring in just a bit of Black Soot to deepen the Faded Jeans around the top.  I use two types of blending brushes.  The standard foam brushes and Picket Fence Blending Brushes.  I like how much ink the standard foam brushes lay down and I love the way the Picket Fence brushes blend the colours together so smoothly.

Once the ink blending is done I add some water droplets with a find mist sprayer and some sparkle with the Hero Arts White Iredescent Shimmer Spray.  This will give the look of snowfall in the background by the water pushing the pigment out.  You can create larger snowflakes by unscrewing the sprayer and tapping the water directly from the straw.

Make sure you let this dry or use a heat gun to speed up the process.  You want to make sure that the ink had dried and set before going on to the next step.

While I let the ink dry I die cut 3 circles in 3 different sizes to create the snowman’s body.  I also used my Silhouette machine and a cut file to create a hat, scarf and nose.  You can fussy cut your own accessories if you don’t have an electronic die cut machine.

Once my inked panels were dry I trim down each gate fold so that they measure 1 3/4″ and that they would close nicely against each other.  I then began to adhere the snowman parts to the card with some Gina K Connect liquid adhesive.  I encountered a bit of a snag in my plan and to find out what that is you will have to watch the video below.

http://youtu.be/QxAPyq7NUZw

The base and head of the snowman are adhered directly to the left panel of the card and the middle of the snowman is adhered down with foam squares to allow clearance for the snowman body to interlace into each other.

Now it’s time to decorate our snowman.  I adhere the hat and scarf with some more liquid adhesive and decided to use Nuvo Drops in Ebony Black for the eyes and buttons.

The card needed a bit of glitter so I used the Nuvo Glacier Paste in Winter White to create puffy snow on the bottom and the Nuvo Glitter Gloss to add some magic to the top hat.  The only thing left to do is to write a message on the inside.

I hope you enjoyed today’s Snowman card!  Remember to post the snowmen you build on the Scrap’N Stamp Facebook Page.


Do You Wanna Build a Snowman? Read More »

Free Shipping Anywhere In Canada