Scratch-N-Stamp
Search

Checkout

Keep up with Sales, New Products and other events at Scrap `n Stamp. Sign up for our newsletter now!

What's New

Hot Deals


p.s. i love you

No Cha-Ching Bling Christmas Cards

Hey guys, I am back to share two “No Cha-Ching Bling” Christmas cards with you.

What is that you ask? Well, I wanted to share a card that had bling without you having to spend any money or break the bank if you need to . Most of the supplies I am sharing you likely already have in your stash!
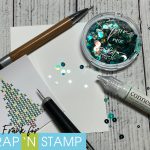
For my first card I KNOW that we all have sequins in our supplies. We have all taken that fateful trip to the dollar store and purchased sequins because we knew they would make great embellishments and you bought every colour and now they are sitting there all lonely wondering when it will be there turn to be used on a card! Here is your chance to use them. Oh – I should probably let you know that the inspiration for my cards today was brought on by two other crafts – cross-stitch and diamond painting. So if you don’t like either…..well, I hope this changes your mind! Let’s start with the first card!

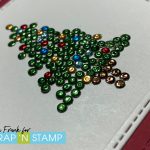
Pull out your sequins, find yourself a fun cross-stitch pattern for inspiration, or free-hand a design you like. My inspiration today is a Christmas Tree cross-stitch pattern I found on Pinterest. I printed the picture out and will actually use it as reference for both my cards today.

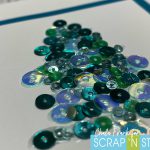
I closed my eyes stuck my hand in my sequin drawer (yes, I have an entire drawer for sequins – don’t judge me) and pulled out the Spiked Ocean Water Sequins from Picket Fence Studios.

The next step is very difficult….find your favourite clear drying glue. I say it is difficult because I actually have a few….Glossy Accents and Gina K Connect Glue are my favourite. Gina K won this time as she was the closest at hand.
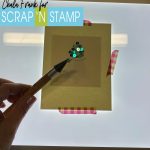
I then just added glue in the shape of the tree and began adhering the sequins keeping in mind which colours and sizes I was laying down to help it look pleasing to the eye. This is made a lot easier by using reverse tweezers, a Jewel Picker and the Tim Holtz Craft Pick. You could be even more particular and follow the cross-stitch patter and match up the colours with the sequins, but because of the ones I picked I didn’t have a large variation in colours…so mine is more monochromatic. Once I was done adhering them down I set that aside to dry very well.

When I was sure everything was dry, I used my Fiskars sure cut paper trimmer and trimmed down the image and backed it onto some coordinating cardstock and adhered to my card leaving enough room to stamp a sentiment underneath with Versafine Claire Nocturne Ink

For the sentiment you can really use any one you like that you think works well with the style of card. I am sure we all have a ton of Christmas sentiments that we can choose from! And that finishes card number one! Pretty quick and simple except for the glue part – LET IT DRY!!!
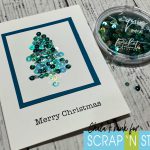
Card two!! This one is more of a diamond dot painting type card…so, it took a bit more patience but was worth it! If you are a girl from the 80s/90s I know you have some hot fix crystals somewhere! lol! Or you can even use jewel embellishments.
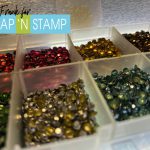
I had some hot fix crystals that I pulled out and used my hot tool to adhere them to the cardstock. This time I followed the cross-stitch pattern a little more carefully…but not 100% Again, if you are using embellishment jewels you can just adhere them with your favourite clear drying glue.
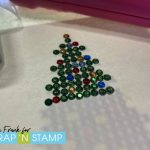
I used a two of the Small Stitched Square Stackable dies from Lawn Fawn and used the smaller of the two to die cut the hot fix crystal tree. I ran it through my Gemini Jr. and was pleasantly surprised to see that all the crystals remained in tact. I adhered that onto the large stitched square that I die cut from some red cardstock and again adhered to a card base and stamped a simple sentiment with the Versafine Claire Nocturne Ink.
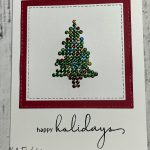
I hope that you enjoyed today’s simple yet beautiful bling cards! Leave me a comment to let me know which card you liked the best the Sequin card or the Crystal Card.

Remember to play along with the Scrap’N Stamp Random Acts of Cardness Facebook Challenge for your chance to win some great prizes!!

Enjoy the rest of your weekend!

Chala xoxo

Images not showing?  Head over to my blog by clicking HERE to check them out!

No Cha-Ching Bling Christmas Cards Read More »

Perfectly Pink Mother’s Day Card

Happy Hump Day Everyone!

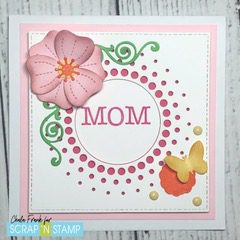
I am excited to be back and I am really enjoying the Random Acts of Cardness Challenge happening over at the Facebook Challenge Page. Today’s word is of course –  PINK!  Not just one of my favourite musical artists but also a perfect colour for my Perfectly Pink Mother’s Day Card!

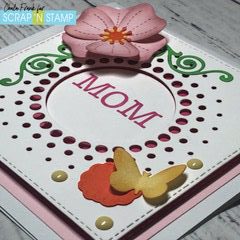
I love mixing old and new products as well as combining different brands together.  For this card I am using a Large Stitched Square Die from the nesting set of Paper Rose, Stitched Squares, The Pretty Poppies Die from Lawn Fawn (although I think the Flower Power set would also be super cute!), the Large Circle Burst from Memory Box, as well as a few dies from the Sizzix Butterfly Embossing Folder and Die Set.

I found that with cards with many layers and die cuts it is easiest for me to do all my die cutting at one.  It is went especially fast since I was able to use my Gemini Jr. die cutting machine.  I received it last year for my birthday and I have declared it a necessity in my craft room and it is worth every penny my husband spent on it!  LOL!

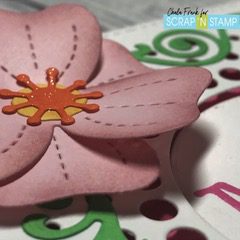
Once I had all the die cutting done I wanted to add some dimension to the flower and some of the other embellishment images with Distress Inks.   I used Wild Honey, Victorian Velvet, Spiced Marmalade, Ripe Persimmon and Bundled Sage and a picket fence blending brush to add some colour to the edges of the die cut images.  I really like how it add texture and dimension to the flower.

After the ink blending it was time to layer the images together to create my scene.  You can watch the YouTube video below to see how the card came together.

I used Gina K Connect Glue to adhere all the smaller die cuts together and for the dark pink stitched square I adhered that with my tape runner onto a 6 x 6 Square Card base.  I stamped the “MOM” sentiment with an alphabet stamp in Picked Raspberry Distress Ink using my Stamp Perfect (which is not exactly centred…but, that’s okay!) I then glued the white circle from the Large Circle Burst with the liquid adhesive and popped the rest of the Circle Burst die cut up with some Foam Squares.  The final touch was to add some enamel coloured dots and some Clear Wink of Stella to the centre of the flower and the small butterfly die cut.

This card was really quick to make and I am really happy with the way it looks.

Remember to play along with the Random Acts of Cardness Challenge this month as we love to see what you all create!  Also, if you missed this month’s Blog Hop be sure you check it out and leave your comments on each participants Blog Hop for your chance to win a $50 Scrap’N Stamp Gift Card.  The winner will be announced on May 14, 2020!

Happy Crafting!

~Chala

Perfectly Pink Mother’s Day Card Read More »

What the Flock?

Hey Crafters!

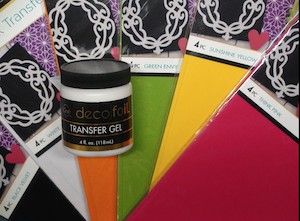
Anybody else feel like.. What the Flock is going on in the world today?  Well…I am going to embrace the isolation and get to know some crafting materials I haven’t played with before.  Thankfully Scrap’N Stamp is still able to deliver and I ordered some Deco Foil Flock Transfer Sheets.  There are so many fabulous colours to choose from…and of course I ordered as many as I could!

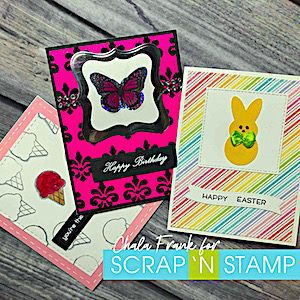
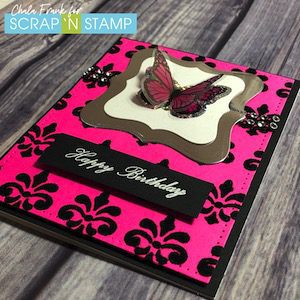
As soon as I saw these I had several ideas come to mind.  The first was to incorporate our current stencil theme and I created a super chic birthday card with the Fleur de Lis stencil from My Favourite Things.  I think this will work really well with any flourish or geometric stencils.

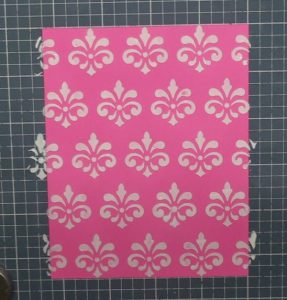
You will also need the Deco Foil Transfer Gel or the Duo Gel  and a laminator (or iron).  With the help of my Wendi Vechhi Make Art Stay-tion and a craft pallet knife I spread a thin layer of the Deco Foil transfer gel evenly over top of the stencil.  I removed the stencil and set the wet stencil piece aside to dry for about an hour. The transfer gel starts off as white and will dry clear.  Remember to wash your stencil with warm soapy water right away.

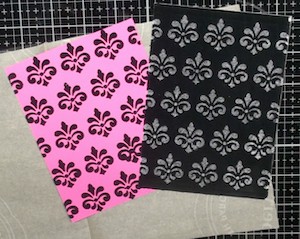
While the gel is drying I went ahead and prepared the rest of my embellishment pieces by die cutting some elements from mirrored and white cardstock  I also took the time to preheat my laminator for a good 20 minutes.  Once the transfer gel has dried clear, place the Deco Foil Flock sheet fuzzy size down on to the dried transfer gel.  I use parchment paper as my carrier sheet and I ran it through my laminator twice to ensure good adhesion. Then, gently peel back the liner paper off the flocking.

I am so pleased with the outcome of the black flocking on the hot pink cardstock.  It reminds me of the old textured wallpaper that people used to have, so gaudy looking but so awesome at the same time!  I used my Elizabeth Craft rectangle dies to add more interest and a decorative edge.

I found some jewelled ribbon in my ribbon drawer that adds just the right amount of bling to the background and then use Gina K Connect glue to adhere it to the panel, making sure I wrap the ends around to the back.  I secure the panel down onto some Lawn Fawn Black Liquorice cardstock and adhere it to an A2 side folding card base with foam adhesive.

I layer the mirrored and white cardstock element pieces on top of the jewelled ribbon securing the pieces with Be Creative Scor-tape.  During one of my trips to my local dollar store I scored big and found some gorgeous 3D butterfly stickers that worked perfectly for the main element of this card.

I then chose a simple Happy Birthday sentiment in a script font stamping with VersaMark ink onto some more black liquorice cardstock and heat embossed with white embossing powder.

I think this card is so elegant looking and I have someone very special in mind to give this to!

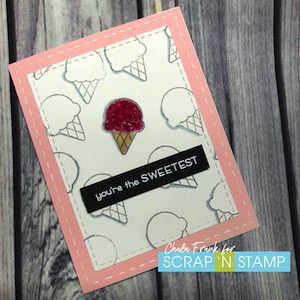
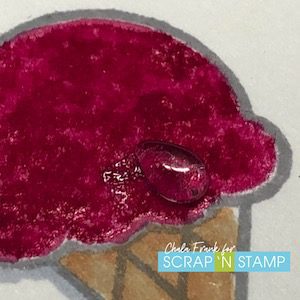
For my next card I wanted to show you that you can use the Deco Foil Gel and flock sheets without stencils as well!  I stamped a background with the ice cream from Lawn Fawn’s Sweetest Flavor and in Hickory Smoke Distress Ink.  I want one of the ice creams to stand out so  I use a paint brush and paint the ice cream mound with the Decal Foil gel.   Again you will know it is ready to flock once the gel dries clear.  This time it was a bit trickier to tell when it was dry as it was on top of white card stock.  I followed the same procedure as my first card, layering the flock fuzzy side down, wrapped in parchment paper and I ran it through the laminator twice.  I must not have put enough of the gel on as it was a bit spotty in areas.  That’s okay though, I used my copic markers to gently darken in the area with a similar colour.  I did very simple colouring and shading and did another black sentiment strip with white embossing.  I layered this panel onto light pink cardstock and used my white gel pen to add a boded of white stitch lines.  To give the ice cream an extra special look I added a tear drop crystal from Studio Katia adhering it with Glossy Accents.  The glossy accents, jewel and flocking made a realistic textured look to the ice cream.

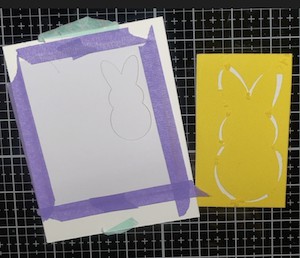
As soon as I saw that Sunshine Yellow flocking I knew exactly what card I wanted to make! I also wanted to try using my Silhouette machine with the flocking. The one thing you want to remember is that you will need to cut the flocking with the white backing piece up.  Otherwise, the blade just scrapes off the flocking.  See the photo below.

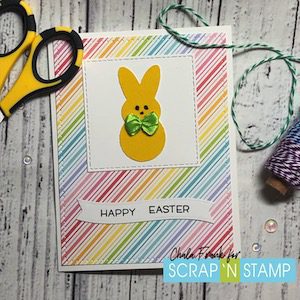
I taped down the flocking onto a piece of cardstock with some purple thermoweb tape and then stuck that onto the adhesive carrier sheet.  You do not want to place it down directly onto the adhesive carrier sheet as all your flocking will stick to the sheet!  I cut a simple bunny silhouette shape to create this fun “Peep” card!  I used a copic marker to add the little face, I used several Lawn Fawn products including the sentiment from the Easter Party stamp set, die cut banner from the Double Slider Surprise die set and the Really Rainbow cardstock worked so well as my background.  I love how this one turned out!  So cute!

I can’t wait to use this flocking on other card creations and I hope that these cards inspire you to add some flocking to your cards.

Stay safe and crafty!

Stay safe and crafty!
xoxo, Chala

~Crafting Through the Chaos of Life


What the Flock? Read More »

Free Shipping Anywhere In Canada