Scratch-N-Stamp
Search

Checkout

Keep up with Sales, New Products and other events at Scrap `n Stamp. Sign up for our newsletter now!

What's New

Hot Deals


papercrafting

I Made a Box…


It’s my first January post here on the Scrap ‘n Stamp blog, so happy 2022! I’ve actually been taking a bit of a crafting break to deal with some other *stuff*, and to get back into the groove, I spent some time making something totally different from the usual – I made a Graphic 45 chipboard box!
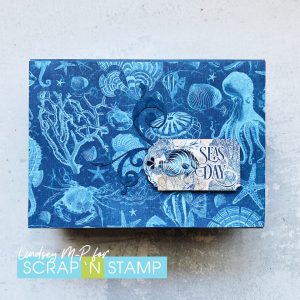


Scrap ‘n Stamp offers a number of different Graphic 45 kits, and I picked the Ocean Blue Kit, which has everything you need to make this box, as well as a mini-album and decorative matchboxes, with lots of paper and ephemera left over.  The full-colour instructions are detailed and easy to follow. Of course, I had to add my own spin, and switched the papers around so that I could have a blue box with a tan interior, rather than the reverse. I did this both because I prefer blues to neutrals, and so it would fit with the January Random Acts of Cardness prompt, BLUE! 😉

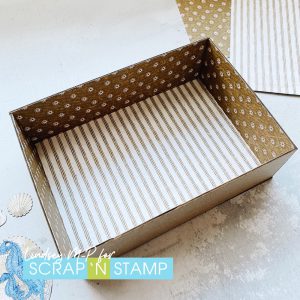
To start, I covered the bottom inside pieces of the box with my chosen papers and adhered them together. I think adhesive choice is important with a project like this, so for paper-to-chipboard I used Nuvo Deluxe Adhesive, and for chipboard-to-chipboard, I used Ranger multi medium matte for extra strength. Here’s the box base:


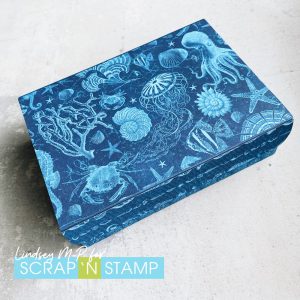
The box lid comes next, with paper on both sides before adhering it to the bottom using a paper hinge. The lid flap is also attached with a hinge. Extra long strips of paper are adhered around the the box to strengthen the sides. At this point, my box was essentially done apart from a few embellishments:
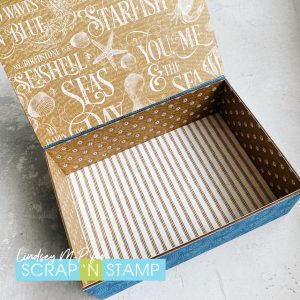


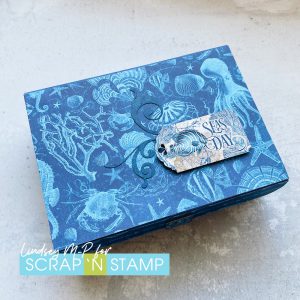
In keeping with my usual style, I kept my embellishments clean and simple, with a few die cuts on the lid, and a reinforced sticker element as a lid clasp. Here’s another view of my finished project, along with a close up of the lid:
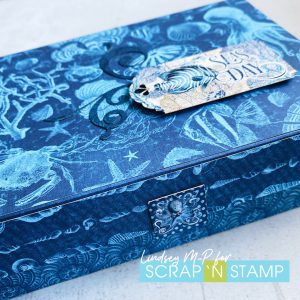


This project was quite the departure for me, but it turned out to be a lot of fun to make! Next up, I plan to make some cards using the kit elements to add to my box. I’m thinking one of the matchboxes would be a perfect addition for holding postage stamps! Thanks for checking in today, and I hope you’re playing along with the Random Acts of Cardness Challenge for your chance to win a $50 gift code to the Scrap ‘n Stamp store!


I Made a Box… Read More »

Zippy Zebras Fun

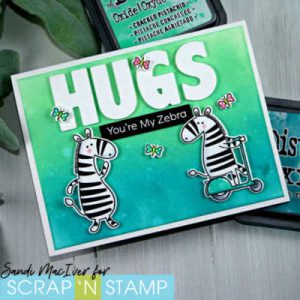
Hi crafty friends and welcome back.  Sandi MacIver here and I have some Zippy Zebras Fun to share with you today.  This adorable Zippy Zebra stamp and die combo is from our friends over at My Favorite Things.  Their stamp artwork is always adorable and uplifting and this set is no exception.  Who can resist a Zebra on a scooter?  NOT ME!   haha.

Zippy Zebras Fun

I started by blending the background in Peacock Feather and Cracked Pistachio Distress Oxide Inks for a bright playful look.  Next, I splattered with water for some distressing.

Zippy Zebras Fun

The black and white Zebra stamping is super easy and you can use Copic Markers Co and C1 (light grays) to add a little shadow down the side for depth.

I colored the scooter with Copics in Blues:  BG11, BG13, Bg49 and the tires in C5 and C6 with a bit of White Gel Pen to highlight.

Zippy Zebras Fun

There are sweet butterflies and flowers in the stamp set too, as well as coordinating dies which I have used to cut out my Zippy Zebras (love that name).

Next I cut out my “Hugs” from white card stock using Alpha dies.  The final sentiment is white heat embossed on black.

The large letters and Zebras are mounted to the card with Foam tape to add depth and extra interest to the card front.

This stamp set is fast and fun, would look great with any background and works for all occasions ….a must for your stamping stash.

That’s it for me today, Hope you enjoyed the card and here is a list of the supplies I used.  Clicking on them will take you to the Scrap ‘N Stamp Store where you can see a larger image and add them to your shopping cart.

Until next time – Toodles!


Zippy Zebras Fun Read More »

More Hot Foiling

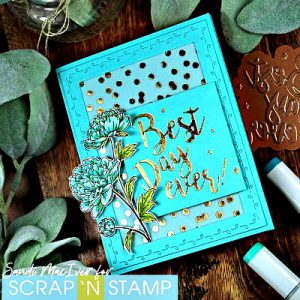
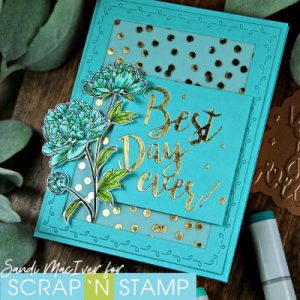
Hi crafty friends and welcome back.  It’s Sandi here and I decided it was time for some more HOT FOILING.   I combined it with  Gina K Peaceful Floral.  I haven’t used my hot foil machine since before Christmas and I recently purchased the Spellbinders Glimmer Scattered Dot Pattern die as I thought it would make a great background.

Before Diving into the card, just a note:   Raya is offering 10% Off Hot Foil products over in the Scrap ‘N Stamp Store starting today through Jan 30th, get the coupon code at the end of this post.  Thank you Raya!

More Hot Foiling

I also decided to try foiling on card stock vellum (40 lb) to see how it worked and looked, and I think it looks FABULOUS.  This is the 40 lb vellum, often referred to as card stock vellum, I have not tried the lighter vellum, as I think it might pucker with the heat, I’ll give that a go another day, LOL.


More Hot Foiling

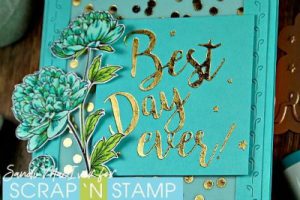
The card sentiment is also hot foiled.  This is Spellbinders Glimmer Best Day Ever die plate gold foiled onto Gina K Turquoise Sea card stock.

Card details:

  • I die cut a piece of Gina K Turquoise Sea card stock with the Penny Black Leaf Stitched Frames.
  • Next I attached my foiled piece of vellum to the back of the frame before attaching it to my A2 card base.
  • I heat foiled the sentiment and added that with foam squares to add dimension to my card.

  • I used my MISTI to stamp the Gina K Peaceful Floral image onto a 4-1/4 x 5-1/2 piece of White card stock.  Using the Misti allows me to stamp a couple of times to get a nice dark outlined.
  • I used the Gina K Amalgam Black Ink for this as it’s waterproof and Copic friendly.
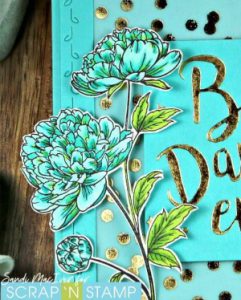
  • Next I colored the image with only SIX Copics:  The flower is done with BG11, BG13, BG49 and the leaves in YG03, YG17 and YG67
  • You may notice a bit of green in the flowers:  I like to take the lightest green and use it for a little highlight in the flowers, I think it really adds life to the image.

More Hot FoilingOnce the floral image was colored I cut it out and used small pieces of foam squares on the back to attach it to the card to again add a bit of depth.

That’s it, a quick and easy monochromatic card, with a pop of wow thanks to my Gemini Hot Foil Machine.

SAVE 10% on HOT FOIL at Scrap ‘N Stamp – use code SMFOIL10 – good on Spellbinders and Gemini Foil Press Products and good through Jan 30th.

valid on in stock items only.  Not valid with any other sale, promotion or coupon.  Not applicable to previous purchases.

I have listed the products I used below, you can click on them for a larger view

Until next time – Happy Stamping


More Hot Foiling Read More »

Free Shipping Anywhere In Canada