Scratch-N-Stamp
Search

Checkout

Keep up with Sales, New Products and other events at Scrap `n Stamp. Sign up for our newsletter now!

What's New

Hot Deals


Penny Black

Fun With Distress Oxides

Hi Everyone. It’s March 1st and it’s still so cold out. I’m really

hoping it warms up soon. I spent last night in my craft room

where it’s warm playing with my distress oxide inks. I set the

camera up to record all the fun but apparently I forgot to hit

the record button – oops. But I do have lots of pics for you.


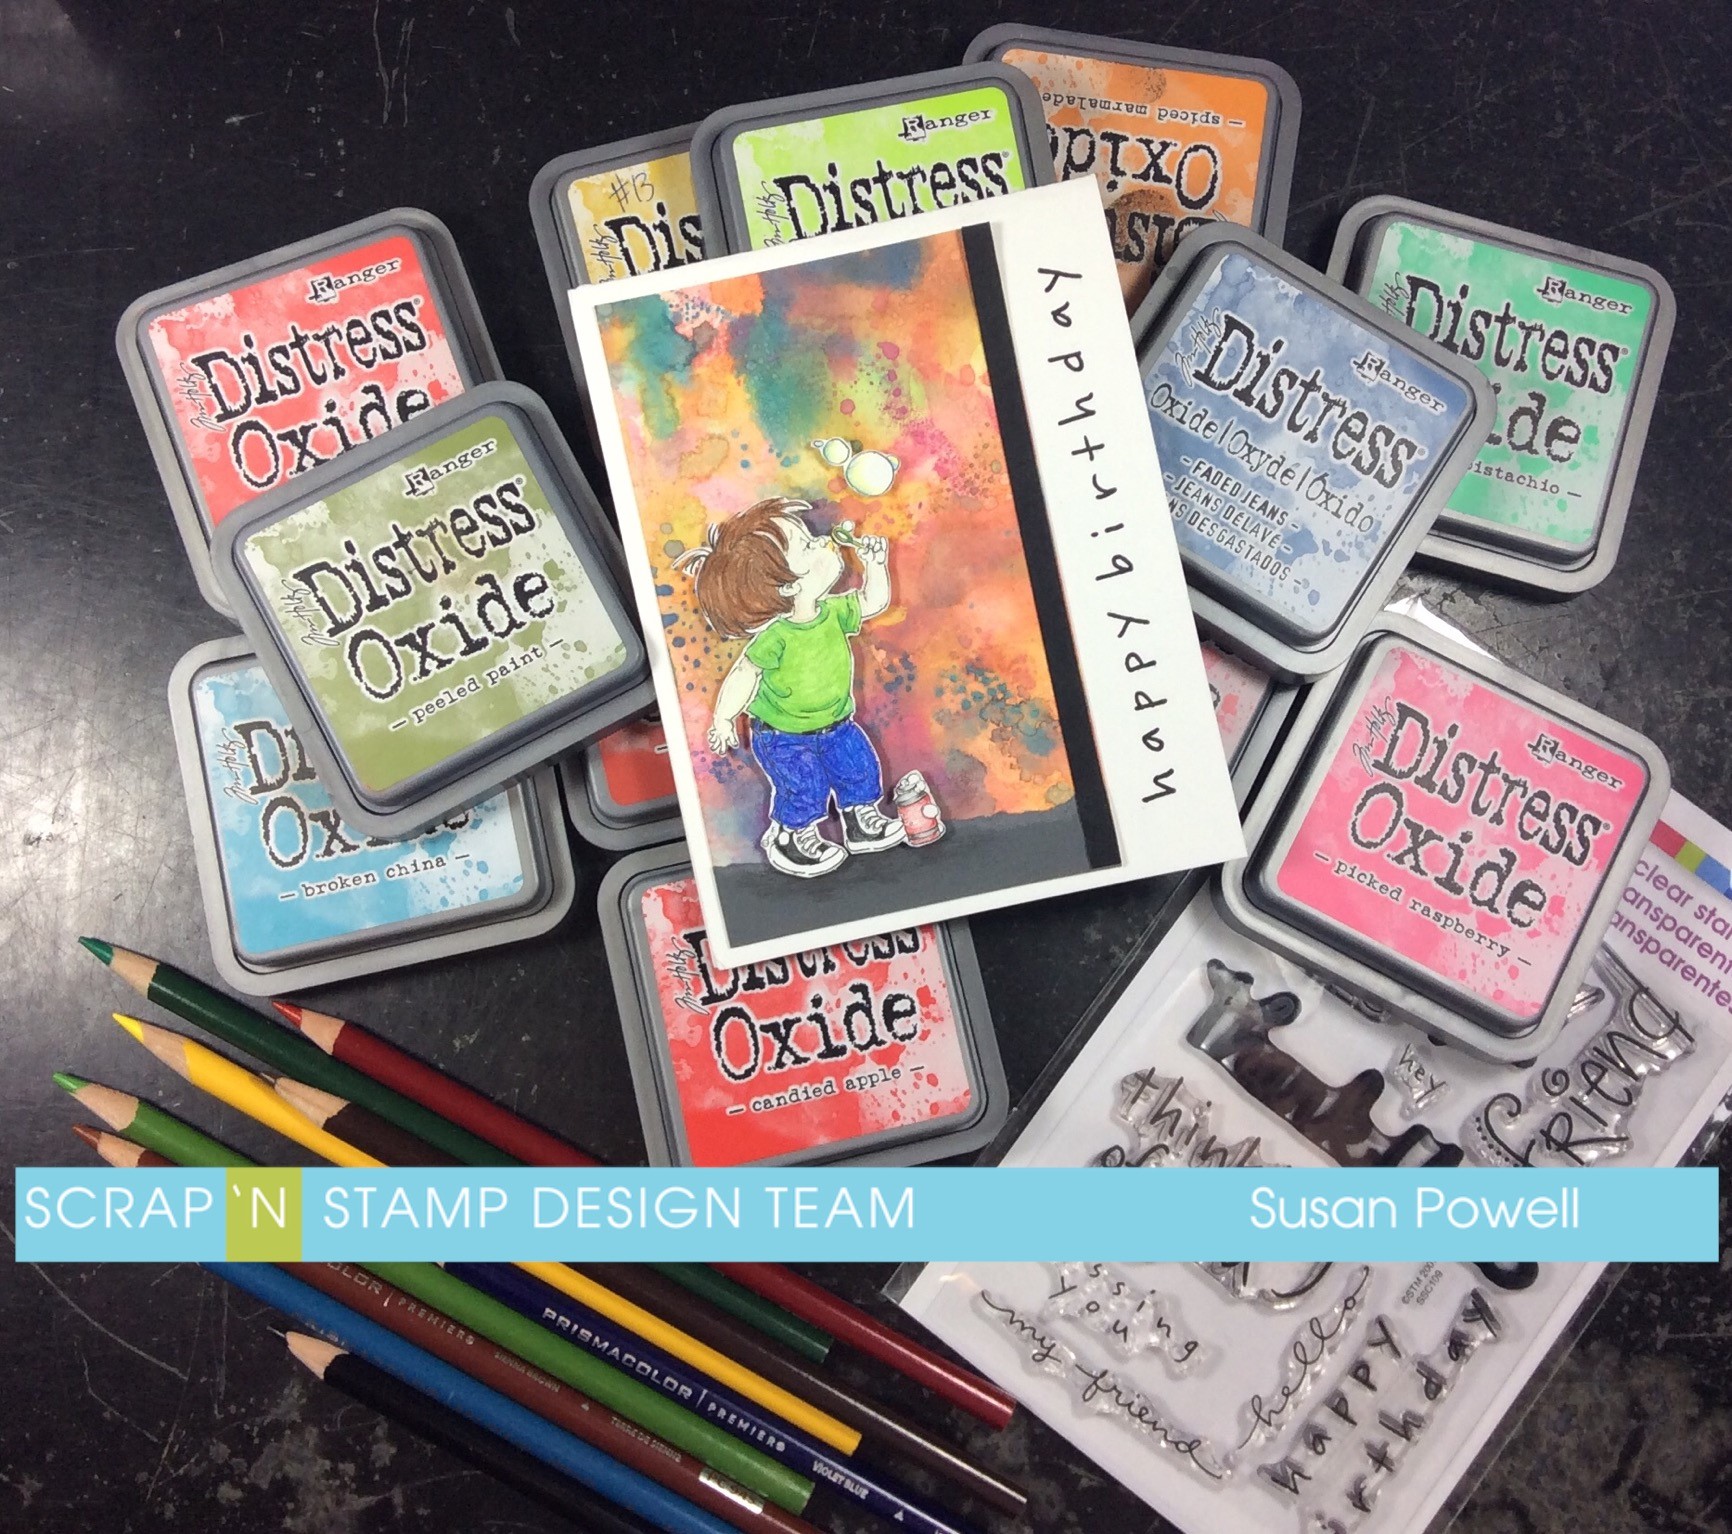
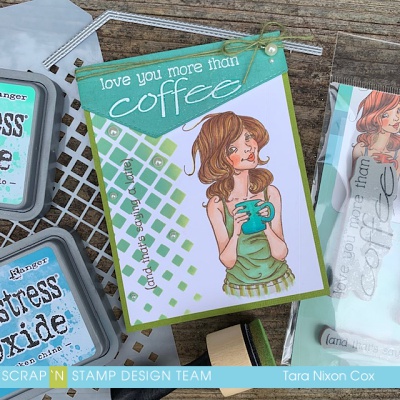
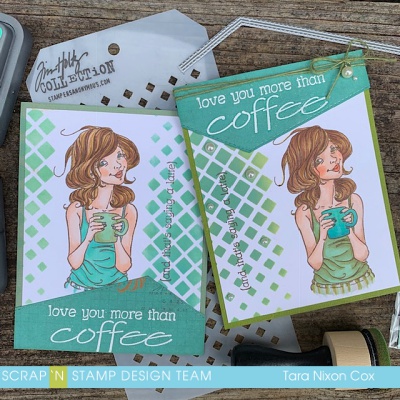
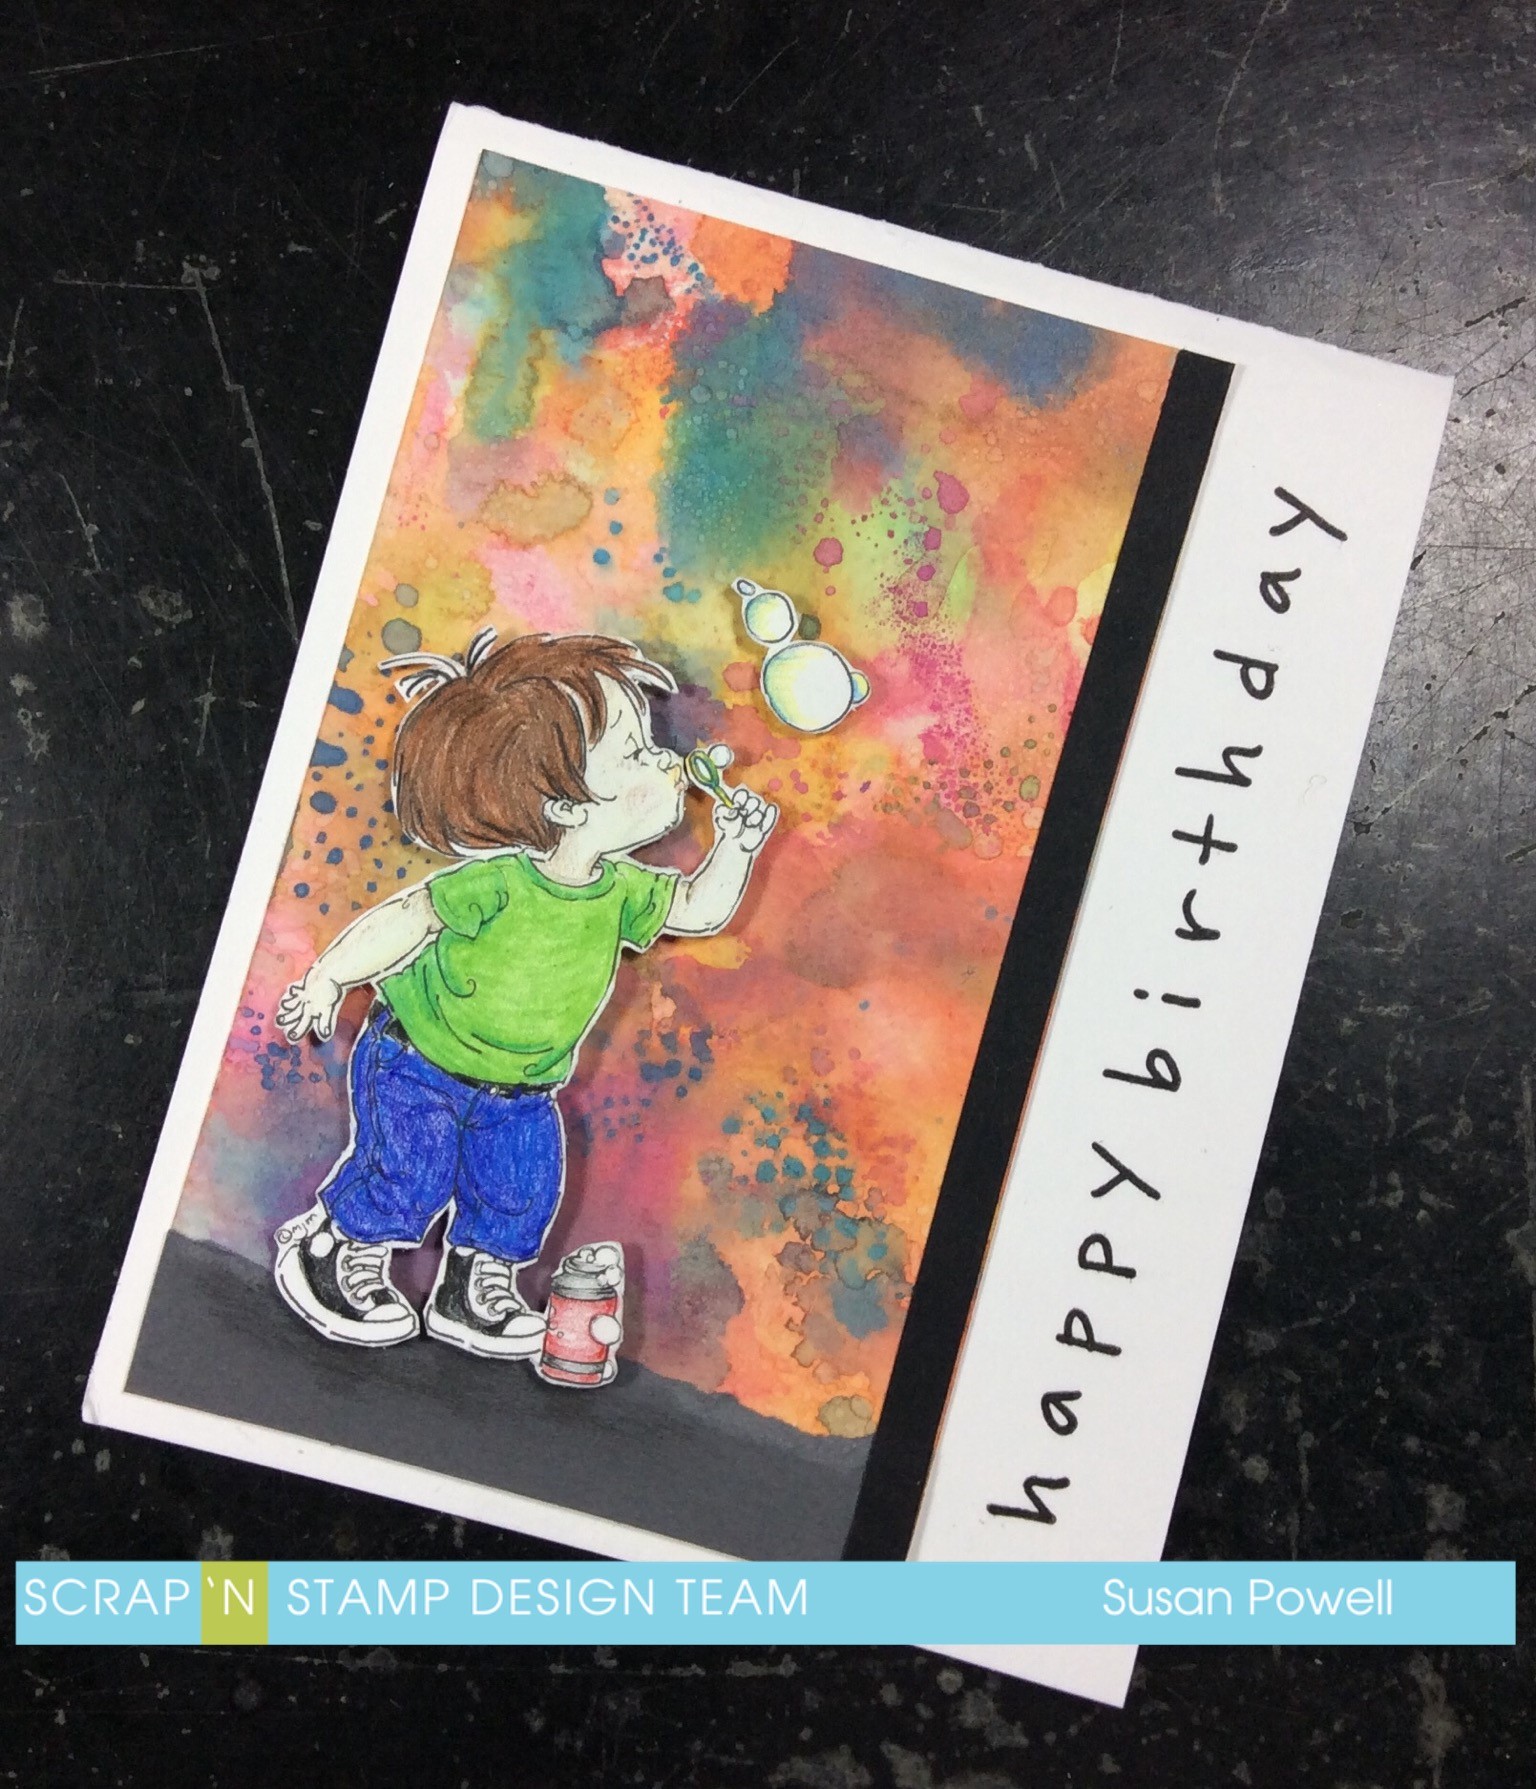
I pulled out my distress oxide inks and couldn’t decide which ones to

use, so… I used them all 🙂 I cut a piece of watercolor cardstock to

5 1/8 x 3 1/4″ and set about making the background. The amazing

thing about oxide inks is the colors layer on top of each other.

Normally when you layer as much ink as I did it would end up

looking like mud but with the chemical combination in oxide inks

makes it so they layer. It’s all very sciency and super cool!

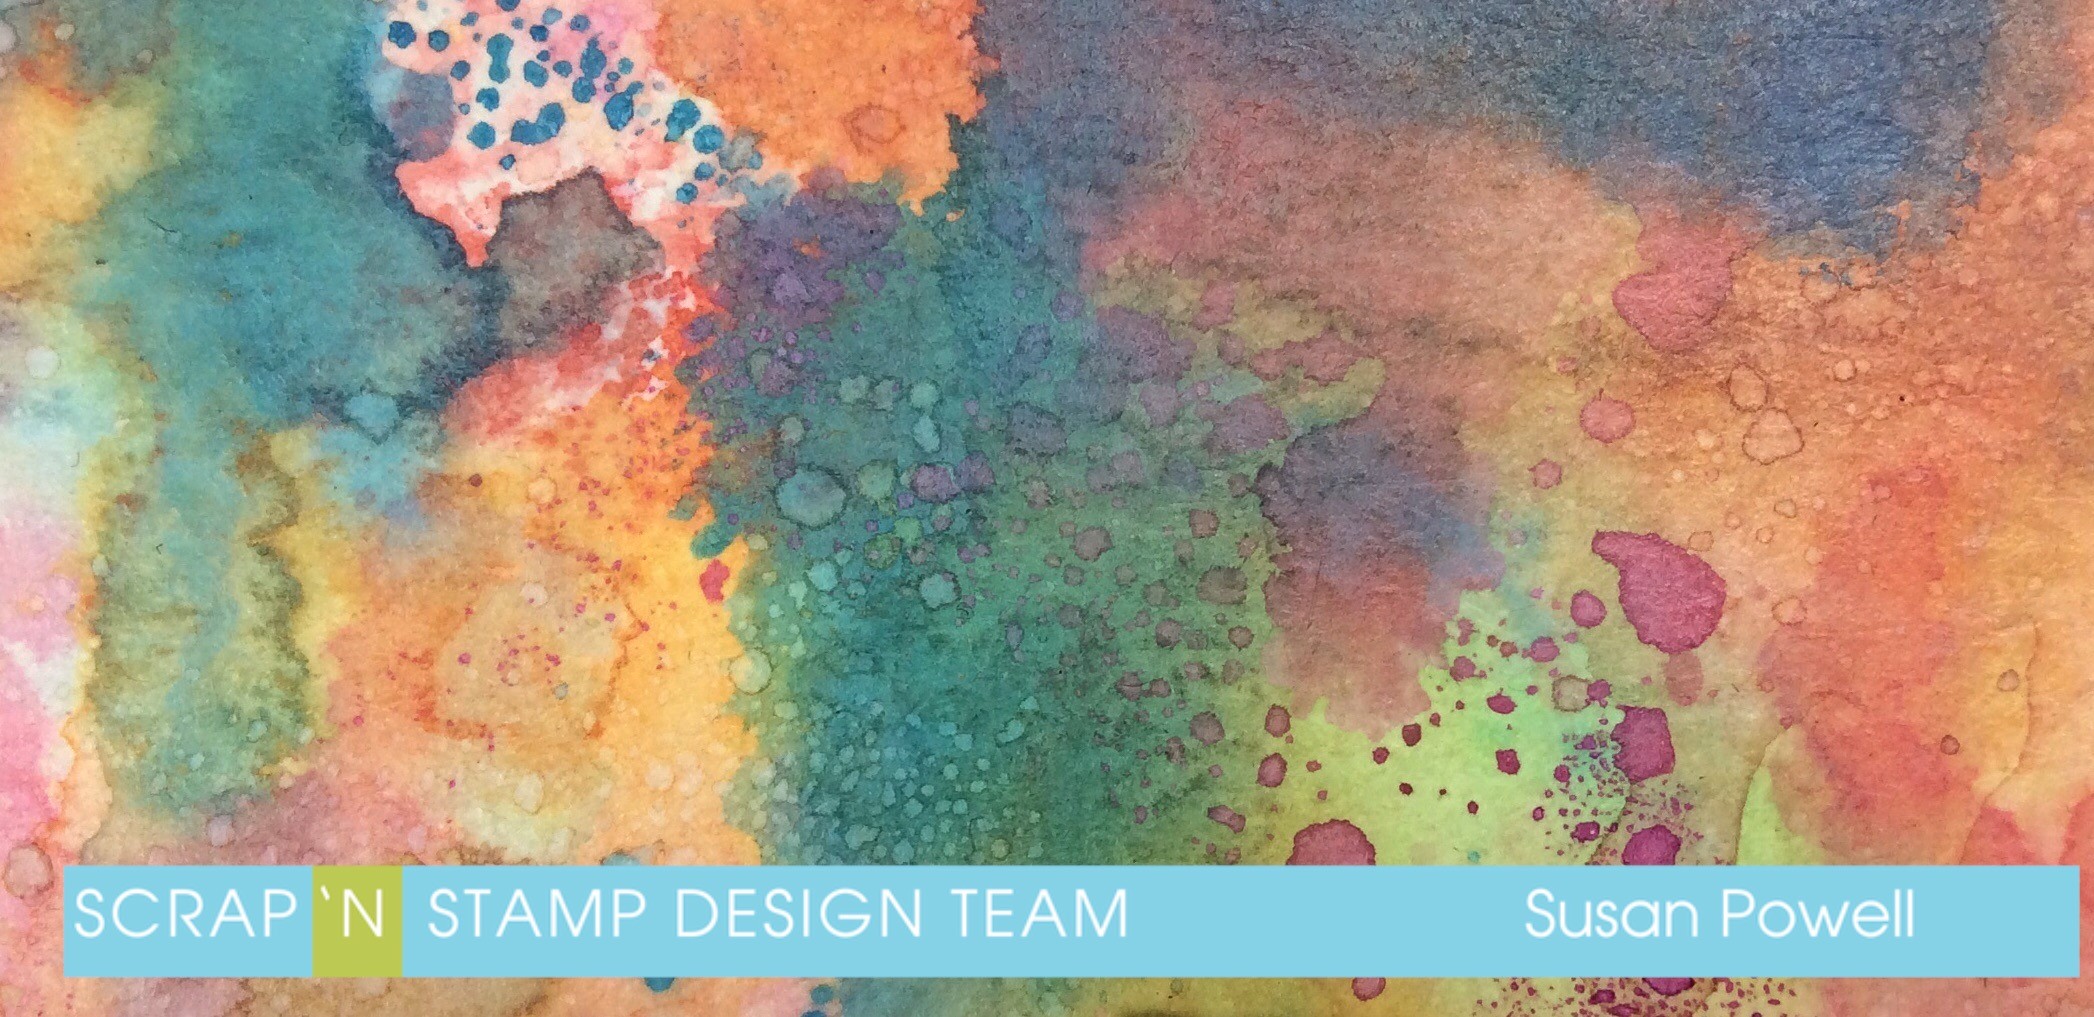
To make the background, start by smooshing one color of ink onto a

craft mat. Give it a few spritz of water and start pouncing the water

color paper into the ink. Use a heat gun to dry the ink and then

repeat the steps with a new color of ink. Be sure to dry each color

before adding the next one – this is key to building the layers.

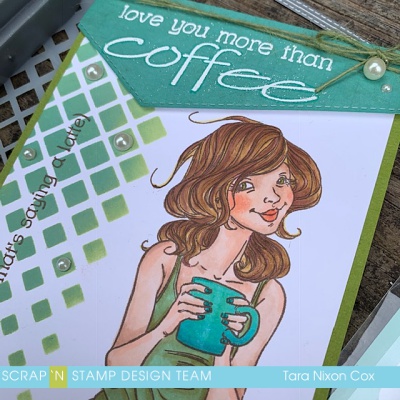
Here’s a close up – check out all those colors sitting on top of each

other – so cool!

I’m really sorry I didn’t get a video for you and hope that the

instructions make sense. If you have any questions, please leave them

for me below and I will do my best to help.

Now for the little guy blowing bubbles – isn’t he adorable. The

stamp set is called Bubble Boy from Penny Black and reminds me

of when my kids were little and spent hours blowing bubbles. I don’t

have the actual stamp but I do have the digital image so I printed

it off, colored him in with Prismacolor pencils and then fussy cut

him and the bubbles out. I added a strip of grey cardstock at the

bottom and then adhered bubble boy with some craft foam for

dimension. The sentiment is from Happy Messages by Stampendous.

I performed a little stamp surgery and cut the words apart so I

could easily stamp them in a straight line.  To finish it off I added

the thin strip of black cardstock.


I hope you enjoyed this card and are inspired to create. If you have

any questions, please don’t hesitate to ask.

Be sure to check out the Scrap’n Stamp Challenge Page.

Happy Stampin’

and thanks so much for visiting!

Susan


Shopping list:


Fun With Distress Oxides Read More »

Some Like it HOT blog hop

Welcome to our February Blog Hop- “Some like it HOT” this theme is all about hot beverages- coffee, tea, hot chocolate… 

We will be giving away 9 prizes – one for each designer. 8 Some Like it Hot prize packs and one $50 gift Certificate Prizes will be chosen randomly from the people who comment.  We are especially excited as this is our first hop with the new design team, I hope you’ll take time to bookmark and explore each of their blogs and leave them some love 🙂  Here’s the full hop order & everyone’s links:

Tara (you are HERE at the SNS blog!)

And now let me jump in and show you my card!  I fell in love with this cutie from Penny Black “Saying a Latte” and have been saving her for this hop- I’ve been out of practice coloring with my Copic Markers, except for small images, but she was a fun one to play with!  I actually have 2 cards featuring her to share (since I colored a backup “just in case I mess up” image as well).  Since I knew coloring was going to take a bit of time, I kept the rest of my design pretty simple- stamping my sentiment on a panel die cut with MFT’s Stitched Edge die.  I also just got the new gradient square stencil by Tim Holtz and the angles seemed like a perfect match!

I used a mix of Distress Oxides on the stenciled details, but I’m not even positive of all the colors because I used a dirty ink blending tool. LOL. (note to self- buy more blending foams!)  I knew the Cracked Pistachio would match my die cut panel, but the rest was just trial and error! I figure you really can’t go wrong with a mix of blues & greens- they are my happy colors!  A few pearl details & twine added some subtle embellishments to my simple card.

And here’s one last pic with the two cards together- the other is free of embellishments, but very similar in design!

I hope you enjoyed my card and are getting warmed up a bit for our “Some Like it HOT” blog hop!  We hope you’ll join us and play along with our challenge blog as well this month!  If you’re ready to keep moving, head on over and check out Dawn’s project!

Inky hugs,

Tara

Some Like it HOT blog hop Read More »

You’re The Best with Penny Black Stamps!

Hello and welcome back!! It’s Laurie and I’m here to share a rather clean and simple card using products from Penny Black. I also incorporate on small stamp from Concord and 9th but we’ll get to that later!

I love Penny Black products. They are so beautiful but also run the range from elegant to cutesy. Today, I used the Sunny Wishes stamp set.  This is a gorgeous set that includes 3 large, different floral images.  I had yet to use this set because I was fairly intimidated by it.  The images are VERY fine-lined.  Which, if you are anything like me, gets a little nerve wracking because chances are, you’ll colour outside the lines!! Colouring outside the lines can look amazing. I just can’t seem to let go of what I was taught in elementary school, hahaha!

Anyway, I stamped the largest image onto some white cardstock with Memento Tuxedo Black Ink. This has always been my preferred ink when I use my alcohol markers.  I coloured in the flowers and the butterflies INSIDE the lines but left a little white space on each to act as a highlight as well as to make it look “messy”. I have no idea if I achieved that look at all.

Next, came the labour of love. I decided to fussy cut this image out. Cutting around the entire thing was simple, but I decided to cut some of the inner portions away, as well.  Ugh.  It was tricky but if I made this card again, I would do it the same way because I love the look!

I wanted to create some “controlled splatter” on the front of the card base.  I love the look of black paint splatters on cards but have issues with achieving a good mix of paint…plus the mess.  I took a small stamp from the Hello Lovely stamp set from Concord and 9th and stamped it randomly onto the card front. I did do some minor stamp surgery to be able to get more mileage out of the stamp.

I did a test run on how I wanted my image and sentiment to look and decided that the card front was missing something. I added a 1/4″ strip on black cardstock to the left side and it seemed to balance everything nicely.

It was here that I decided to stamp, colour and fussy cut an extra butterfly. I also partially stamped the sentiment to read “You’re the Best”.  This comes from the Penny Black set, Choose Happy.

I adhered the floral image and butterfly with foam squares for a bit of dimension and used the Memento Ink to stamp the sentiment.


I added a bit of Clear Wink of Stella to the butterflies and some Nuvo Crystal Glaze to the flower centres and vase to finish off this card!!

Thanks for stopping by!!  I hope you found a bit of inspiration here today!!

See you soon!!

Laurie

You’re The Best with Penny Black Stamps! Read More »

Free Shipping Anywhere In Canada