Scratch-N-Stamp
Search

Checkout

Keep up with Sales, New Products and other events at Scrap `n Stamp. Sign up for our newsletter now!

What's New

Hot Deals


Pinkfresh Studio

Creating Texture

Hi Everyone! It’s Susan and I’m sharing a post for the Random Acts of Cardness prompt of Texture. I have a LOT of pics so I made them smaller to fit more in – hope they’re not too small to see.

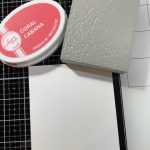
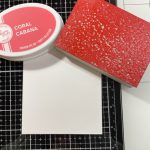
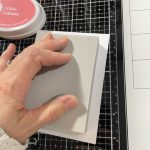
I was playing with the Simon Hurley Stampin Foam. This was my first time and I am HOOKED!! If you haven’t tried these I highly recommend them. All you do is heat the foam for a couple of minutes with your heat tool then press in to whatever you have that is textured. Next you ink up the foam like you would a stamp then stamp with it. I wiped it clean with a wet wipe then heated it up again with my heat tool to remove the impression and moved on to the next thing with texture.

Click HERE to watch a quick video on how it works.

Here’s a pic of the foam with the impression of the wall and inked up then me stamping it.


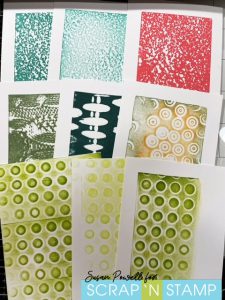
Below are all the panels I made using the foam. The top three are made from the impression I got from the wall in my craft room

The middle row: left is from my sweater, middle is a wicker basket and right is my Tombow markers

The bottom row is all the edge of the baskets that I store my stamps in.

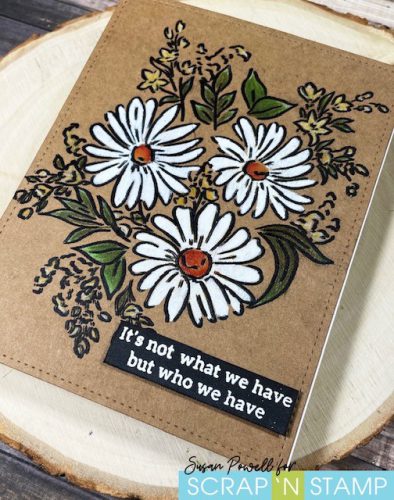
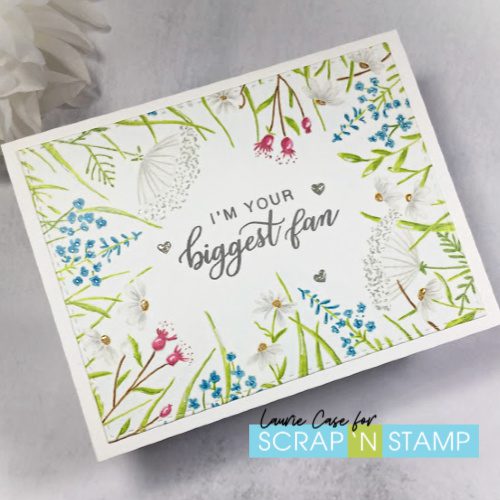
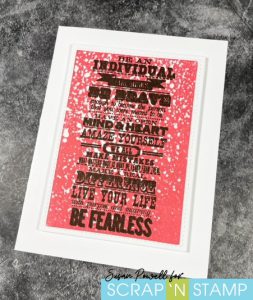
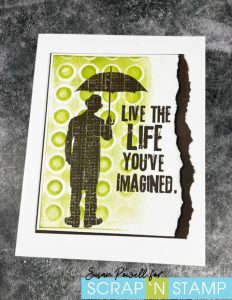
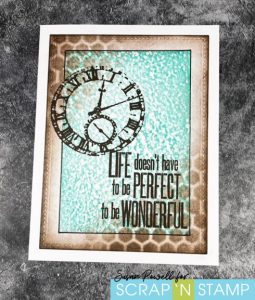
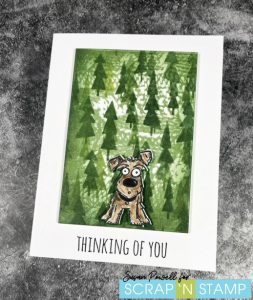
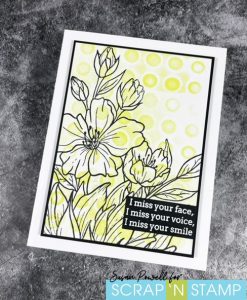
And these are the cards I made from the panels. I do have a couple still to play with but I did make a lot.

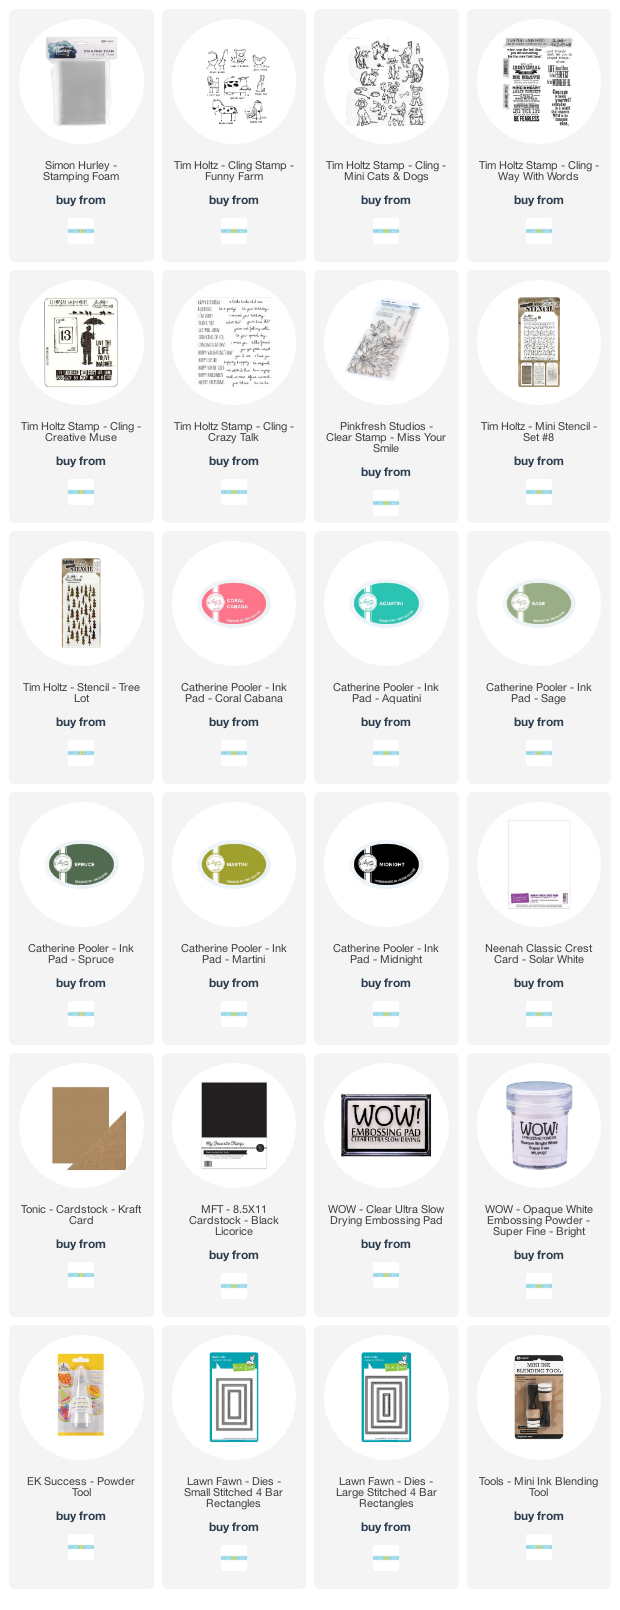
All the products I used are listed below.

Other ways I added texture was to to use stencils, tear edges of card stock and also distress the edges of some of the card stock.


Thanks so much for spending some of your day with me.
If you have any questions about the cards please don’t hesitate to ask.
You can leave a message below, DM on Facebook at Susan Powell or email me at greetingsfromsusan@live.com and I will get back to you asap.
Take care.
Susan
Shopping list:
I use affiliate links when I can which means I earn a small commission when you purchase through one of my links – this is at no cost to you. Thank you!!

&
;

Creating Texture Read More »

Daisies on Kraft Cardstock

Hi Everyone! It’s Susan and today I’m sharing a card for the Random Act of Cardness prompt which is Kraft. I used the beautiful floral image from the Floral Bunch Stamp Set from Pinkfresh Studios. I used my MISTI to stamp the image and left the stamp in place so I could stamp it again after I colored it. My original plan was to only use my Prismacolor pencils but I really wanted the flowers to pop off the page so I painted the flowers with a white POSCA Paint Pen and used my pencil crayons for the rest of the image.

I used the large die from the Lawn Fawn Stitched Rectangle Dies to cut the panel and adhered it to a white card base. The sentiment is from the same Floral Bunch Stamp Set and embossed white onto black card stock and added to the card with craft foam.


Happy Stampin’
and thanks so much for visiting!
Stay Safe Everyone!!
 
Susan
SUPPLIES
If you’re interested in purchasing any of the supplies I’ve used I’ve listed them below. I use compensated affiliate links which means if you make a purchase after clicking one of my links below I will earn a small commission at no additional cost to you.

Thank you! I truly do appreciate your support!


Daisies on Kraft Cardstock Read More »

No Line Pencil Colouring with Hero Arts & Pinkfresh Studio

Hello and welcome back! I hope everyone is playing it safe and staying at home!! I have been and actually enjoying every minute of it!! I’m a homebody at heart so staying in doesn’t bother me one bit. But if you’re the more social type, I give you strength :)!

Today, I’m sharing a card featuring the Hero Arts and Pinkfresh Studio collaboration set, You Make A Difference. This is a large stamp set with a beautiful, sketchy background along with tons of awesome sentiments. I decided to do a bit of no-line colouring with my pencil crayons.

Because I wasn’t adding any water or blending solution to this card, it was safe to use any type of ink. As long as it was quite light in colour! Memento Desert Sand Ink is perfect for this technique! I used a two shade combination for each image. Starting with the light and adding some darker bits. This image is very sketchy and easy to colour!

After it was all coloured, I took a very light blue pencil and went around the edges to create a bit of contrast. It’s very subtle and hard to see but it’s there!  I was so tempted to fussy cut the centre of the image out but didn’t want to wreck anything at this point. So, I stamped one of the sentiments from the set using a medium shade of grey ink. The hearts came from a set I had in my stash.

I put some finishing details like white gel pen and Nuvo Crystal Glaze to bits of the image. The panel was adhered directly to a white card base.

And that’s my finished card for today! I hope you enjoyed!

Thank you for dropping in. Stay home and stay healthy!

Laurie

No Line Pencil Colouring with Hero Arts & Pinkfresh Studio Read More »

Free Shipping Anywhere In Canada