Blooms Fill In – Concord & 9th
Hey there and happy Saturday! It’s Chala and I am back for another “Floral Frenzy” themed card.
I am going to be using the Concord & 9th Blooms Fill-in stamps. This is an older set but it is one of my favourite floral stamp sets. There are so many different themes you can use this stamp for: Birthday, Mother’s Day, Thank-you, Christmas, Wedding, etc. There are also coordinating dies, however, I will just be using the stamps today for which I created three cards.
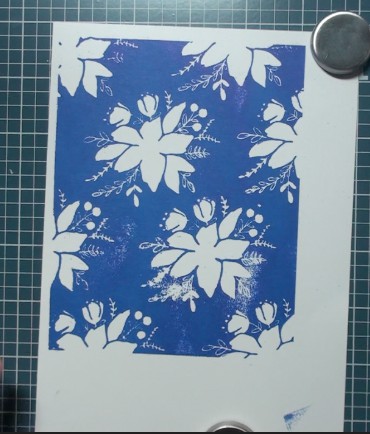
For the first card I used Blue Print Sketch Distress Ink and my Tonic Travel Stamp Platform to create the background with the largest of the stamps. I highly recommend using some type of stamp platform as you will need to stamp this background multiple times to get a good coverage and you will need to apply a bit of “CPR” type pressure. This large stamp measures just a bit larger than a standard A2 size card.
The next step is layering on the flower and leaves. I am able to do this with an acrylic block along with the help of my Wendy Vecchi Make Art Stay-tion. The metal platform and the large magnets keeps everything in place so your project does not shift or accidentally disappear from your work surface. (It is also great if you are in the midst of a hot flash and need to have a fan on, or if you have small children and/or fur-babies who like to hover while you work….)
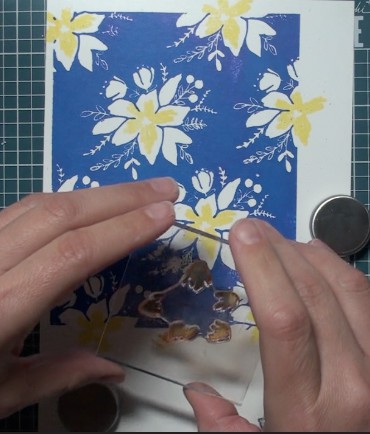
The Distress Inks I used for the flowers and leaves are as follows: Squeezed Lemonade, Wild Honey, Ripe Persimmon, Peeled Paint, Shabby Shutters, Antique Linen and Weathered Wood. I do drop my stamp and get ink where I do not want it…but that is okay! I used the Tombow Mono Sand Eraser and it removes that ink blotch just fine!
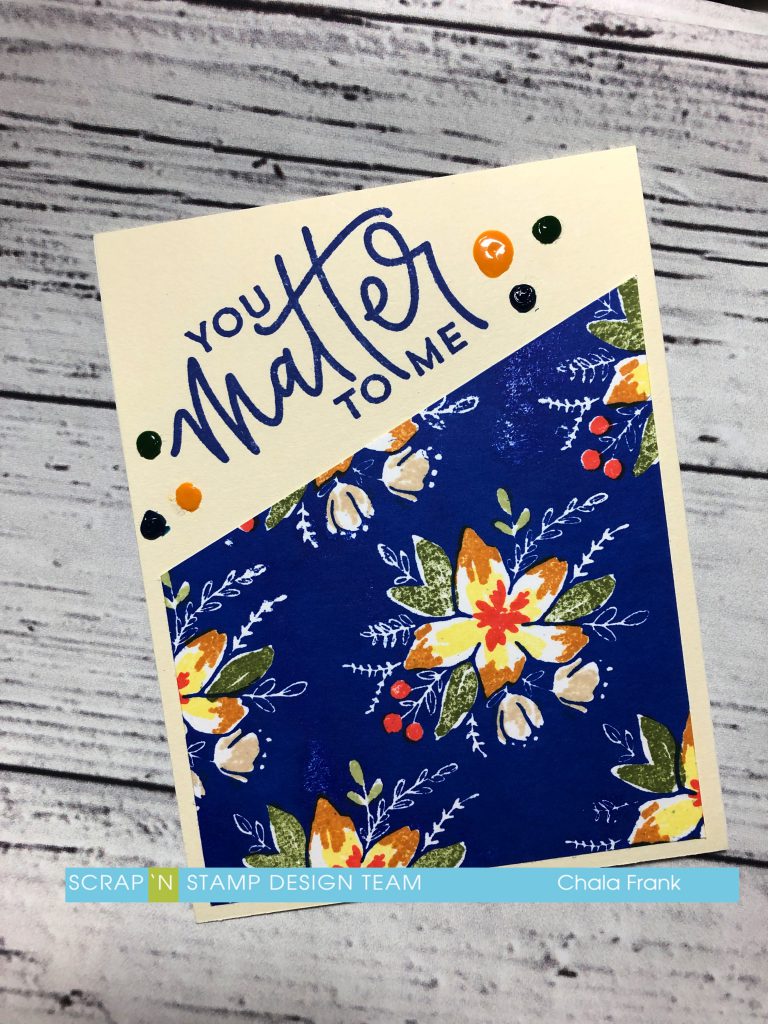
I cut the panel in half on an angle and trimmed of an 1/8″ of each side. This will allow me to create two cards. I adhere one of the pieces onto a piece of cards stock that was complimentary to the colours of ink used. The sentiment is from the same set and I used the “You Matter to Me” phrase. This was stamped with the Blue Print Sketch Distress Ink. To finish off this card I added some Nuvo Drops in the following colours. Midnight Blue, Woodland Green, English Mustard. Disclaimer: I need to practice using mine more! I admittedly have not used these particular colours and I should have shaken them and tested them on a piece of paper prior to applying them…..So they are a bit gloppy. I will likely remove them with a craft knife and try again! 😬 I wanted to show you the original as it is important to know we all make mistakes!
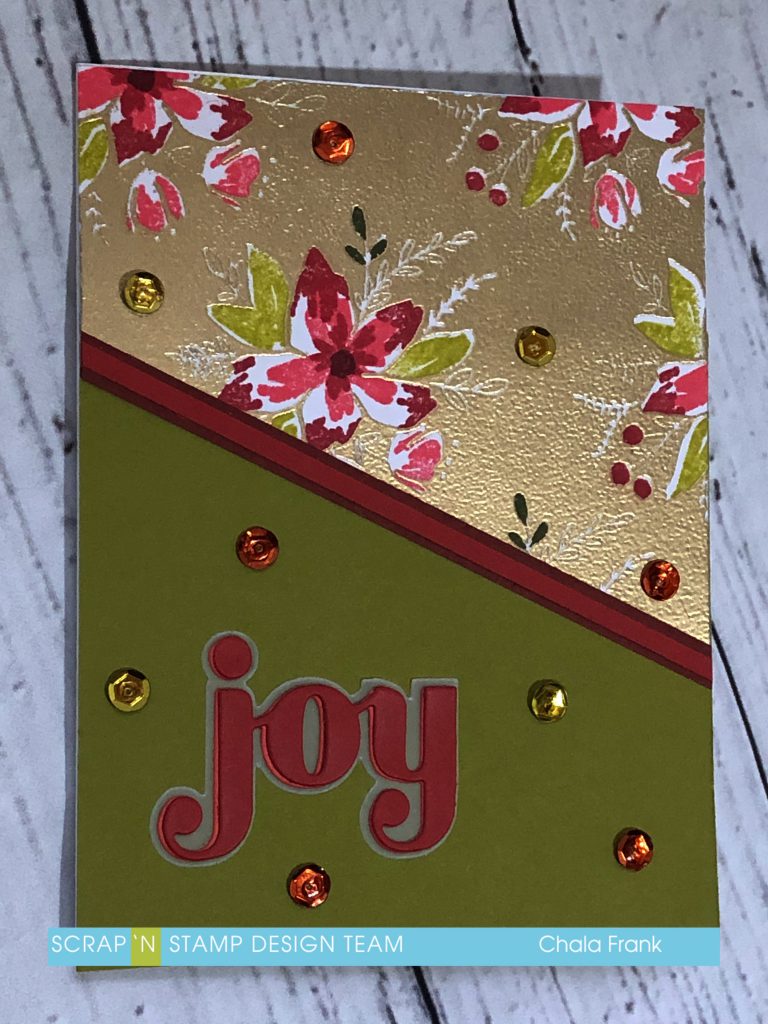
I really like that this stamp can have a Spring/Summer look as well as a Christmas look. So, the next card I created I followed the same steps, however, this time I created the background by stamping in Versamark Ink and Gold embossing powder. I then stamped the flowers and leaves in the following Distress Inks: Abandoned Coral, Fired Brick, Crushed Olive, Forest Moss and Aged Mahogany. I again cut the panel on an angle so that I could create an additional card. I adhered a piece of cardstock similar to the crushed olive colour to my card base and then adhered the stamped panel. I used two thin strips of cardstock over top of where the two pieces joined. I then used the Birch Press Designs – Joy – Sugar Script Die for the sentiment. This die is a beautiful script font and it gives you the shadow layer to go behind it. I die cut two of the script dies from two different colours and layered them together to give more interest to the card. Finally, I added some sequins to give the card a bit of sparkle.
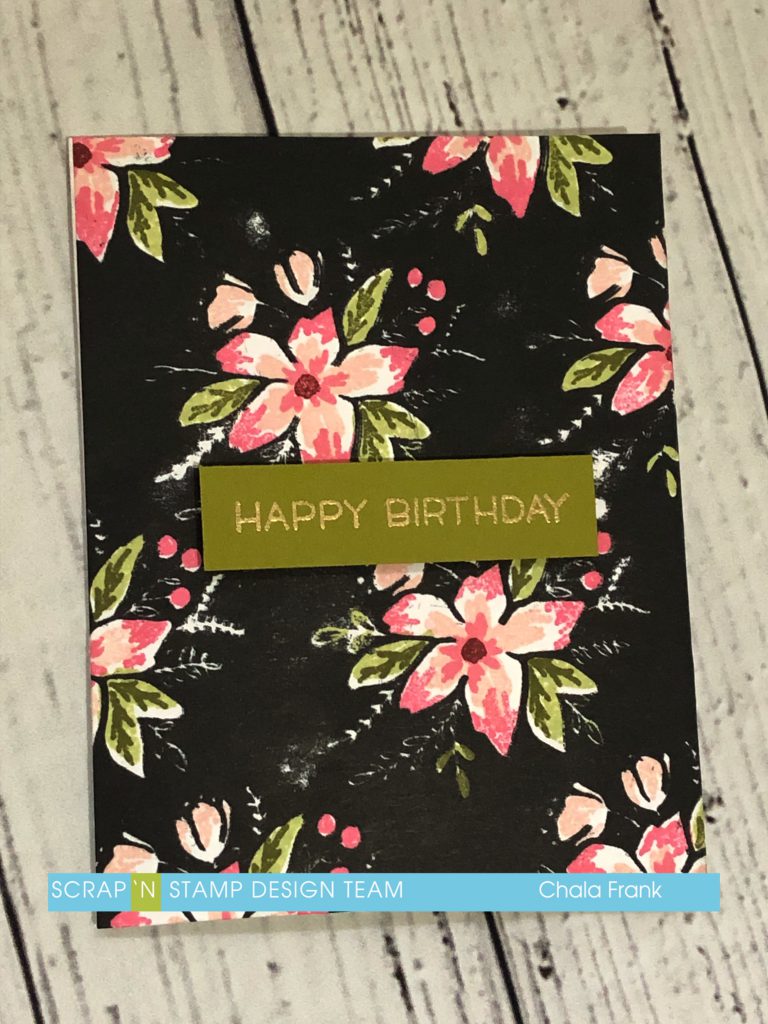
The third and final card is more of a summer look. I kept the panel whole this time. Stamping the background in Versafine Black Ink and the following Distress Inks for the flowers and leaves: Tattered Rose, Worn Lipstick, Shabby Shutters, Forest Moss andAged Mahogany. I used the same green cardstock as before to create a sentiment banner and stamped “Happy Birthday” from the Lawn Fawn – Hay There stamp set with Versamark ink and gold embossing pohttps://www.scrapnstamp.ca/store/pc/Lawn-Fawn-Embossing-Powder-Gold-825p22850.htm?idaffiliate=24wder.

Thank you for stopping by and I hope you enjoyed today’s cards.
You can watch the quick video of how the first two cards came together here:
Share a photo of your Floral Frenzy card on the Scrap’N Stamp Challenge Facebook wall and get your name entered to win a $50 gift certificate to Scrap’n Stamp! You’ve got until May 31st to post. Make sure to hashtag it for another chance to win #SNSfloralfrenzy.
Stay Crafty Friends!
~Chala
Blooms Fill In – Concord & 9th Read More »


