Scratch-N-Stamp
Search

Checkout

Keep up with Sales, New Products and other events at Scrap `n Stamp. Sign up for our newsletter now!

What's New

Hot Deals


Simple Card

Tuesday with Tara {take 194}

Happy Tuesday!

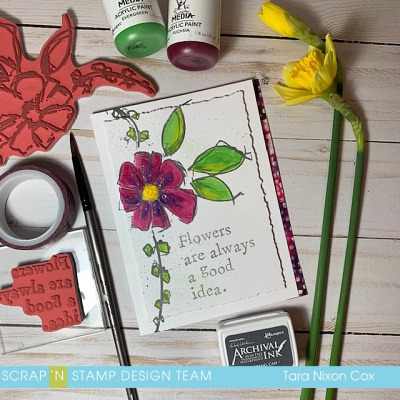
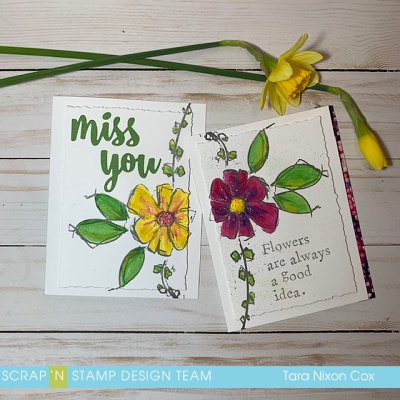
Today I’ve got another simple, fun card for you that features a punny little rabbit from Tim Holtz’s Funny Farm stamp set & a background created with the new Alcohol Pearl Inks!  I actually picked this set of inks to work with the Funny Farm stamps, thinking they were nice neutral colors for an earthy sort of background to go with the farm animals… and then I paired my background with a blue bunny. LOL. So much for neutral & earthy!  I stamped the bunny on a strip of cream card stock and decided to add some blue media marks as a border along the edges with Forget Me Not Archival Ink… I reached for a brown pencil and grabbed blue instead and I think he’s pretty cute!  I kept thinking about the Velveteen Rabbit for some reason, though I’m pretty sure he was grey, right?

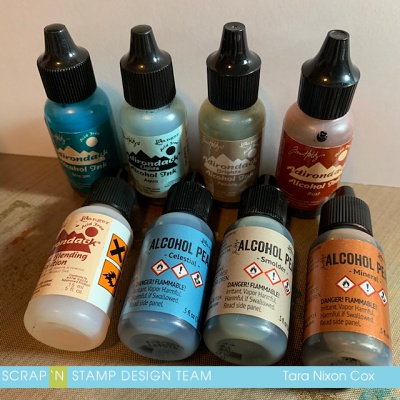
I wanted to show off as much of my background as possible, so layering the stamped image on a strip of burlap and adding a bit of Nuvo glitter is as fancy as I got.  For the background, however, I worked with the new Alcohol Pearl Ink Kit 4 and grabbed some coordinating colors (Stream, Aqua, Pebble & Rust) of regular Alcohol Inks from my stash (if yours look nothing like this it’s because I’ve had these for YEARS. As long as your bottles are sealed, they will last you a very long time!). Together with Blending Solution, I was ready to play!

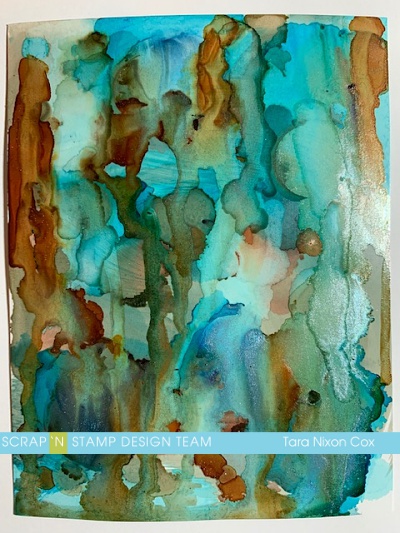
I made a few different backgrounds with this mix of colors… this one was created by dripping the inks onto Alcohol Ink Glossy Paper and holding the paper vertically to let the color drip down the page.  I added some larger spots and a mix of both types of ink and some blending solution and just kept adding and dripping until I was pleased with it.  It’s really fun to watch the pearls drip- they shimmer so nicely!  Here’s a look at my full background before I finished the card.

And here’s an angled look at the finished card, to show you how the pearls shimmer…

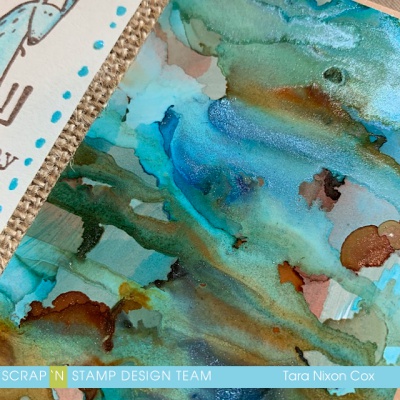
So pretty, right? They look just as fab with other inking techniques as well… I’ll share some in a future post!

Hope you have a ‘hoppy day’ and maybe find a minute or two to play along with us on the Challenge Page before the month is through!

Inky hugs,

Tara

Tuesday with Tara {take 194} Read More »

Simple Stamping – I’m a Puffer for You!

Hello friends!  It’s Chala here for today’s blog post.

Things have been crazy in my world and I got so wrapped up in life and trying to survive that I almost forgot my husband’s birthday!  (Bad wife, I know!)  But this made me realize that creating does not have to be super complicated!  Sometimes we are so enamoured with what others create and the techniques they use that we forget that there is nothing wrong with creating a simple card!  In fact, they are just as beautiful and for me….just finding time for crafting therapy through the chaos of my life is what is important.

So, I am here to share a super simple and quick card with you that received just as much praise from my sweet husband as some of the complicated cards I have created.

I will be using the Hero Arts “I’m a Puffer for You” stamp and die combo set.

I stamp some of the cute puffer fish images and party accessories with Memento Tuxedo Black  ink onto some white card stock.  I colour the images with my Copic markers and die cut them with the coordinating dies.

I then wanted to create a super simple ink blended background.  I wanted something that wouldn’t take the focus off the cute little images. To do this I used the Distress ink in Mermaid Lagoon and my ink blended brush and blended the ink onto the middle top portion of an A2 size card base.

I cut an A2 size panel of yellow cardstock and adhered it to a top folding card with my adhesive tape runner. Then I die cut the ink blended panel with the Elizabeth Craft Designs Stitched Rectangle Die that is slightly smaller that the A2 size panel and adhered that onto of the yellow cardstock.

To  add a bit of interest and to give the background an underwater feel I spray it with some water and lift the water droplets up with my microfibre cloth.

I then lay out the images and sentiments that I wanted to use on the inked panel.  I use Versafine Onyx Black ink to stamp the sentiments.  I adhere the party accesories with some liquid adhesive  and pop the puffer fish images up with scotch 3M foam tape.

I also add one of the left over puffer die cut images onto the inside of the card and give all the puffer images a coating of clear Wink of Stella (because every card needs a bit of sparkle) and stamp one of the solid fish images onto the upper right hand corner of yellow envelope.

I felt like the card needed a little something special so I added these sparkling clear droplets.  You can also achieve this look by using Glossy Accents or Nuvo Crystal Glaze.  I didn’t have time to wait for those to dry so the sparkling clear droplets were perfect for this rush card!


Here are some photos of the completed card.


Thank you so much for dropping by for today’s blog post.  You can check out the video of how this card came together at my YouTube channel here:

https://youtu.be/6lt9_2ynXkk


Happy Crafting!

~ Chala

Simple Stamping – I’m a Puffer for You! Read More »

Tuesday with Tara {take 191}

Happy Tuesday!

After the week I’ve had I decided I needed to make some simple, bright & cheerful cards!  I love the variety of styles represented by the creative girls on our design team and I took my inspiration today from some of the cards I’ve seen Kia & Nancy E. making, though I definitely added my own twist. I wanted to focus on simple layers and white space, and I wanted to use my new Good Idea stamp set by Dina Wakley!  The large flower stamp in this set is really large, definitely sized more for art journaling than for cards, but I wasn’t about to let that stop me… I played around with placement and stamped it overlapping the edges of a plain white card, then stamped it again on a die cut Stacked Deckle layer.  I used a grey archival ink called Watering Can for a somewhat softer look than black would have given.  I repeated the process twice, switching around where the card fold was since I wanted to try a couple different design options.

For my first card, I decided to trim the edge of the card to leave room to reveal a strip of washi tape on the inside of the card.  I used this as my color inspiration and decided to do some watercoloring with my Dina Wakley paints, placing tiny amounts of Fuchsia, Lapis, Evergreen & Lemon on a palette.  I then painted my design with a wet paintbrush, which gave me a vibrant wash of color that matched the washi tape perfectly (since it’s also by Dina!).  I splattered a bit of the paint along the left side of the card to balance the colors a bit.  I finished off this card with the sentiment that came with the stamp set and a bit of Distress Stickles in the center of my flower.  (Once both cards were finished I applied the leftover paint to a page in my art journal as a base for a future page!)

For my second card, I went with a yellow flower and a few touches of pink.  I die cut a Miss You sentiment by MFT in a green cardstock that coordinated with the leaves and assembled my card, using a generous amount of foam tape around the edges to give extra stability.  I skipped the splatters on this card leaving extra white space.

These cards came together fairly quickly once I had the design concept!   I think that’s something a lot of people don’t realize, just because a card is simple doesn’t mean a lot of time and energy didn’t go into it.  I find simple cards often require more effort on the planning end because each of the few elements needs to be just right 🙂  Hope you like my cards and they brought some cheer to your Tuesday!  Here’s a final photo with the two cards together- at first glance you’d almost think I used different stamps!  Love the versatility of florals… and I love that I have some brave daffodils blooming in my garden so I could cut some for these photos 😉


Inky hugs,

Tara


Tuesday with Tara {take 191} Read More »

Free Shipping Anywhere In Canada