Scratch-N-Stamp
Search

Checkout

Keep up with Sales, New Products and other events at Scrap `n Stamp. Sign up for our newsletter now!

What's New

Hot Deals


slimline card

Sea Life Sentiments

I hope that you’re playing along with the Scrap ‘N Stamp daily challenge, and enjoying yourself! I love visiting the challenge page HERE on Facebook, and seeing how creative everyone is.  If you haven’t joined us yet, it’s easy to do! Just join the page, create a project for one of the daily prompts, and share your creation on the page. Be sure to use the hashtag #snschallenge there, & on your other social media pages.  Play along with as many days as you want. Then, at the end of the month, one lucky participant is randomly chosen, and WINS a $50 GIFT CARD to shop Scrap ‘N Stamp! Today’s word prompt is ‘sentiments’, courtesy of me, Deb, for the Design Team.   I chose to use the Poppystamps Sea Life Sentiments stamp sets, along with some Lavinia sea themed stamps.

SEA CREATURES

I admit that I just love the design style of Lavinia stamps! And since I’ve been in a sea/ocean theme lately, it was easy to choose the Sea Creatures, and Sea Tangle stamps to use on today’s card.

Sea Life Sentiments

This card was fun to do – I just let my creativity have fun!

CARD DETAILS

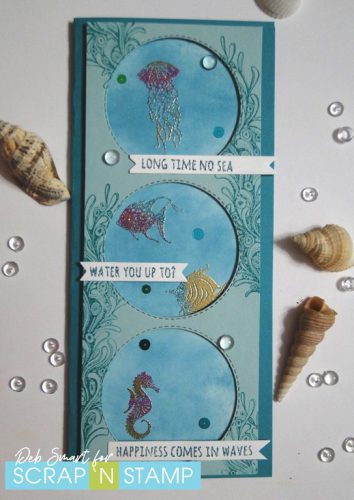
First, start with a blue slimline card base. Next, use the Picket Fence Studios Slimline Die Cutting System to cut a piece of white cardstock for the back layer, and a light blue/green piece for the top layer. Next, use the stitched circle from this same die set, and die cut 3 circles from the front.

Use the Lavinia Sea Tangle stamp and a turquoise ink, and stamp randomly on the die cut front panel. Set this aside, while you work on the back panel.  On the white panel, use a blending tool to apply Broken China Distress Oxide ink within the 3 circle areas. Next, place the piece in your stamp platform, and line up the image stamps from the Sea Creatures set. Cover the stamps with Versamark ink, and stamp.  Have fun with the embossing powders – I combined 3 WOW embossing powders in Gold, Florida Sunset and Sea of Tranquility on the 3 images.  Shake off any excess powder, and set with your heat tool.  Stamp the sentiments from the Poppystamps Sea Life Sentiments set in Versamark, and use the left over combined colours of embossing powder for them.

Now, layer the stamped die cut/stamped panel over the image panel with foam tape or squares, and then attach the sentiments. Finally, add some sparkle with Picket Fence Studios Spiked Ocean Water Sequin Mix, and some clear acrylic bubbles.

Sea Life Sentiments

I love the sparkle  & shine from the mixed embossing powders, along with the sequins!
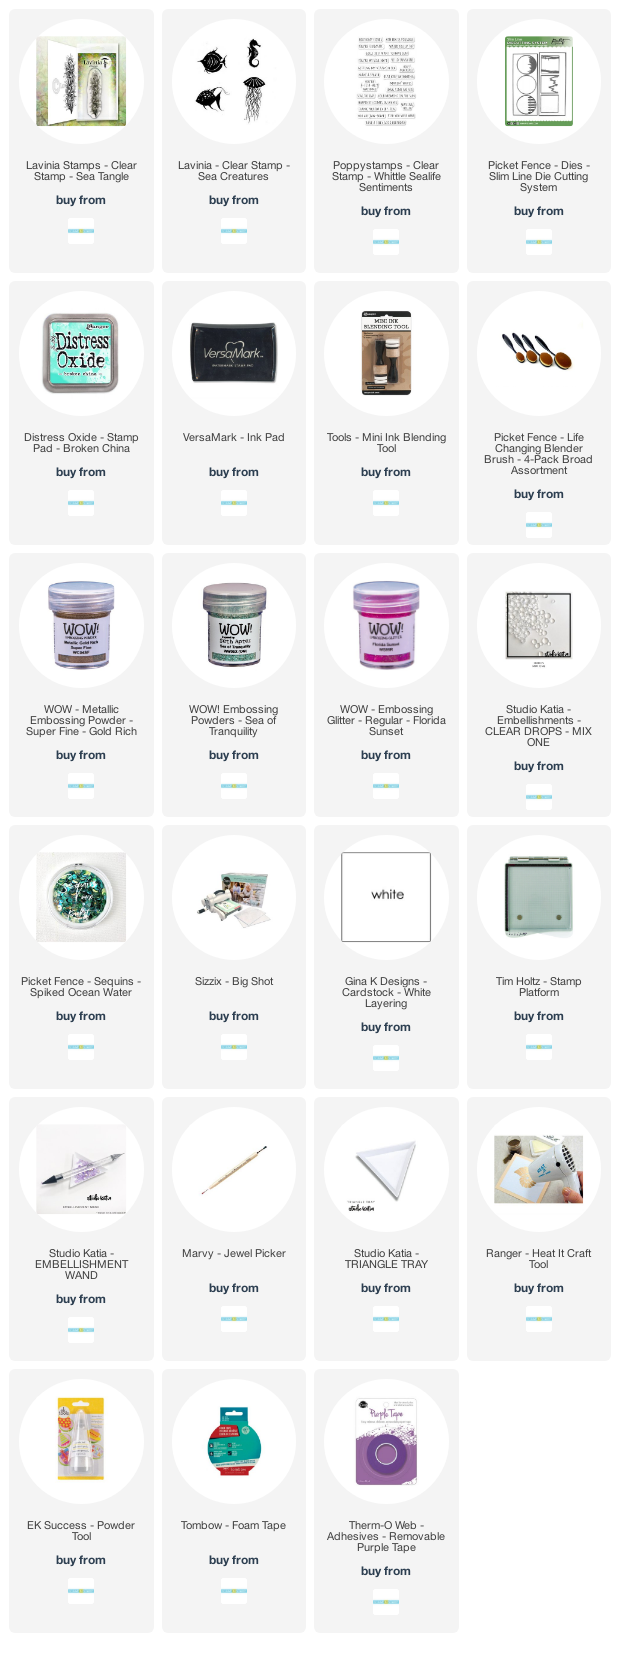
SUPPLIES

All of the supplies you need to create this card are linked below, from the Scrap ‘N Stamp shop. I do hope you’ll play along with my word prompt of ‘sentiments’ today! And of course, as many other days as you’d like to join, as well. Have fun creating!

Sea Life Sentiments

Affiliate links for supplies are provided. If you choose to use my links, you help support me in maintaining my blog, at no extra cost to you. Thanks in advance!


Sea Life Sentiments Read More »

SNS Live, Love, Lavinia Blog Hop

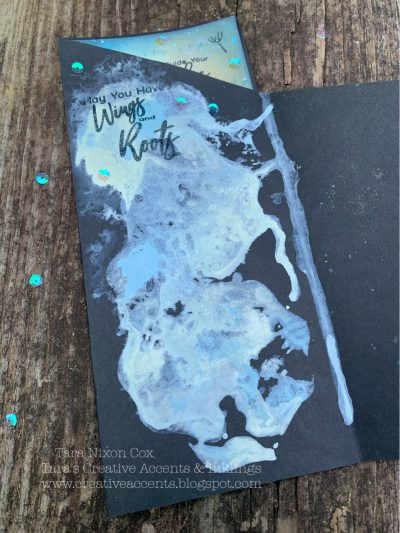
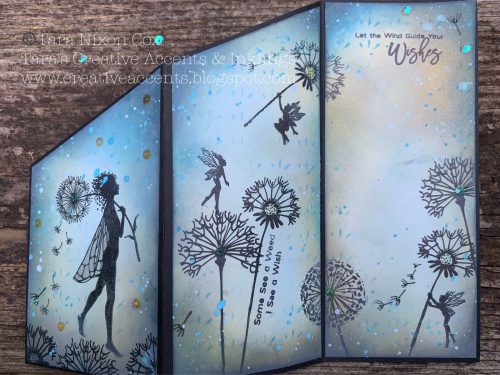
Welcome to the September Scrap N Stamp blog hop- Live, Love, Lavinia!  We are hoping the cards you see will bring a bit of magic your way as we share projects featuring this British company that is new to SNS, Lavinia Stamps!

if you like what you see, you can save some money shopping this weekend since all Lavinia stamps are 20% off until Sunday at 9pm, PST!

I’ve used an assortment of stamps on my card today: Make a Wish & Three Dancing Fairies by Lavinia Stamps and Dandelion Wishes stamps with the Fairy Wings stencil by Picket Fence Studios.   I’ve also used a bunch of Distress Oxide Inks and Paints to tie this fun angled tri fold slimline card together!  It was a fun challenge and I hope you like how it turned out!
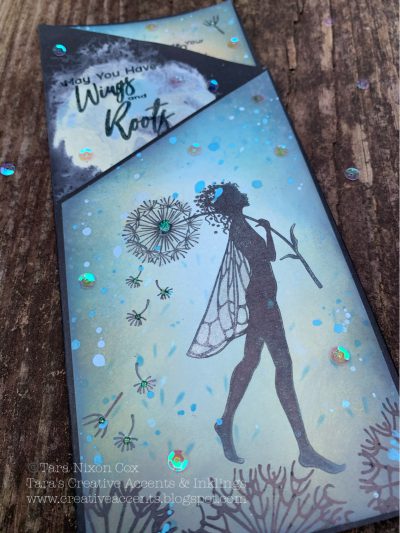
Here’s a peek at the center panel on the folded card. I used Distress  Paints to get a marbled effect for some fun contrast to the rest of the straight lines. It’s a bit messy, but I think it works well with the finished card!

Here is a look at the open card!  I started by inking all three panels on white, then added the stamping and more inking after I trimmed them to size to fit my angled design.  It was fun to create a sort of continuing scene across the panels with the fairies and the dandelions.  One I got going, I challenged myself to use every stamp in the sets (and I did!).  The final touches included paint splatters (I love the Distress Oxide Sprays for this!) some sequins and glitter glue & markers.


The hop today continues over with Nancy, and I can’t wait to see how she makes a clean & simple card with Lavinia stamps!

Here’s the full hop order: 

HERE at SNS with me, Tara

Nancy

Laurie

Deborah

Kia

Chala

Susan


Happy hopping!  Don’t forget to leave comments here and on other social media for your chance to win one of three surprise packs!


inky hugs,

Tara


SNS Live, Love, Lavinia Blog Hop Read More »

Slimline Card Using MFT Stamps!

Happy Saturday AND Happy First Day of Summer! I’m not sure where you live but if you are in Manitoba, it definitely has not felt very summery. Or Springy, for that matter! It is currently 7C here right now (it’s about 10:30pm) and we’ve had the heat on in the house. In fact, we haven’t yet turned it off for the season :(. I really hope for some improvement soon!

Anyway, today’s card is a slimline card which measures 8.5 X 3.5 inches and fits nicely into a regular business envelope. It’s also going to be a graduation card for my niece who is graduating tomorrow! They’ve put together a very interesting “drive-in” grad with social distancing rules in place. I’m interested yet can’t help but feel sad at the same time. These kids have been dealt a crappy hand this year. But they will no doubt make the best of things!

What’s really awesome about making this card size is that after you trim your 8.5X 11 piece of cardstock to make this card, you’re left with a piece that makes a great layer. I trimmed half an inch off this strip. This left a nice space to add some patterned paper. This particular paper came from my stash. I’ve had it for years and think I got it at Micheals.

On the layer, I used the Cloud Stencil from MFT along with a rainbow of Gina K inks! I worked my way down the panel which resulted in this super pretty background. The butterflies come from the newer stamp set, Brilliant Butterflies, also from MFT.  I used this set in a different way. It is a stamp layering set but I only used the detail layer along with silver embossing powder. I did use the co-ordinating dies but just trimmed the excess off.

Not using the solid layering stamps resulted in a much “lighter” butterfly. I didn’t want them to overtake or compete with the background. I did add a little bit of colour to the centres of each butterfly.  I foam mounted each butterfly. The sentiment comes from the a set called Essential Sentiments (MFT) which unfortunately isn’t available in the shop…so sorry!

I white embossed the sentiments onto strips of black cardstock and used foam adhesive to adhere them. I added a spattering of sequins to finish the card off!

Thanks for stopping by today. I hope you’re first day of summer is spectacular!

See you soon!

Laurie

Slimline Card Using MFT Stamps! Read More »

Free Shipping Anywhere In Canada