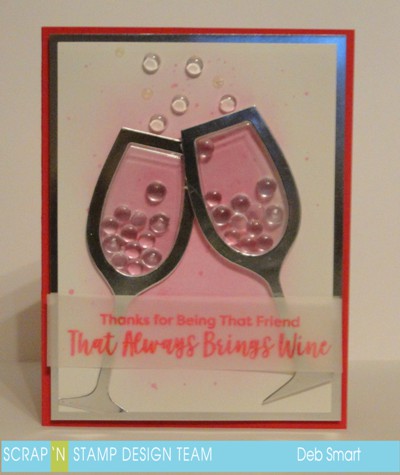
THANKS FOR BEING THAT FRIEND!
Hello there! I’m super excited to be here, as a new member of the Scrap ‘N Stamp Design Team! My name is Deb, and I live here on the beautiful Canadian west coast – in Vancouver, in fact, which is where Scrap ‘N Stamp is located. I’m a WAHM of 2 grown boys (20 and 24) with my husband. I found stamping when carpal tunnel syndrome in both wrists forced me to give up my floral business just over 7 years ago, and before that I gave up my ‘corporate’ job when our first son was born. Needless to say – I much prefer the creative world!
Today I have a quick & fun card to share with you, involving another one of my favourite things – wine! I think this card would be a great ‘Galentine’ card for your bestie, or just because they’re a great friend.
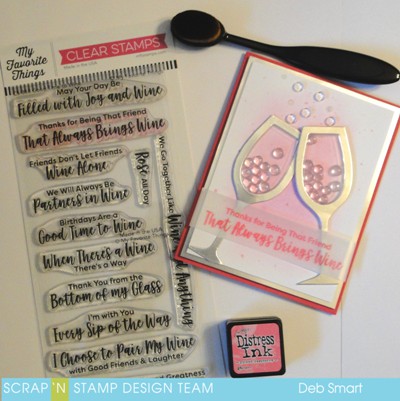
I’m using the My Favorite Things Good Time to Wine stamp set, along with the matching Wine Glass Shaker & Frame dies. I also added extra fun, making it a shaker card by using the MFT Wine Glass Shaker Pouches!
To start, I sponged on some Picked Raspberry Distress Ink onto white cardstock. I used my Life Changing Blender Brushes from Picket Fence Studios – be sure to keep checking the store, because these are COMING SOON to Scrap ‘N Stamp!! (you’ll fall in love with these brushes – they really do live up to their name!). After sponging, I dabbed some of the Picked Raspberry ink onto a clear block, and picked up some of the ink with a slightly wet water brush, and flicked some ink over the panel.
Next, I used my Big Shot with the MFT Wine Glass Shaker & Frame Dies to die cut 2 of the glasses from silver foil cardstock. I wanted my glasses to be clear, so I then cut 2 of the backing pieces for the shaker from acetate.
For the next step, I lined the back of the glass ‘bowl’ part with 1/8″ double sided tape, then removed the backing. I then insert the Wine Glass Shaker Pouch, 1 per glass, and then filled each one with some clear droplets form my stash. Then, I attached the acetate backing with more double sided tape, to hold them in place.
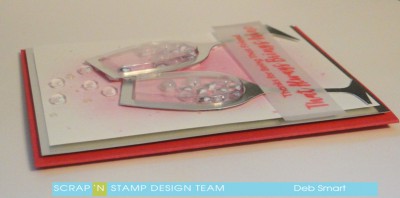
In the photo above, you can see the fun dimension that the Wine Glass Shaker Pouches add to the card!
For the sentiment from the Good Time to Wine stamp set, I place a strip of vellum into my stamp platform. The sentiment is stamped first in Picked Raspberry Distress ink, and then again in Versamark ink. I then covered it with clear embossing powder, and set it with a heat tool. The heat embossing helps the sentiment stand out a bit more, on the vellum and over the glass stems.
To assemble the card, I used the double sided tape to attach the left glass directly to the sponged panel. The left glass was attached using foam tape, to give it dimension, so it looks like the glasses are clinking. Next, I added some more of the clear droplets above the glasses, to look like bubbles. I also added a few drops of Nuvo Crystal Glaze between the droplets, to look like smaller bubbles. The sentiment is attached with a small amount of liquid glue onto the stem of the glasses.
Finally, the front panel is attached to a panel of silver cardstock (to carry over the silver of the glasses) and then onto a card base of bright pink.
I hope you’ve enjoyed my project for today, and you’re inspired to create one of your own! I’ve included the links below, for each of the products you’ll find in the Scrap ‘N Stamp store. Be sure to visit the store often, as new product is added frequently. And be sure to visit the blog every day, for new inspiration from all of the amazing Design Team members!
Happy stamping! ~ Deb