Scratch-N-Stamp
Search

Checkout

Keep up with Sales, New Products and other events at Scrap `n Stamp. Sign up for our newsletter now!

What's New

Hot Deals


watercolouring

Slimline Card with Gina K Elegant Asters

Hi, everyone! Welcome back to the SNS Blog! Laurie with you today to share a card made using Elegant Asters and other Gina K Designs goodies new to the Scrap ‘N Stamp Store!

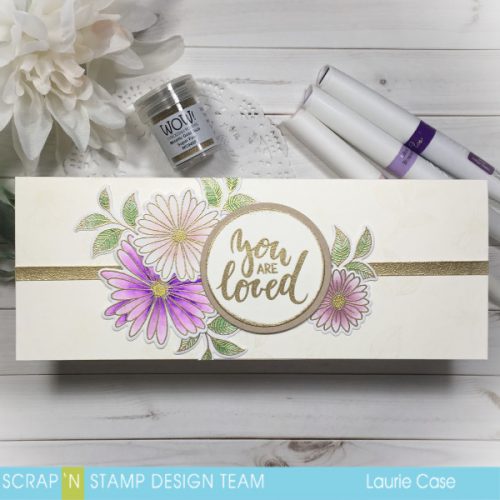
My most used card size is an A2 size which is 4.25 X 5.5 inches. I’m not sure why I focus so much on this size as I absolutely LOVE making 4 Bar sized cards which are 3 1/2 X 4 7/8 inches…I always round up to 5 inches! Today, however, I’m going slightly out of my comfort zone by making a slimline card. This measures 3 X 9 inches and fits your standard business sized envelope! I have made only a couple of these as I find it daunting to “fill the space” :).

I started by stamping all the floral images from the Elegant Asters Stamp Set from Gina K Designs. This is a beautiful set and has been on my wishlist for so long. I’m so excited that SNS is now carrying Gina K’s line! I used Mixed Media paper because I love the whiteness of it as well as it’s not too textured. I also used Versamark Ink for the stamping.

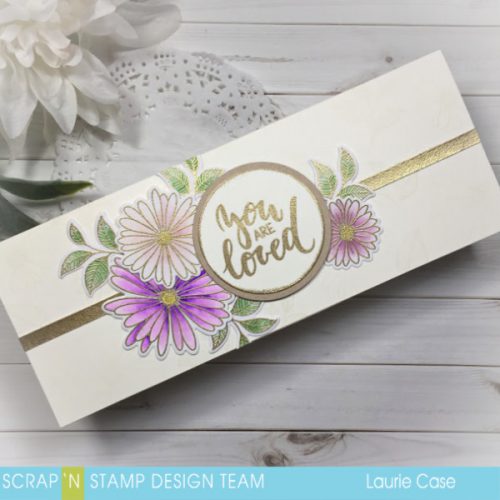
I used Pale Rich Gold Embossing Powder from WOW to heat emboss the images. You’ve got to check out the tons of EP the shop is carrying! For the simple watercoloring, I used a couple of sets of Nuvo Aqua Pens, Autumn Woodland and Spring Meadow. These pens are so bright not to mention, easy to use!!

After using the co-ordinating Elegant Asters Dies to cut out my florals and leaves, it was time to make the card base. I used an Ivory cardstock. I think Ivory looks stunning with gold!

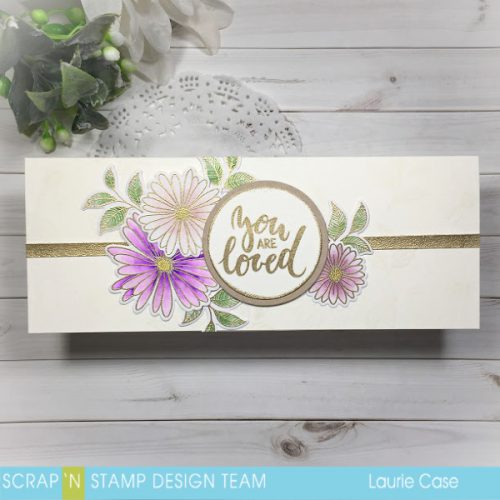
I used a very light shade of beige ink to stamp some of the flowers and leaves directly on the front of the card base. It’s really hard to see in the photos. I decided to add a gold strip of cardstock to break up all that ivory in the background. I smooshed my Versamark ink pad onto a scrap of cardstock, add the gold EP and heat set…instant gold cardstock!

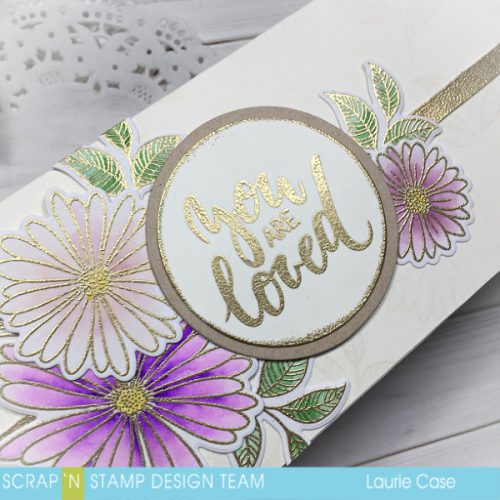
The sentiment was heat embossed onto a die cut ivory circle, then layered onto a larger die cut kraft circle. I used foam adhesive to adhere it. After deciding on an arrangement, I used Nuvo Deluxe Adhesive to adhere all the flowers and leaves.

I’m happy with how this card turned out although, I had a hard time photographing it.

I hope you enjoyed my project and get some time to look at all the fab new products that are now available in the SNS store!!

Have a wonderful and see you soon!

Laurie

Slimline Card with Gina K Elegant Asters Read More »

Simple Water Coloring With Zig Markers

Hi Everyone, it’s Susan with a quick tutorial showing how easy water coloring can be with Zig Clean Color Real Brush Markers. These are a great marker set. They have a lot of fun colors, they have a brush tip and they are really easy to use!  This is a set of 60 but you don’t have to dive in to the big pack to start because they come in 4, 6, 12, and 24 packs – lots of choices to start you off.

I did promise you that these markers were easy to use and I’m going to show you how I made this card. I’ve even got a video tutorial showing the process.

The best tip I can give you, and this tip is good for any medium that you’re working with, is to make color swatches. This is a great way to see the full potential of the inks you’re working with and actually they’re fun to make too.

Now, some of you may think that choosing brown for the flower is a little odd, but another tip I want to give you is to not think about that. Think about what you like and go with it.

Start by adding the ink to the where you want it to be the darkest. Then, using your water brush blend the ink out to the outer edges of the petals. When this layer dried I went in with a darker gray color and adding some shading into the center of the flower.

I like to finish off the water coloring by adding a wash of color around the edges of the image. To do this spread some ink onto a stamping block or a sheet of acetate, add some water and then apply it loosely around the edges.

I told you this was easy. I highly recommend these pens no matter what your skill level may be.

I did mention earlier that I made a video showing the whole process. Here it is – if you have any questions at all, please don’t hesitate to ask.

https://www.youtube.com/watch?v=sBOP3IQy8_s&feature=youtu.be

Click HERE to watch it on YouTube.

Happy Stampin’

and thanks so much for visiting

Simple Water Coloring With Zig Markers Read More »

Your My Super Hero

Hello and Happy Thursday

Hope you are all having a wonderful week. Its been sunny and cold here where I am.

I am on the blog today with circle card inspired my by sons adorable request for a circle Super Hero Card. He is only 3½, I couldn’t say no to his adorable little face, so here it is. I hope you enjoy

I was inspired of course by the one and only Jennifer McGuire and her amazing technique videos, for this background.

I have linked to her page and the particular video that inspired me. In the video she showed how she used plastic wrap to create this affect on water colour. So I had to try it out and well I couldn’t just stop at one background, nope I made several… and kept them in my stash for this card and well you will see future cards using these backgrounds also.

So for the backgrounds I started with some Canson Water colour paper cut in to different sizes, really I was just playing around at first so I wasn’t concerned about sizes. I pulled out my Gansi tambi water colours and went to town. I loaded the paper with water and then added the colours I wanted. Once I was happy I added the plastic wrap on top and scrunched it around. I then but something heavy on top and let it dry.  Once They were dry I pulled off the plastic wrap and you can see the lovely texture you get with this technique.

While I let that dry I stamped out my little guy on to Bristol water colour paper, I stamped him numerous times, this way I could test out colour combinations.  I colored him in using my Zig clean colour real brush markers. I still absolutely love these markers, so so easy to get a fantastic and detailed look with out much effort. I did colour the cutie to look a lot like my son.

  While I was stamping I pulled out my Concord and 9th Stacked city set and stamped out the skyscrapers numerous times, a few times on bristol and then on to black heavy weight cardstock.  I did end up heat embossing the ones on the black. (At this point I wasn’t sure which ones I would use)

Once I had finished up embossing, I moved on to all the die cutting. I pulled out my large nesting circles, the coordinating dies from the city stack stamp and my lawn fawn stitched cloud dies.

I started by die cutting the background with the second largest circle in my stash, then I went on to die cut two more circle out of black cardstock using the largest die. I knew I had to make a completely round card, My son is obsessed with circles, he says its is favorite shape. I then die cut out the skyscrapers and clouds numerous times. I would eventually die cut the clouds again using the circle die so it would layer perfectly.

 I accomplished this using my Gemini Jr. I have to say its my new favorite tool specially for doing so much die cutting. (not paid to say this) It just makes it so much easier. Highly recommend it.

I did have to fussy cut the little super hero boy out as I did not have the coordinating die.

Now the fun part, to make it all come together. I started with the base, I took one of the black circles and created a hinge by scoring a portion of the circle and then adhering the other circle to it. I adhered the background flat to the base and then popped up the city scape, as well as the clouds and the Super Hero, as you can see there is a lot of dimension.


I decided to go back and heat emboss the sentiment to match the city scape, it just added a nice punch. I sat and looked at the card for a good while and it was missing something that’s when I added the action bubbles.  I did have to fussy cut those action bubbles out but it didn’t take long and I think it just adds that little extra something.  I also glued on tiny tiny little star sequins to the night sky, I don’t think I will do that again. lol

For one last finishing touch I added Tonic Aqua shimmer brush to the clouds,  I use that on everything haha.

I hope you like it and found inspiration.

I would love to hear from you so please leave a comment and tell me where you find your inspiration when creating.

Don’t forget to check out the awesome SALES  and out the Scrap’N Stamp Challenge page  we would love to see what you create.

Have a beautiful day and wonderful weekend filled with lots of crafty fun

Nancy


Your My Super Hero Read More »

Free Shipping Anywhere In Canada