
Simple Waterfall Cards
Hey Guys! Glad to be back on the Scrap’N Stamp blog! I wanted to re-share an old card technique that is sure to Wow your recipients.
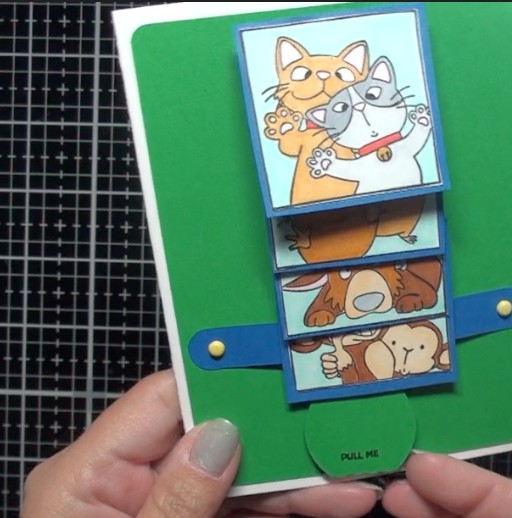
The waterfall card is one of the first interactive cards I attempted to make way back in the day. The nice thing about this type of card is that you don’t actually need a special die set to create it. It also is a great way to take a look at the stamps you have on hand and use them in a different way. Today I will share two cards with you. One using a newer stamp set by MFT – Picture Perfect which is such an adorable and fun set, as well as an older Lawn Fawn set called Thanks a Latte. I will also be using my Silhouette die cut machine to cut out the pieces for the waterfall card, however, you do not need this machine at all! In fact, there are many free templates available on the internet or you can use the template that I created. My template includes 4 squares in which you can stamp your image or text, a decorative panel that is slightly smaller than an A2 size card and the waterfall mechanism. I encourage you to watch the YouTube video linked below on how to use the template.

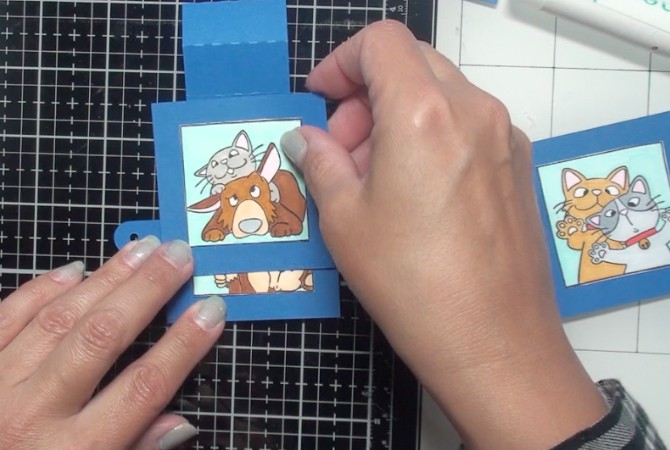
Let’s get started! The template I will be using works with a standard A2 size card. However, you can increase or reduce the size to fit the size of card or stamps that you are using. Once you have your pieces cut out you will want to stamp your images (or sentiments) onto the 4 squares. You can use any medium to colour in your images. I used Copics for mine. Another thing you can do is create additional square cards out of coloured cardstock that are slightly larger in size to give them a backer or frame and to hide any Copic bleed through.
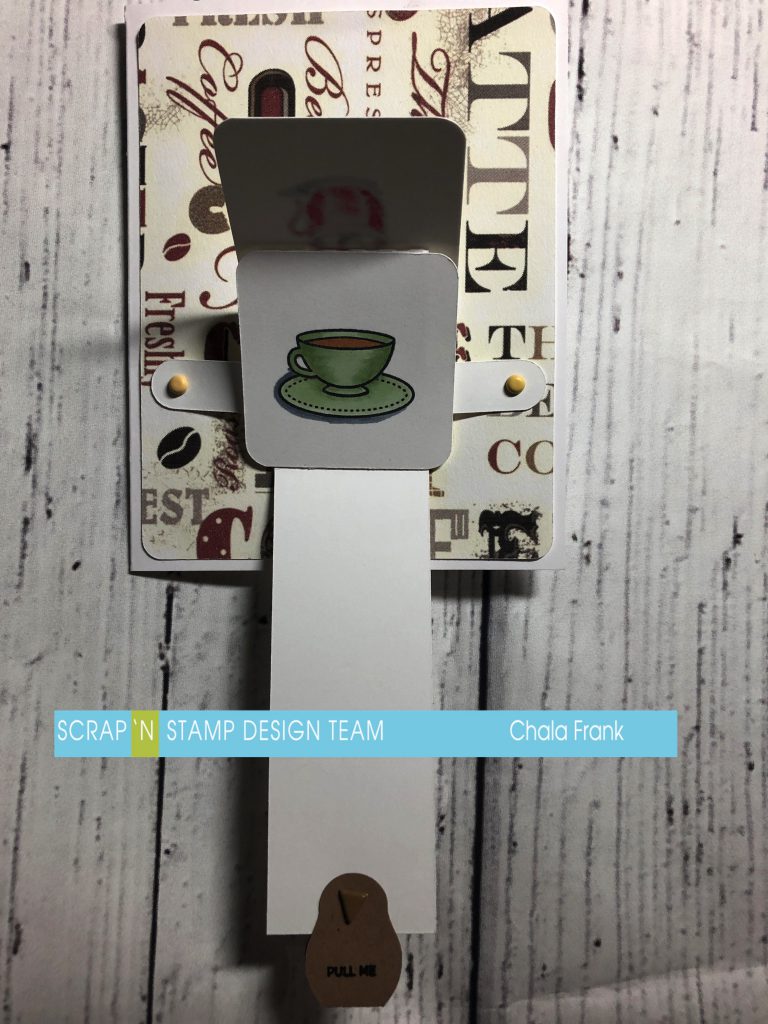
The next step is to prepare your pull / waterfall mechanism. You will want to score and fold the top of the “T” over and glue it down. You can use a liquid adhesive or a strong adhesive like Be Creative Scor Tape (3mm).
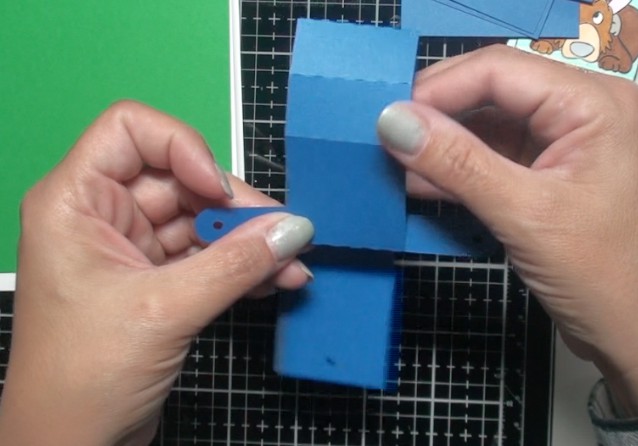
Then you will score the other four marks on the base of the “T” shape and fold the paper to the back. This is a bit tricky to explain…so, I again I encourage you to watch the YouTube video linked below. Once those folds are made, you can adhere your squares down starting with the image that you want on the bottom and lining them up to your score marks. This will make the waterfall effect when you pull on the tab.
I like to punch or pierce holes in the ends of the “T” portion of the waterfall fall mechanism and create corresponding holes in the decorative panel that I can attach the two pieces together with brads. You don’t have to do this, however, if you are not adhering with brads you need to ensure you are only applying adhesive to the end of the tabs…otherwise you cannot feed the waterfall portion through the back….(again, this is confusing to explain but much easier to follow along with the video)! If you are using brads you will want to connect the panel and waterfall mechanism pieces together before you glue the panel down onto your card.
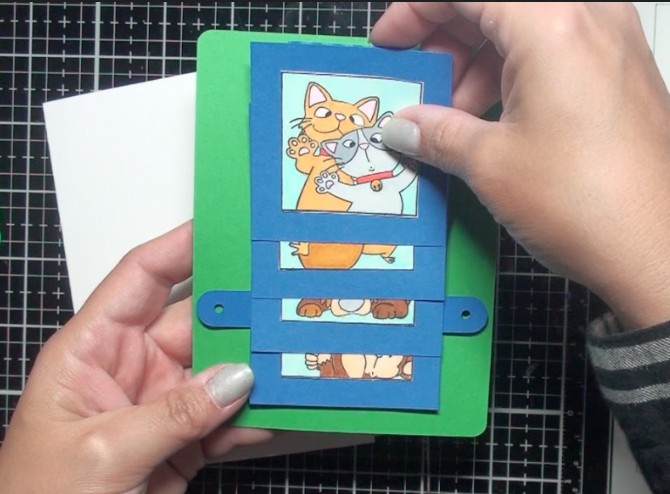
Once you have the panel adhered down you can embellish the pull tab with sting or simply by creating a tab and stamping or writing “pull here”. Again, you can glue the tab or adhere it with a brad. (Note the template above does not have a separate tab piece…but you can always create one!)
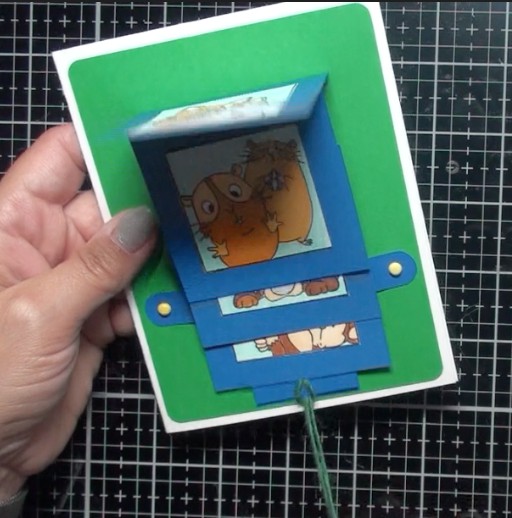
Now you can pull down your tab and watch the “waterfall” of images.
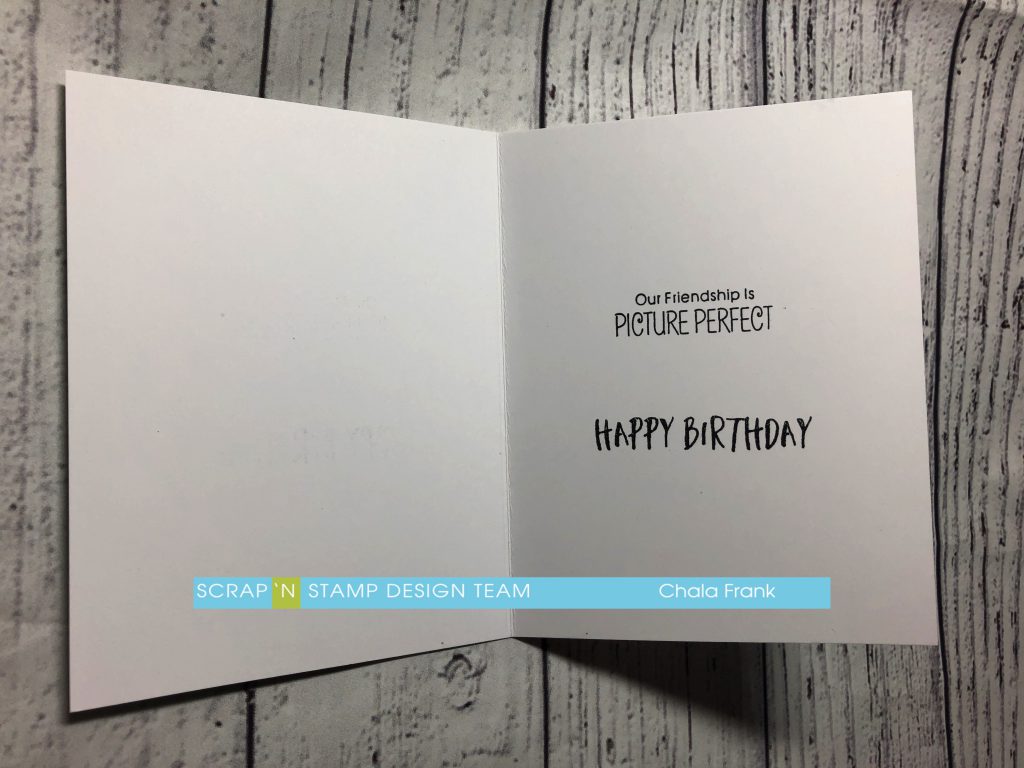
To complete your card you can stamp a sentiment or greeting on the inside.
This first one is for yet another birthday that my son Leighton was attending! I kept the front of the card super simple…although you could totally add embellishments and additional stamping!

I thought it would be fun to attach the gift card to the pull tab as an additional surprise! It also helps give the slider mechanism enough clearance for the brad to slide underneath the images without getting caught.
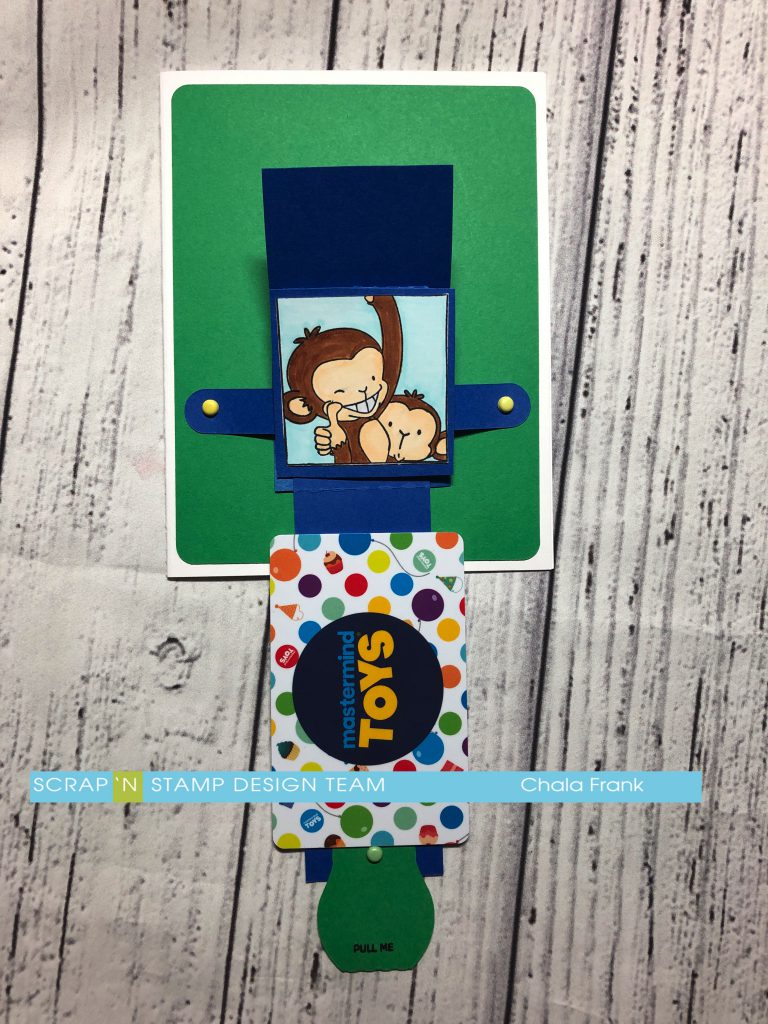
This corresponding sentiments from the MFT – Picture Perfect stamp set was perfect for the recipient and the giver! In fact, the two monkeys remind me of my son and his friend! (My son is really tiny so the little monkey is a spitting image of him! LOL) I also added “Happy Birthday” from the Lawn Fawn Ahoy Matey stamp set. (Another set that has images that would be super cute on a waterfall card!)
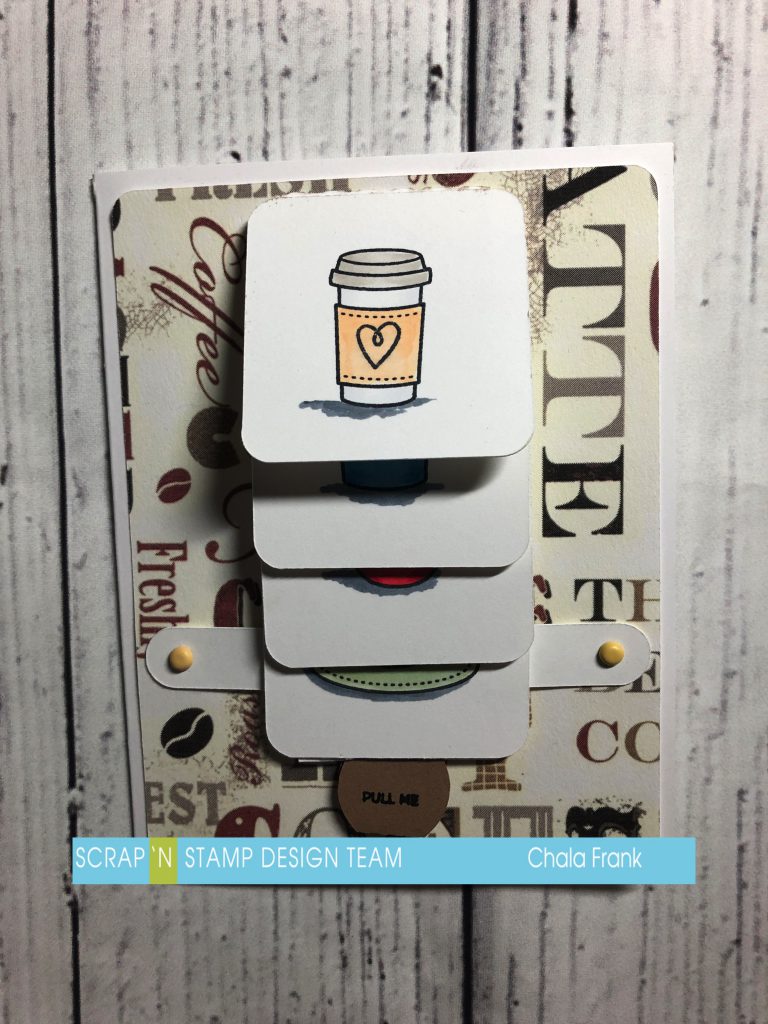
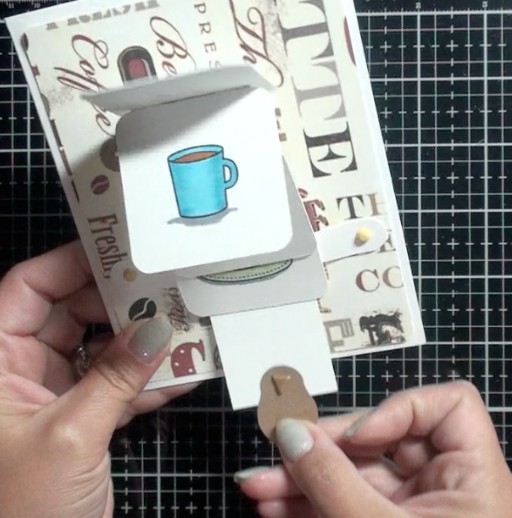
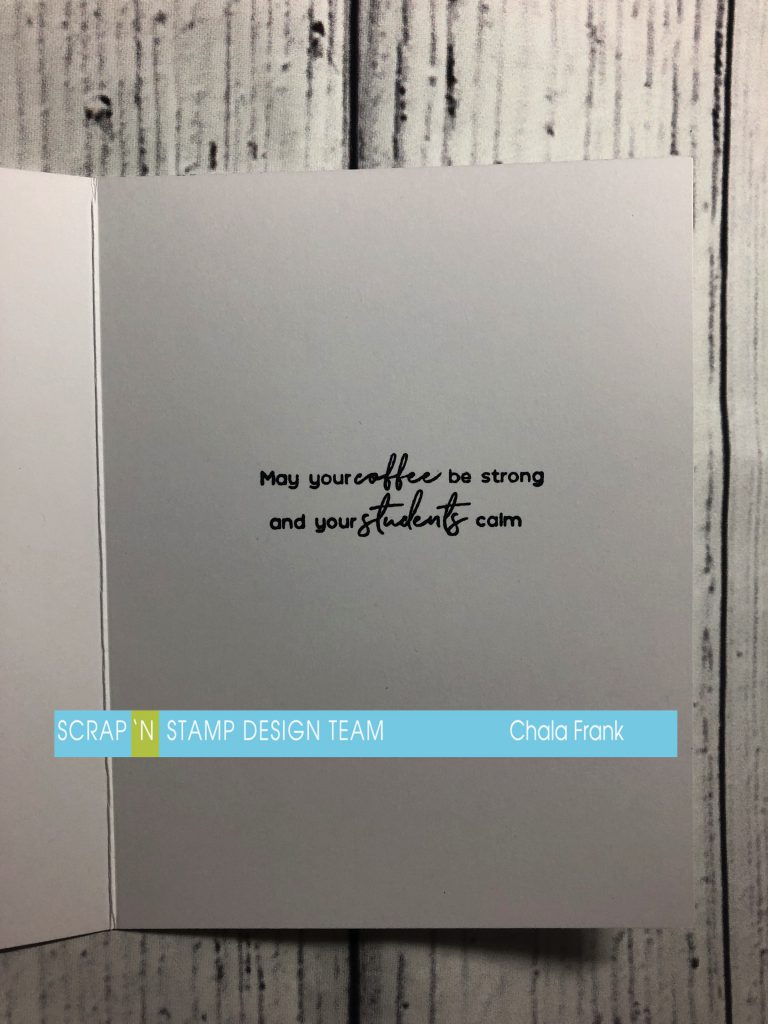
The second card was going to my son Arden’s teacher for an end of the year “Thank you”. I used some coffee themed patterned paper for the panel.
Again, there is room to add a gift card to the pull tab if you like! On this one I did not add backing cardstock so you can see the Copic colouring that bled through…but, I am okay with that.
I used a sentiment from Picket Fence’s stamp set Good Teacher that I thought worked nicely with the coffee theme. The sentiment just cracks me up…again, it suits the recipient perfectly!
I hope you enjoyed today’s cards and again, I encourage you to watch the corresponding YouTube video to get a more concise view of how these cards are assembled.
Click Here to watch the Video:https://youtu.be/C71fPqIebVQ
Take a look at your stamp stash and see what cute waterfall combinations you can come up with! I have stamped with the following sets and am hoping to have the cards completed shortly and posted on my Instagram account. Lawn Fawn: Ahoy Matey, Rawrsome, On the Mend, Mama Elephant: Puppy Play, Tailored Expressions: Grouchy Grumplings
Please share your creations and use the tag #snsblogwaterfallcards so we can see what you have come up with.
Have a great long weekend and Happy Canada Day to you all! 🇨🇦
~Chala
Simple Waterfall Cards Read More »


