
Happy Tuesday!
Today I happen to have a day off work, so I decided that instead of the card I planned to share, I would incorporate a facebook live into my post, which I’ve never done before and I’m kinda regretting the idea a bit… LOL but I’m gonna roll with it! I recently got my hands on Dina Wakley’s new pouring medium & cell creator and I decided to play with it! I’m not feeling like I was entirely successful on my first attempt… and I used the entire 4oz bottle of pouring medium to cover two 8×10 canvases, but it was fun to get all painty and experiment! And it’ll be fun to see what these not-so-perfect backgrounds become…
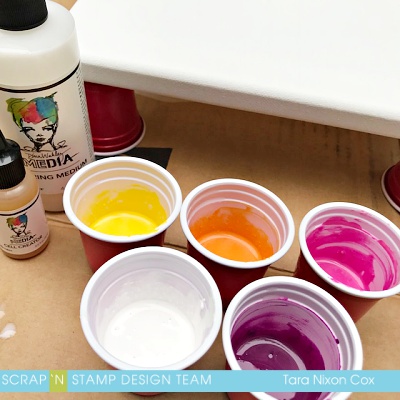
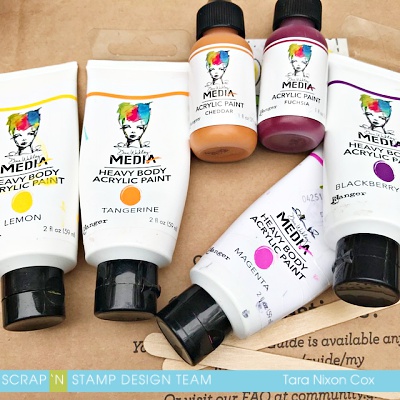
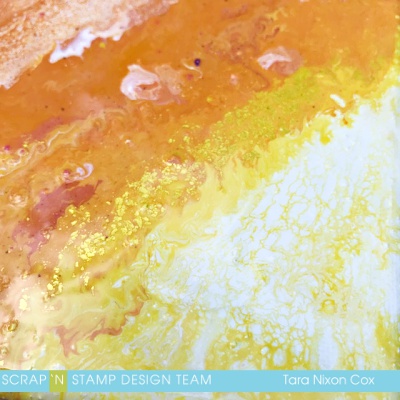
First, I poured the medium into my cups (I used little plastic shot glasses) and added some paint. I worked with lemon, tangerine & cheddar, magenta, fuchsia, blackberry & white as I was going for an autumn sunset sort of vibe… I think in the future I will get Dina’s mixing cups (since they have measurement lines for more accurate mixing) and I’m gonna be picking up the larger bottle of Pouring Medium as well! I mixed up my colors with craft sticks, and I found some of my colors were a bit lumpy… I thought I had it mixed up really smooth, but you’ll see little clumps on my finished canvas that doesn’t look so great 🙁
I used the same little cups to prop up my canvas so paint could drip off. I decided to work outside on a picnic table with cardboard beneath my canvas as well. My first canvas looked better earlier on than it did at the end… I poured each color individually and then tilted the canvas to blend them together. I think I overworked it a bit much so it lost some of the color definition. Here’s a peek before I started tilting & blending the colors.
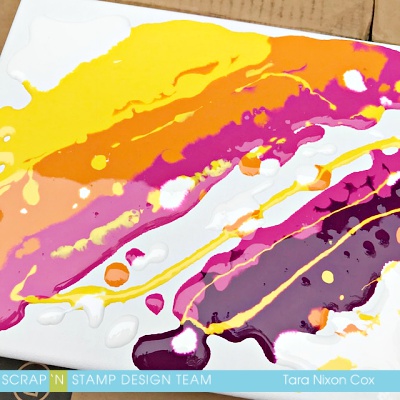
My second canvas was a ‘dirty pour’ which involved pouring all the colors into one cup and inverting it on the canvas. This technique was more fun, but I think I just didn’t have enough paint for the kind of results I was hoping for. Here’s what my setup looks like and the two canvases as they sit and dry. I think it might take a while…

I added a bit of a gold paint into the first canvas just to see what would happen. It does add some fun metallic bits and helped break up some of the orange ‘melted cheese’ look.
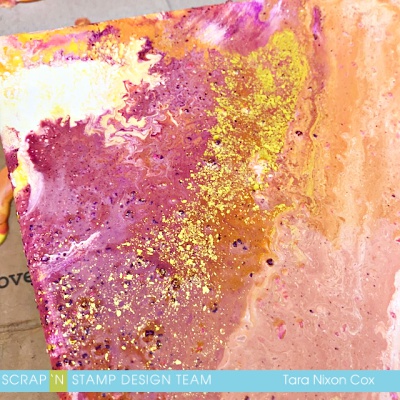
Here’s another close up shot, which shows I did get a few cells. I learned a few things, and I look forward to playing with this technique some more!
Paint is still drying, but I think I have an idea what I’m going to add to these once they dry. I’ll be going live on facebook in a few minutes to show you more of my setup and the mess I made! I also took a little video of the dirty pour which I’ll upload on facebook as well, since space is limited here on the blog!
Until next time,
Inky (PAINTY) hugs,
Tara

I think this looks like fun. My question is did using Dina’s heavy body paint have a different outcome than if you just used normal body acrylics?
For a first try it is awesome! I have not tried this technique yet…
I haven’t tried with normal body, though I’m guessing maybe you would just use less of Dina’s paint and more of the pouring medium? You can see a couple of my older colors were a bit clumpy and that definitely made a difference!