How to insert, resize & print.
In our first Digital Basics tutorial we showed you how to download and save your digital files. Now we are going to show you how easy it is to use Microsoft Word or any similar word processing program to resize and print your digital stamps so you can use them on all kinds of paper crafting projects like cards, scrapbook pages, books and so much more. We think you will be amazed at just how easy they are to work with.
Step-by-Step Instructions:
(To see more detail you can click on any of the pictures and they will be enlarged)
Open a new document in Word.
INSERT YOUR IMAGE:
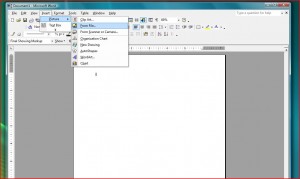
1. To add an image to your Word document click on Insert in the top menu bar and then click on Picture. Another menu will open and you need to click on From File.
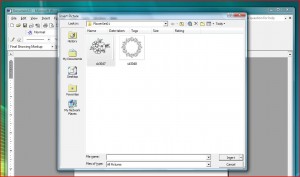
2. The window that opens up allows you to locate and select the file that you want to work with. Select the image that you want to insert into your Word document and click Insert.
TIP: If you have created a file folder on your Desktop for your Scrap ‘n Stamp Digis as suggested in our previous tutorial you will definitely find it easier to locate and insert your images when you want to work with them.
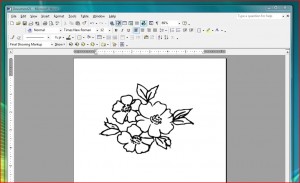
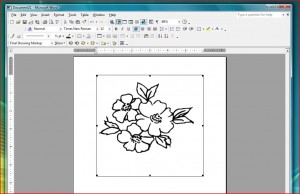
Your image has now been inserted into your Word document and is ready for you to resize or print.
RESIZING YOUR IMAGE:
Method #1 – Click & Drag:
Click on your image once and a frame will appear.
To resize your image put the cursor over one of the corner nodes, an arrow will appear. Now hold down the left mouse button and drag the mouse in or out to make the image smaller or larger. When the image is the size that you want, release the mouse button.
Tip: You can use the rulers along the top and sides of the screen to see the exact measurements of your image.
Method #2 – Format Picture:
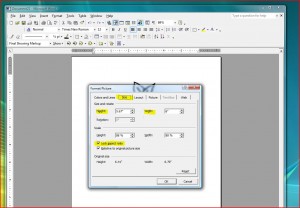
You can also resize your image by right-clicking on your image and selecting Format Picture.
From the tabs on the top select Size. Make sure that you keep the Lock Aspect Ratio box checked so that the image isn’t distorted in any way. Change the Height to the size that you want, press your Tab key and the Width will automatically be adjusted to the correct size.
This method is very accurate and makes resizing easy when you are going to cut out the image later with a Spellbinders Nestabilities Die.
Tip: You may want to save your resized image to use again later. Select Save As and put this new file with your other digis so you can find it quickly when you need it.
PRINTING YOUR IMAGE:
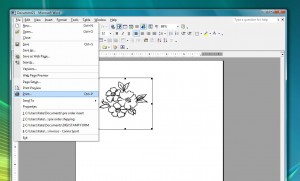
When your image is the size that you want you are ready to print. From the file menu select Print, review your printer settings and select OK.
Most printers are able to print on a variety of papers and cardstocks so you may have to experiment a little to find the best settings.
TIP: If you are going to be coloring in your image with paints or markers and you are printing with an Inkjet printer you may need to leave the ink to dry for a few hours or you can heat set it with your embossing heat tool. Different papers dry at different rates so you may want to do a test before you do your final project.
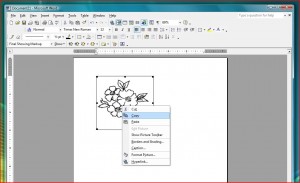
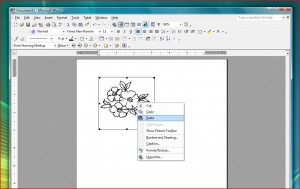
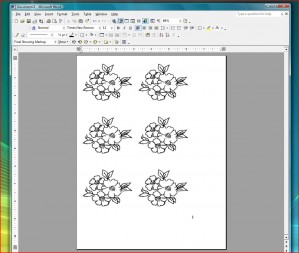
TIP: To get the most from your paper when you are printing you may want to insert several images or create several copies of the same image. To duplicate the same image simply right-click on the image and select Copy. Now right-click on an empty space in the document and click Paste. Your image has been duplicated. If you want more of the same image just repeat the second step until you have the number of images that you require.
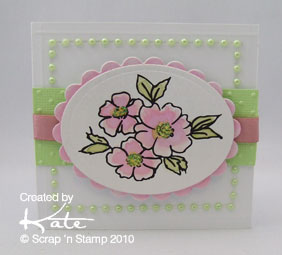
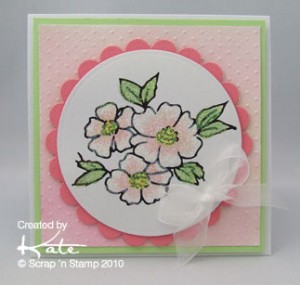
Here are some samples showing you how we used the stamps from the Studio K Flower Set.
The Digital Stamp was resized to fit on a 2 3/4″ x 2″ Spellbinders Oval Nestabilities. Card size is 3 1/2″ x 3 1/2″.
The same Digital Stamp was resized to fit on a 3 3/4″ Spellbinders Circle Nestabilities. The finished card size is 5″ x 5″.
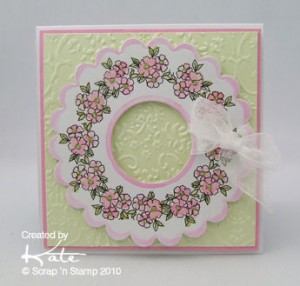
This Digital Stamp was resized to fit on a 3 3/4″ Spellbinders Scalloped Circle Nestabilities and then layered onto a 4″ x 4″ card.
As you can see the same stamp can be sized to fit your project perfectly. By combining Digital Stamps with the products you probably already have and techniques that you use for rubber and clear stamps the possibilities are endless!




Pingback: Scrap 'n Stamp Designer Showcase - Candy Cane Digi Stamp Set | Scrap N Stamp
Thanks for the tutorials. Will you be doing a tutorial on how to put multiple images together? I have inkscape and photoscape and can’t seem to figure it out. But I have this cute image and would like her to be sitting on the bench I have.
Thanks.
Hi Nicole! Yes, we will be doing more tutorials on working with digital images and have made a note of your request to see one on how to put images together. It’s a more advanced topic but we will try and make it simple.