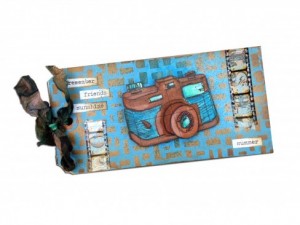
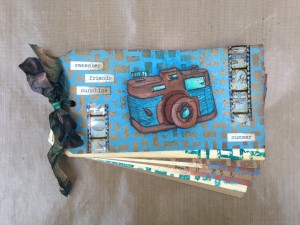
 Happy Tuesday! For most of us, it’s the last Tuesday of summer vacation… time is flying by, but hopefully you’ve got some fun memories from the summer to take with you! Here’s a cute little project you can create & save some of those summer memories! It’s a tag booklet I made that was featured on the Ranger blog, but all the fun details are here for you today on Scrap N Stamp Canada!
Here’s what you need to recreate my project (though I encourage you to change it up and make the project your own!)
- Ranger Black Archival Ink
- Ranger Surfaces: Kraft Tag #8
- Ranger Surfaces: Manila Tag #8
- Ranger Non-Stick Craft Sheet
- Ranger Multi-Medium: Matte
- Ranger Ink Blending Tool and Foam
- Tim Holtz Distress Ink Mini: Walnut Stain
- Tim Holtz Distress Paint: Salty Ocean
- Dylusions Stencil: Staggered Brickwork, small
- Dylusions Ink Sprays: London Blue, Vibrant Turquoise, White Linen & Melted Chocolate
- Tim Holtz Stampers Anonymous Cling Stamps: Camera from Travel Blueprint Set
- Tim Holtz idea-ology: Elements Tissue Tape, Tiny Attacher with staples, Crinkle Ribbon, Filmstrip Ribbon, Seasonal Chitchat Stickers
- Other: Adhesive Foam Square, Paint palette
Here’s how it’s done:
- Stamp camera blueprint twice on a manila tag in Black Archival Ink.
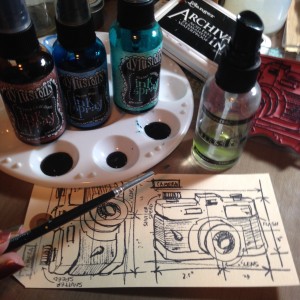
- Use Dylusions Ink Sprays to paint the images. If you have water brushes filled with paint, use those *budget tip* If you don’t, simply pour a small amount of your desired colors into a paint palette and paint with a brush. Add multiple layers of color to darken and white dylusions to add highlights.
- Don’t waste the extra ink- pour it on your craft sheet and ink up some Crinkle ribbon with it! Crumple up and set aside the ribbon to dry. It will be used to tie up your booklet later.
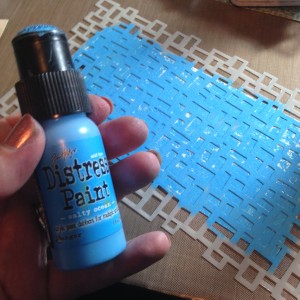
- Place a Dylusions stencil over a tag and apply Distress Paint over it onto the tag. Lift the stencil and flip over onto another tag and ‘stamp’ off the excess paint. Allow both tags to dry and select your favourite to be the front of your tag booklet. I used the ‘stamped’ kraft tag.
- Cut out the colored cameras, layering the lens portion of the image with adhesive foam squares.
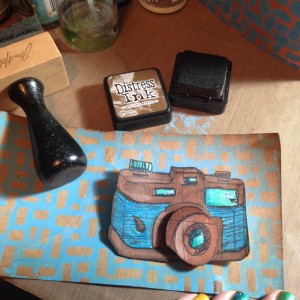
- Ink the edges of the camera image and the tag with Walnut Stain Distress Ink.
- Select some words from the Seasonal Chit Chat Stickers, stick them on your Craft Sheet and ink part of each of them with Distress Ink. Adhere to opposite corners of the tag.
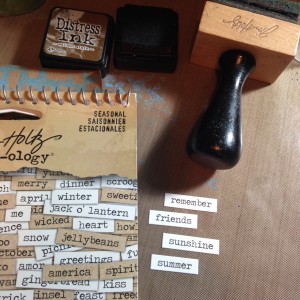
- Embellish your tag with Tissue Tape and lay bits of Film Strip Ribbon over it. Adhere with Mini Attacher.
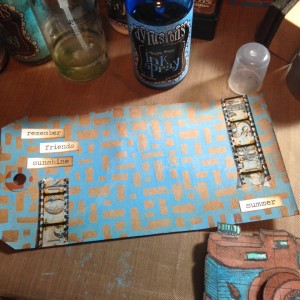
- Spritz Dylusions Ink Spray in London Blue in the center of the blank space on your tag and allow to dry.
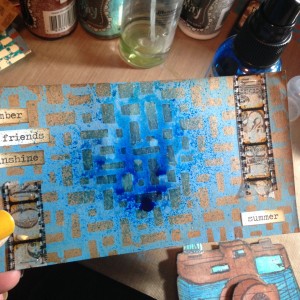
- If you’d like some extra thickness, brush Matte Medium to a second tag and adhere to the back of this tag to stabalize it. Once dry, adhere the camera image over the ink spot in the center of your tag.
- Before you clean up- use the sprays, inks & stencils you from this tag to add simple decorations to assorted manila & kraft tags. These will be the pages of your tag booklet- fill them with photos, memories & ephemera from your summer holiday! Tie it all together with the Crinkle Ribbon you inked up earlier.
Hope you have an excellent Tuesday! See you next week 🙂
Inky hugs,
Tara


