
Happy Saturday!
Today’s Random Act of Cardness word is “texture”. Texture is the feel, appearance or consistency of a surface or substance and whe can achieve texture in many different ways. You can use a Gell Press, fabrics or laces, buttons, twines or thread, texture or gel pastes and even paper layering. The possibilities are endless! I have been playing around this week with two very different ideas to add texture to my cards.
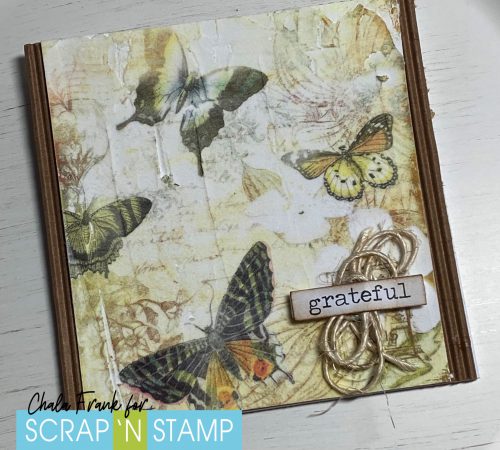
For the first card I wanted to have the feel and look of an old plaster or fresco painting. The problem is, I am not the greatest painter…but, I have a work around. Stick with me! To start, I begin spreading a thin layer of Ranger Texture Paste with a palette knife onto a piece of 80lb white cardstock. I let this dry completely. I suggest a couple of hours or overnight to be safe. You want to make sure that it is completely dry before the next step. I then found an image off the internet that I like and I printed the image onto the dried texture paste with my laser printer. It came out better than I had expected. This did not effect my printer at all, however, this is a user beware technique and I am not responsible should something happen to yours! LOL!
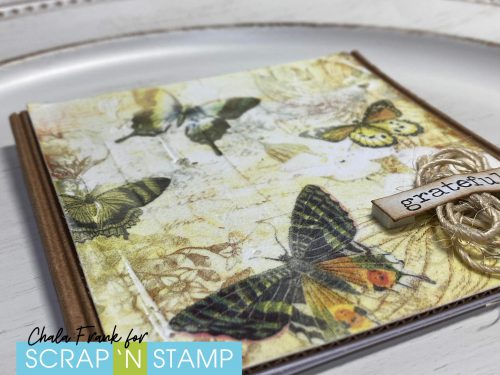
The two things you want to keep in mind is the texture paste needs to be a thin layer so that it will go through your printer and it MUST be completely dry. I then trimmed the image down and added it onto a piece of corrugated cardstock and added some twine and a popped up a sentiment from the Tim Holtz Big Chat sticker book and distressed the edges with some Vintage Photo. This card looks so cool in real life. It is light weight but has the look of plaster painting.

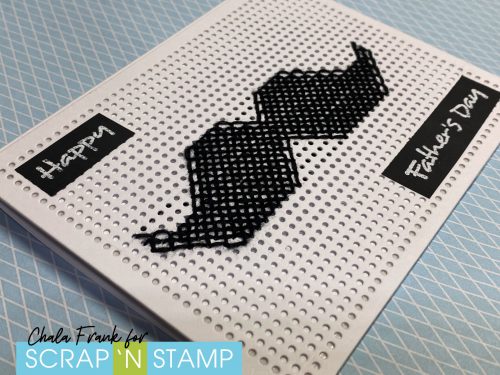
For the next card I went in a completely different direction and decided to play with the MFT Cross-Stitch Rectangle die. I love that you can totally create your own image with stitches! I am not the best at creating my own pattern, so I headed to the internet to find a free pattern. Their are TONS to choose from and so many that would be great for card making! My favourite site currently is DMC.com.
I chose a cute moustache pattern that I found at the familyforham blog as it looked easy (it’s been a while since I have cross-stitched!) and I thought it would be perfect to create a Father’s Day Card. I used some black cross-stitch floss and followed the pattern. The great thing about the size of this die from MFT is that the cross-stitching works up very quickly. I then adhered the die cut onto a card panel using some Be Creative double sided adhesive tape. I then stamped a simple Happy Father’s Day sentiment onto some black cardstock with Versamark ink and heat embossed with some white embossing powder. This card turned out so cute and I love the texture and soft feeling of the embossing floss!
I hope these two ideas of inspired you to play around with texture on your cards! Remember to share your creations over at the Scrap’N Stamp Facebook Challenge Page!
Enjoy the rest of your day!
~Chala
