Tuesday with Tara {take 444} Type Talk
I was browsing the SNS online store the other day and noticed a stamp set that I’ve been a fan of for years still in stock, so I thought it was a great time to share some cards with it!
My cards feature the fabulous Type Talk stamp set by Concord & 9th. For my first card, I’ve used the floral image that is part of the set, colored loosely with watercolor pencils in the neutral shades of brown and teal. The typewriter was stamped onto some paper which I inked up with Frayed Burlap Distress Oxide Spray– the mix of colors in this single spray was the inspiration for the entire card.
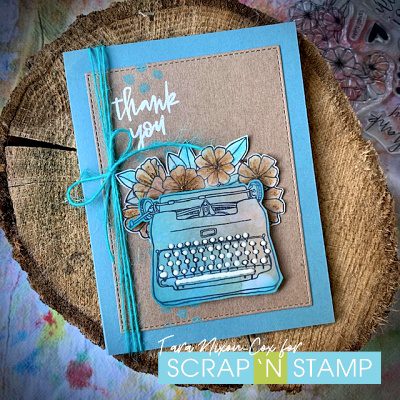
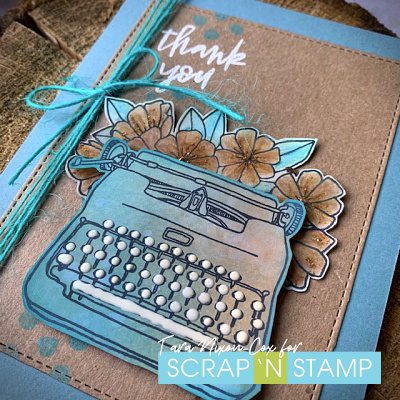
As you can see, the card itself is pretty simple. I fussy cut the two stamped elements and adhered them to a stitched edge die cut panel. I embossed my sentiment in ivory and added some stamped dots in a row above and below it. The fun details that finished it off were some white Nuvo Crystal Drops on my typewriter keys and a bit of thin twine. As you can see there is a touch of glitter on the flowers as well.
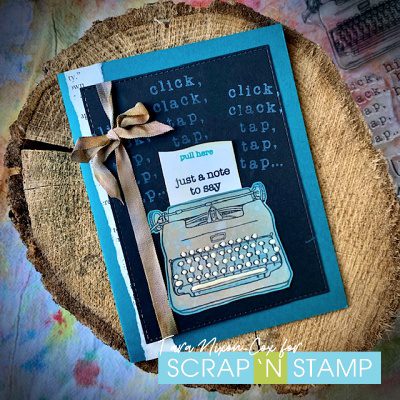
Here’s a more masculine version of the card (very similar, but a smaller scale than this one I shared previously). The typewriter was stamped on the same piece of inked cardstock as my other card.
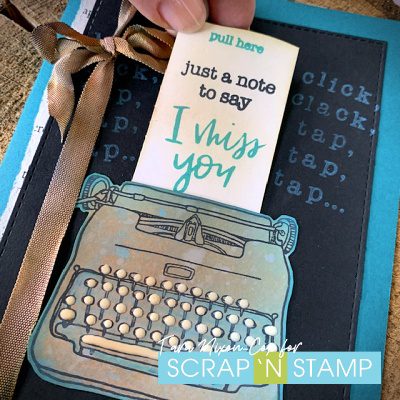
I also used a fun interactive element that I featured on a previous card (you can see my tutorial here). You can see it here, as well as a closer look at the typewrite keys. I love how the Nuvo drops picked up some of the color from the paper, making the keys more ivory than a stark white.
Wishing you creative days ahead… I’ve been struggling to find creative time lately, in this busy season of life so I’ve decided to take a bit of a break from my Tuesday with Tara & Facebook Live posts for Scrap ‘N Stamp. I still plan to make time for our monthly Inspiration Hop projects while I focus on catching my breath a bit :). Please follow me on Instagram where I’ll be sure to share any updates and projects in the mean time!
Inky hugs,
Tara
Tuesday with Tara {take 444} Type Talk Read More »