Christmas in July Blog Hop

It’s our Christmas in July blog hop and I am so excited that you are joining us! We have 12 stops on our blog hop. I hope you you take time to comment on each one for a chance to win a $50 gift certificate from us here at Scrap’n Stamp! Also take a peak at the designers Instagram for more chances to win.

Makers know that if you don’t start early you’ll never get everything done. So we have a little inspiration to get you going. Here is my card for the Christmas in July blog hop. Please bare with me on the photos, they’ve never been my strong suit and glitter looks great in person but is so0000 hard to photograph.
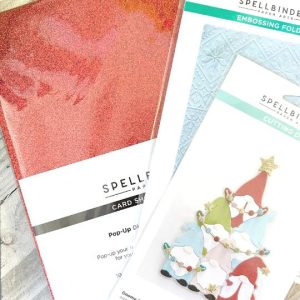
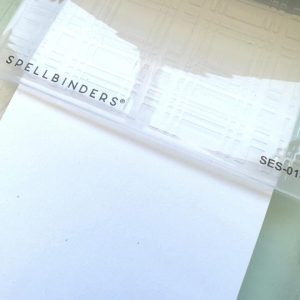
My card feature Spellbinders Gnome Tree die, Ski Lodge embossing folder and sparkly Pop-Up Die Cutting Glitter Foam Sheets. The sheets are what I wanted to share with you – they are fabulous! They cut like butter. One pass, YES I said ONE, on my ancient Big Shot. Remember when we tried foam cutting a couple years ago? It was squishing a not matching up, this foam doesn’t do that. AND the glitter doesn’t shed!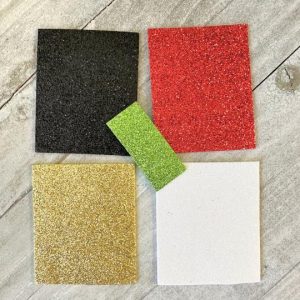
With the foam sheet a little goes a long way. I cut my foam sheets to A2 size to fit my Big Shot and realized they were still too big and cut them in half again. I ended up using less then an 1/8 of a sheet of the sparkly Pop-Up Die Cutting Glitter Foam Sheets. in gold, white, red, black and just a scrap of green.
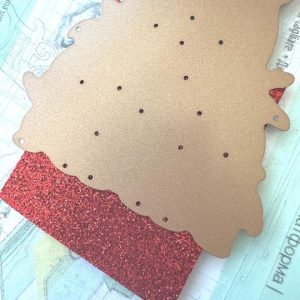
I start by cutting out only the bottom row of Gnomes from the Spellbinder Gnome Tree die in the red Glitter Foam Sheets. I choose to use the middle gnome and set the rest aside for later. One pass through my Big Shot – that all it takes!

This is what I end up with one light string cut from metallic gold cardstock. A set of hands and a nose cut from white card stock. From thePop-Up Die Cutting Glitter Foam Sheets – one one set gnome bits in red, two sets of stars in gold, one set of lights in green, one set of shoes in black and a beard and a pom pom in white. Please note the picture above features black sparkly noses and a shoe cut from card. I realized this much later and it was too late to retake the picture.
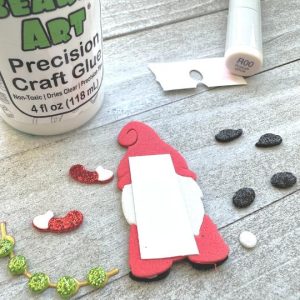
Time to assemble our Gnome Tree foam Gnome. Start by adhering the Green foam lights to the gold string die cut and set aside to dry. Next I started on a scrap of white card and used my Bearly Arts Glue to assemble the hat, beard and robe. After it dried a added the shoes and nose – this is when I noticed my mistake! So, I grabbed my R00 Copic and scribbled it on a white scrap of card stock and cut out the proper nose and then grab my sparkly Pop-up Die Cut foam in black and redid the feet. I used my tweezers to glue the new nose and shoes back on and glued the hands to the arms. Which I ended up colouring with my R00 when the glue had dried because I thought they were too white. All these little bits I was so thankful for my tweezers and the precision tip on the Bearly Arts glue. Your lights should be dry now so position them where you like and glue down. Final Gnome step, flip your gnome over and glue the arms to the back so it looks like they are holding the lights.
Now for the card base. I found that a whole background of embossing was over whelming. So I redid the card base placing only the bottom half of the card base in the embossing folder and running it through my machine. I used skinny foam dots and mounted this to the card leaving an 1/4″ frame on the Twinkle Season Card above but only 1/8″ frame on the GNOEL card below. I then mounted the Tree Gnome using foam squares above the embossed area.
 Time for a sentiment. One the top card I used the words “twinkle season” from Holiday Words, a set of Tim Holtz dies, cut out of gold Glitter foam. On the bottom card cut out of black Glitter foam I used the GNOEL from the Honey Bee Stamps Gnome Place Like Home. After they were assembled I decided it didn’t need the stars I had cut so I left them off but the next day I decided to replace the pom pom that I had cut from sparkly white with the small gold star.
WIN WIN WIN – Leave a comment for a chance to win a $50 Scrap’n Stamp Gift Certificate. We pick one random winner from all comments left and we’ll announce it July 25th, right here, on the blog. I’ll even make it easy for you, leave a comment, which card do you prefer Twinkle Season or GNOEL?

We are celebrating Christmas in July all month. Starting with this Christmas in July Hop & a Christmas sale for 25% OFF select items. There will be other give aways, promos and surprises all month so make sure to check back. Time to hop on – Alison Cope is next on the hop you can click here.
Here’s the complete list so you don’t miss anyone!
SNS Blog
Allison Cope
Ardyth Percy-Robb
Deepa Robbins
Dina Kowal
Kia Gibson-Clapper
Laurie Case
Mari Clarke
Meghan Kennihan
Nancy Elrick
Tara Nixon Cox
Tracey Mehak McNeely
Christmas in July Blog Hop Read More »