Scratch-N-Stamp
Search

Checkout

Keep up with Sales, New Products and other events at Scrap `n Stamp. Sign up for our newsletter now!

What's New

Hot Deals


Distress Oxide Inks

Oh Canada


Happy Canada Day!

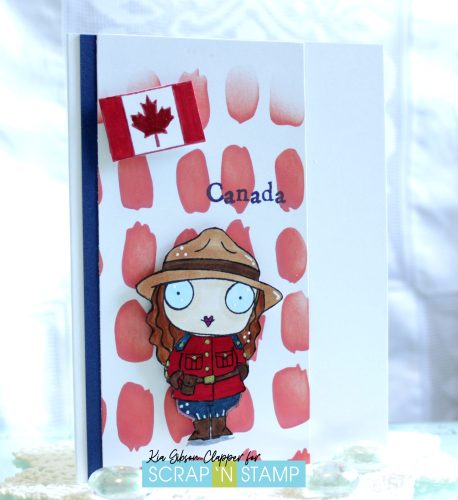
Today is Canada’s 156th birthday, and I wanted to celebrate. What better way than to colour up this fabulous stamp by AALL and Create. But first, let me start with my background.

For the background I am using Stampers Anonymous stencil Brush Mark. I cut a piece of cardstock to fit the left side of my card and stenciled using the stencil along with Distress Oxide ink in Barn Door. I then attached it to a piece of navy cardstock with the mat showing on the left side.

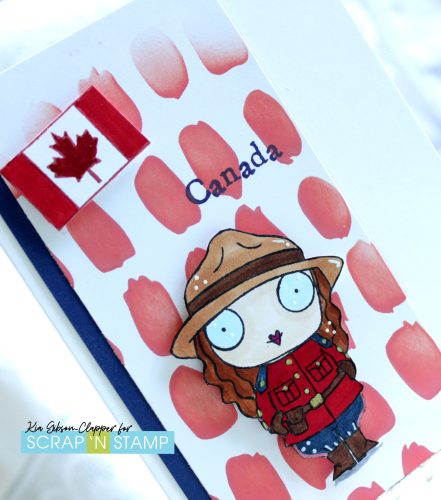
In my mini Misti I stamped the Mountie, being AALL and Create stamp #871, using Memento Ink in Tuxedo Black. I then stamped the flag using Memento Ink in Rhubarb Stalk, and fussy cut both of the pieces out.

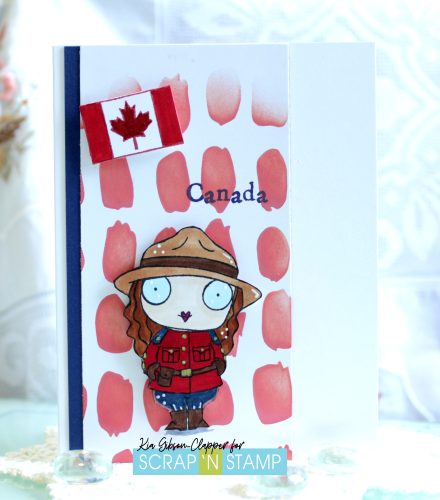
I attached the Mountie and the Flag to the card front using foam squares and finished off with embellishments to the Mountie using red gel pen down the outers sides of his pants, adding gold to the buttons and belt buckle, and adding white gel pen to several areas.

I then put my card back in my Misti and Stamped the sentiment using VersaFine Clair ink in Medieval Blue to finish.

Another fun card to make and to celebrate Canada Day. I hope you have enjoyed this card, and I also hope you all have a fabulous Canada Day!

Copic markers used: E40, E41 face; E59 Belt, Stetson trim, Pouch, Congress boots; R27 Red Serge, E39 Hair and E34 Stetson Hat; B00 on Eyes, and B99 for the Banana Pants.


Oh Canada Read More »

Seas the Day

Hello to you. Kia here with you today to share this fabulous stamp and die set by Colorado Craft Company, along with the background stencil by Gina K Designs. To get a bit of a different look for this card I first did smooshing using Neenah cardstock and Salty Ocean Distress Oxide along with Mermaid Lagoon Distress Oxide inks.

Putting down the dry background piece on my work surface I added the stencil over the piece securing it in place. Using a domed foam blending tool along with Blueprint Sketch Distress Oxide ink I pounced the tool up and down lightly to fill the card piece with ink, which created beautiful dimensions and further textures. While I had the tools out I also did a piece just using the stencil for the inside of my card.

In my mini Misti using Memento Ink in Tuxedo Black I stamped the images, then proceeded to colour using Copic markers in the following colours: The Birds B000, B41, B26 and Y13, R17 on the beaks. The posts are done using E42, E47 and Y19 with C00 and C1 on the Starfish along with B26 dots.

Using the coordinating die, I die cut the pieces with my Gemini Jr. machine. I attached the background piece to my card front using Art Glitter glue, along with the piece I did for the card inside. On the inside piece I also stamped using the beautiful sentiment included in the set.

On the card front I attached the die cut piece using foam strips, including the extra Starfish. I then stamped the sentiment “Seas the Day” using VersaFine Clair ink in Blue Belle.

To finish with a bit of sparkle I added Pinkfresh gems in Ombre, being silver and blue gems, which are so pretty.

I hope you have enjoyed this card today, and look forward to seeing you next Friday.


Seas the Day Read More »

The Birdhouse

It is Day 27 of the Random Act of Cardness event, and for my card today I am doing a delightful Birdhouse Fold card. I saw this card while browsing YouTube awhile back and thought it so cute, and so me.

First I followed the instructions from the video which I had written down. Following is a drawing with the instructions for ease of reference.

I am not one to buy designer paper, instead I like to make my own using stencils, which I have done here using Paper Rose Big Bloom along with Candied Apple distress oxide, Crackling Campfire distress oxide and Twisted Citron distress oxide. I also sponged on the reds to the card base front.

When finished with the front panel I did the panel for the inside, using the dots from the stencil along with a few of the leaves in Twisted Citron. Also, I sponged on the Twisted Citron for the inside of the card base.

Following the instructions I did the folds and attached them in place. I then die cut the circle for the front of the card using 2 sizes of Spellbinder circle dies and sponged on the reds.

Next up was the bird. I stamped using Memento Ink and coloured using Copic markers as follows: Breast  YR01, YR21, YR02; Feathers E15, E29, YR09; Beak YR23, YR21.

Using a tiny hole punch I made the perch for the bird to sit on colouring a piece of cardstock with the browns. I attached foam squares to the bird and the perch before attaching it to the card front.

This was such a fun card to make, and I hope you will give it a try.

Thank you for joining me today, following are Affiliate links for the products I used for this card, at no extra cost to you.


The Birdhouse Read More »

Free Shipping Anywhere In Canada