Scratch-N-Stamp
Search

Checkout

Keep up with Sales, New Products and other events at Scrap `n Stamp. Sign up for our newsletter now!

What's New

Hot Deals


masculine

Tuesday with Tara {take 274} Darling Deer

Happy Tuesday!  Today I’m sharing a pair of simple Christmas cards that fit today’s daily challenge theme: wildlife.  I challenged myself to make two cards using the positive and negative die cuts from Tim Holtz’s Darling Deer dies together with a snowflake stencil by Paper Rose.

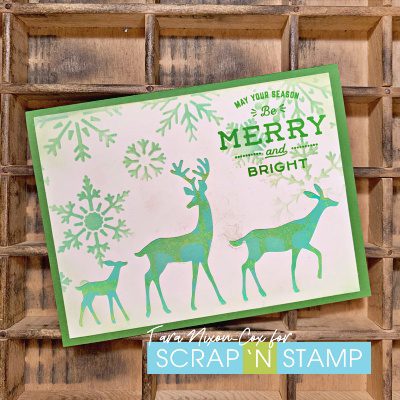
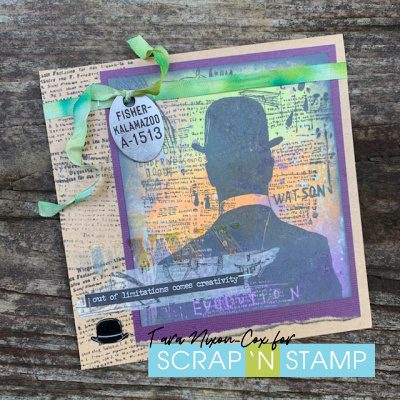
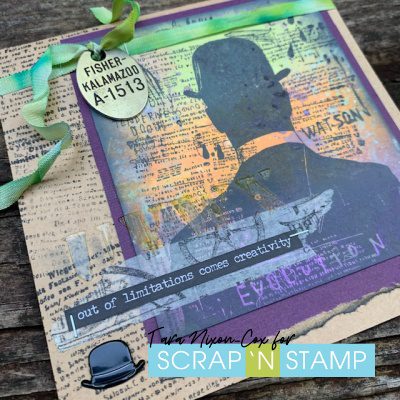
The first card uses the negative space of the deer.  I arranged them on an ivory panel and held them in place with washi tape before running them through my Big Shot.  I then inked up some of the white space with Cracked Pistachio Distress Ink through the snowflake stencil, fading the ink as it came near to the deer.  I selected a gel print background I had created a while back and inked over the white space on it with the same Distress Ink to blend them together and adhered it behind the openings.  The shades of green and blue give a fun retro vibe to this otherwise outdoorsy card!  I finished off the card with a Christmas sentiment from the Festive Overlay stamp set, stamped in Mowed Lawn to coordinate with the green card base I mounted it on.

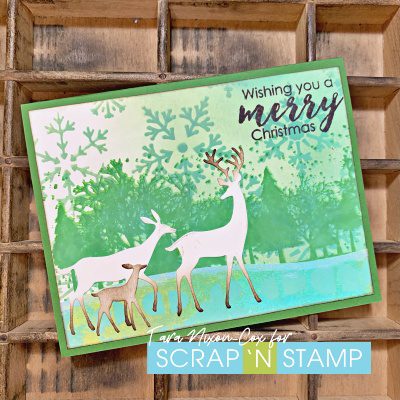
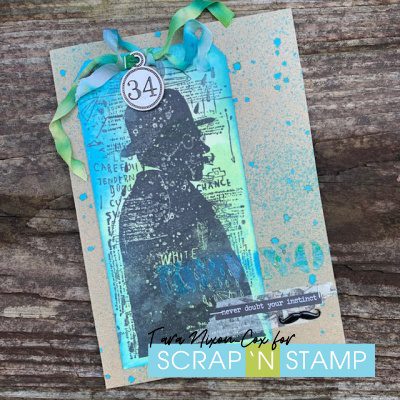
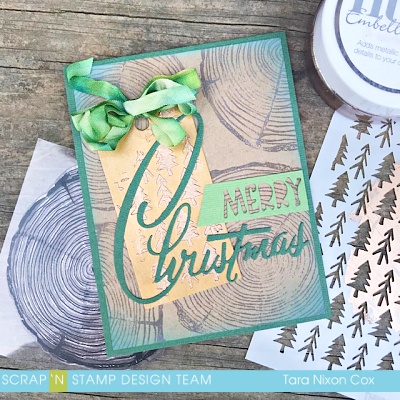
For this card I added the winter trees stamp by Paper Rose that I used for our Sweater Weather blog hop, this time stamped tone on tone for a more subtle effect.  I had some technical difficulties with my stamping and almost tossed this one, but in the end decided it still worked as a background!  I added a bit of Ground Espresso Distress Ink to the deer and a sentiment (from the winter trees set) in the same brown.  I had a scrap of the gel print paper left from the first card, so I trimmed it in a slight wave and mounted it to the bottom of the card for a bit more color and texture.

Here’s a look at the two cards together.  Once you have the design figured out (I find that really is most of the work when you’re creating simple cards) they came together quickly and would be easy & fast to reproduce.

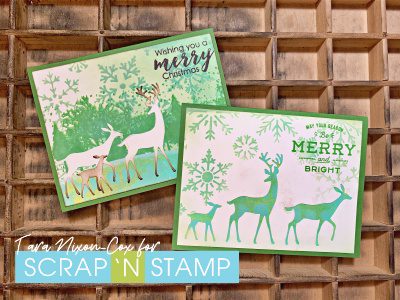
Personally I’m not great at mass producing cards, so I’d love to play with a design like this and do pairs in multiple colors.  Using gel prints in the design and selecting colors from there would be a fun way to mix things up, but you could also use patterned paper from your stash.

Thanks for stopping by- I hope you have a great day!

Inky hugs,

Tara

Tuesday with Tara {take 274} Darling Deer Read More »

Tuesday with Tara {take 244} Kraft Evolution

Happy Tuesday!   Today I’m sharing some cards for Day 21 of our “Random Acts of CARDNESS” Challenge which is KRAFT.  To be fair, it’s kinda  default of mine (I think the last 4 cards I’ve shared have included kraft card stock), but I’m sure for some of y’all it’s a challenge!  Today I doubled the challenge for myself and used the Evolution stamp set by Tim Holtz, which isn’t my typical style.  This set includes two large collage style masculine images that turned out to be pretty easy to work with!

I’ve been in the process of moving my studio space and while I have a work space moved to one room most of my supplies are still in another… I decided to make this project easier on my self and use some pre-inked backgrounds I found while I was making the move. This first card features a fun multi colored background done with Distress Oxide Inks.  I simply stamped over it in black and did a bit  more blending around the edges with Black Soot Distress Oxide Ink.  I chose to use the deepest shade in the background, purple, as a layer behind my image to mount on a 5.5″ square Kraft card base.  I stamped a text stamp by Finnabair along the edge of the card in black as well.  I deliberately stamped crooked to mimic the text in the main image.

I wasn’t really sure where to go from there…so I set the card aside for a bit and started on the next one, which is similarly stamped on an inked tag.  Once I had both images attached to base cards I added some ribbon, which I adhered with my tiny attacher- Tim’s little staple tool.  I wanted some extra stability on my ribbon so I could hang a large metal embellishment (one of Tim’s adornments from my stash).  I then remembered some little brads that were a perfect fit- a hat for this card and a mustache for the other.  A chit chat sticker didn’t seem to be enough on it’s own, so I layered it over washi tape and added a couple more staples.  Once I finished everything I added a touch of extra texture with clear paste through Tim’s CARGO font stencil.  Once everything was dry, I smeared a bit of Distress Oxide Ink with my fingers over the stenciled letters to help them stand out a bit.

This second card is on a 5×7 Kraft base which I had previously sprayed with some Distress Oxide Spray.  Since my tag was inked in greens, I tied it together with the background by inking my edges with Salty Ocean Distress Oxide Ink.   My image is a bit splotchy here because I’d stamped it on a background that was still wet, but I decided I still liked the look and I’d just go with it!

All in all, I’m pretty pleased with how these came out.  It’s great to have some masculine cards ready to go and these images are perfect for that!  I hope you like them too- and I can’t wait to see what you share with our Facebook group featuring kraft today!

Inky hugs,

Tara

Tuesday with Tara {take 244} Kraft Evolution Read More »

Tuesday with Tara {take 176}

Happy Tuesday!  I’ve been working on some Christmas cards and thought I’d share one that’s a bit more masculine today, since we’re currently having the Movember challenge & blog hop happening 🙂  Today’s card is rustic with a touch of metallic texture.

 I’ve used the Tree Ring Background Stamp in the background of my card- simply stamped in brown on kraft card stock.  I used it together with the Retro Merry Christmas sentiment & mini tree stencil by Tim Holtz.   I added Nuvo Mousse through the stencil on a gold tag for some fun texture.  I like that this stuff can be applied thick for texture or thin for just a bit of shine.  (I can’t wait to try the new expanding mousse and see how it compares!)

I added some hand dyed crinkle ribbon and since it has several shades of green in it, I decided to feature two shades of green card stock for my sentiment.  I tried adding a few other elements but in the end I decided simple was best.  This would be an easy card to reproduce multiple times for Christmas, which I know a lot of you like to do!  A single shiny detail like the gold tag with stenciled trees adds great texture and interest on this rustic card.

Inky hugs,

Tara

Tuesday with Tara {take 176} Read More »

Free Shipping Anywhere In Canada