Hello and Happy Thursday
I am happy to be on the blog today sharing this non traditional set of holiday cards with you all.
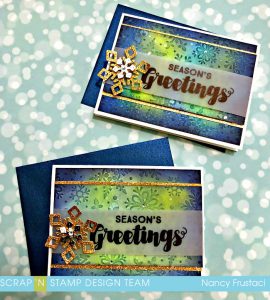
These cards feature some of my favorite products, aka Distress Oxides, Lawn Fawn stitched snowflakes and Taylored Expression snowflake embossing folders.
All the products I have used are linked at the bottom of the blog.
I hope you enjoy and find some inspiration!
These distressed beauties were inspired by a card class I had recently taken taught by a good friend of mine Jo Bird. She is phenomenal with distress inks and I always come out of her classes so inspired and ready to try new techniques and or color combinations.
So I used what I learned from her class and made it my own.
I started off by preparing my bases which were standard A2 5½ x 4¼ cards, and then my panel pieces which measured 5¼ x 4 (I should mention I initially made 4 of these cards and then loved them so much created 6 more) Once everything was cut down and scored it was time for the creating to begin. I pulled out a snowflake embossing folder and ran my panels through my Gemini jr with the folder. (Sometimes I forget how much I love the embossing folders. You get so much interest with so little work) Now it was time for the fun to really begin. It was time to get inky.
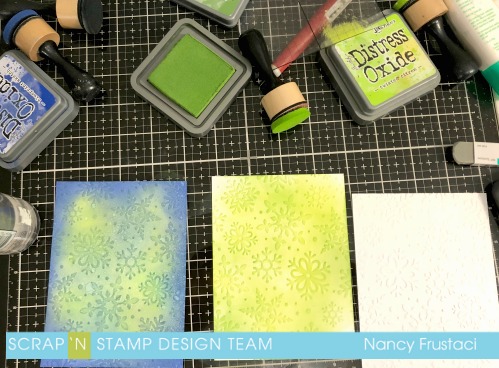
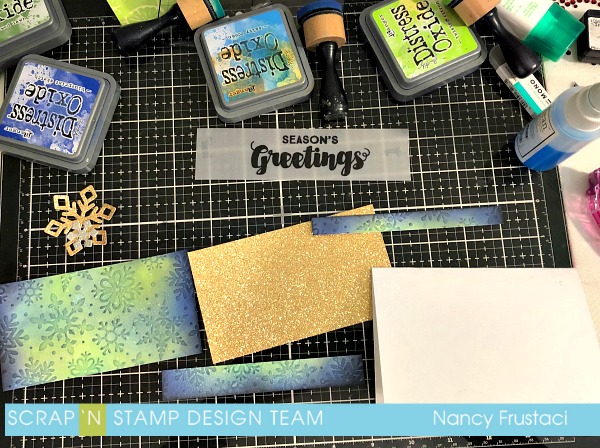
When I was choosing the colors for the cards, I had a specific client in mind as I was finishing up some Christmas cards for them. So I pulled out Twisted Citron, Mowed Lawn, Salty Ocean , Blueprint Sketch and Jo’s fav Black Soot. ( To be honest before her classes I don’t think I had ever used Black Soot before, now I CANT get enough! Thanks Jo 🙂 )
I started off covering the of panels completely with Twisted Citron. I then moved in with Mowed Lawn going over it lightly, from there I added in the Salty Ocean around the edges and brought it home with the Blue Print Sketch. I then spritzed the panels using my Tim holtz spray bottle and then set it aside to dry ( Normally I’d use my heat tool to speed up the process but it bit the dust on me )
Once the panels were dry I decided to go over it again just to deepen the colors and with this second layer I decided to spritz it with my Perfect Pearl mix. This added a nice light shimmer and helped to get rid of any streaks left by the blending tool.
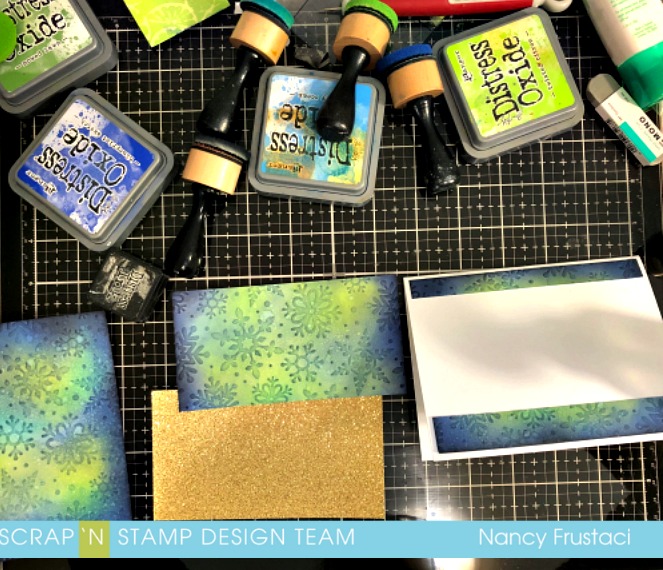
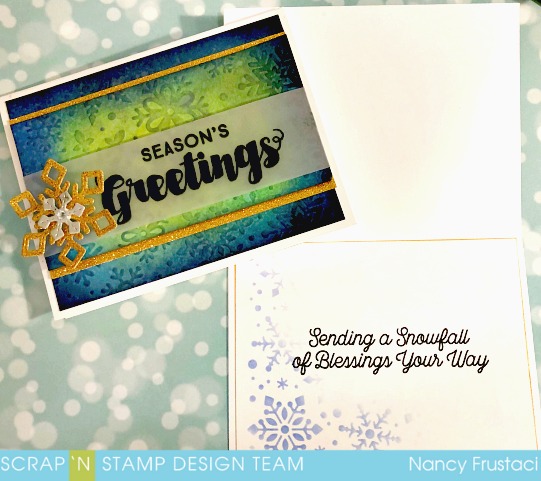
I set all four snowflake backgrounds aside to dry and started to work on the remaining parts to the card. I started by cutting down some gold glitter card to 3 x 5¼, I also cut down some vellum strips to 6 x1½ I left them a little longer so I would be able to wrap it around the snowflake panel. Once I had all that cut and set a side, I moved on to die cutting the last elements for the card which were the snowflakes. I used both gold glitter card stock and silver metallic cardstock for the snowflakes, which I end up layering together. Lastly I stamped my sentiment on to vellum using Archival black ink. The sentiment I used was from the Joyous Christmas sentiment set from My Favorite Things.
Once the panels were dry I went over with Black Soot, trimmed the panel down to 2¾ x 5¼ with the left over stirps I adhered them down to the card base flat, I did this for all four panels. I then went in and adhered the gold strips flat as well using Be Creative tape as its nice and strong.
The next step was to add the sentiment strip to the distressed panel. I used a little bit of liquid glue behind the stamping and wrapped the edges around the panel, I taped down the little flaps to the back and finally added foam taped to pop it up on the card base.

After every panel was adhered I added the snowflakes with some foam dots, just for a tiny bit more dimension. Lastly I had to finish off the inside of the card. I cut down some 80lb card stock to 5¼ x 4, I pulled out a snowflake stencil and took some Blue Print Sketch and inked up the panels. I used yet another sentiment stamp from My favorite things to tie it all together. Before I adhered it to the inside of the card I decided to just add a little extra something, I took some Gold Pigment ink and went around the panel, this gave it a little extra shimmer.
I apologize for the long winded nature of this post, I do hope you enjoyed and found some inspirations for sone non traditional Holiday cards.
Stay tuned as I will be back with more Christmas and holiday themed cards.
Have a wonderful weekend.
Nancy