Scratch-N-Stamp
Search

Checkout

Keep up with Sales, New Products and other events at Scrap `n Stamp. Sign up for our newsletter now!

What's New

Hot Deals


Taylored Expressions

Tuesday with Tara {take 430} Yappy Pyramid Card

Happy Tuesday!

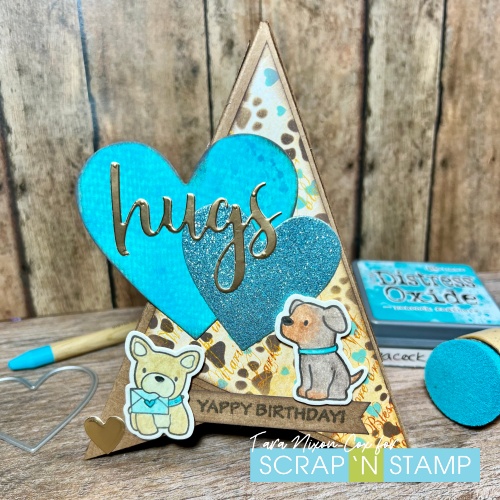
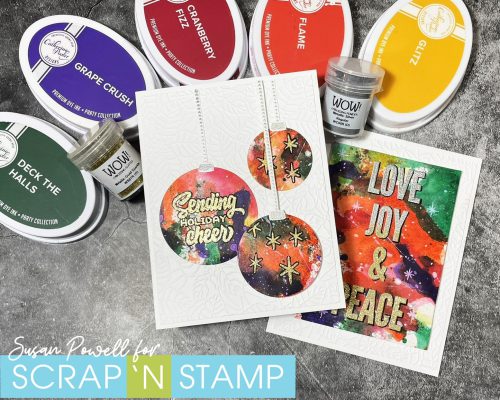
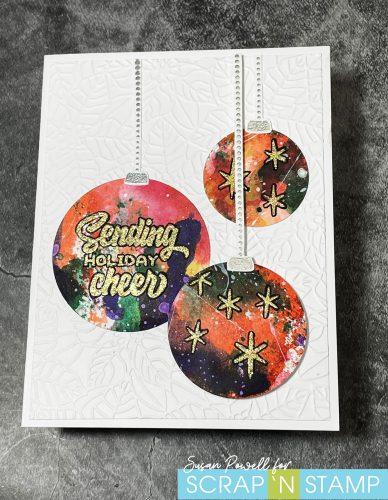
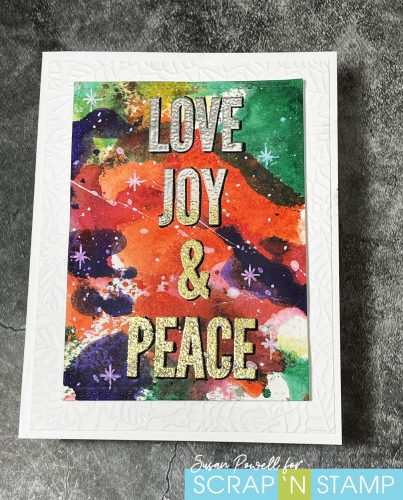
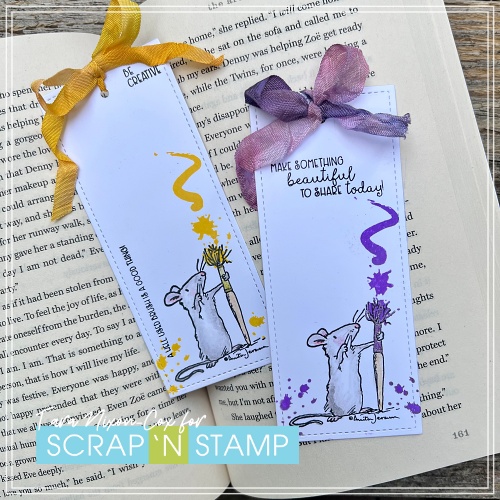
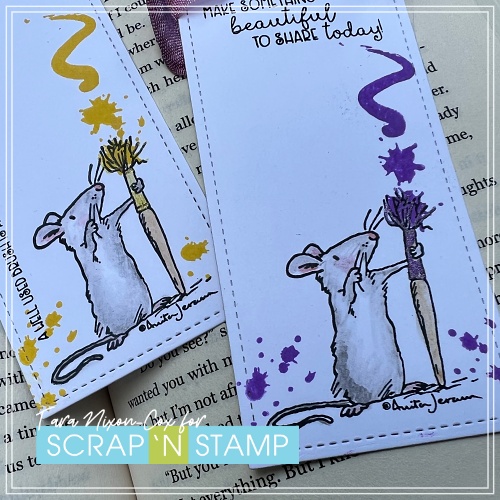
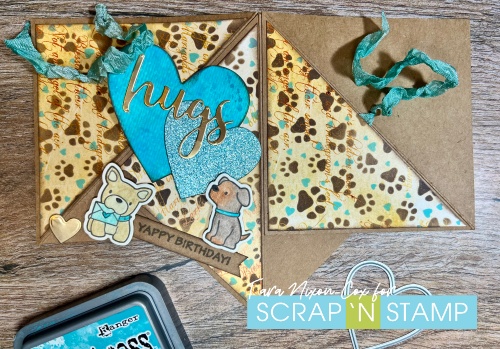
If today’s card looks familiar to you, it’s probably because you saw it in another color palette during our Dimensional Designs Inspiration Hop last month!  I never did give directions for the assembly of the pyramid, or photos of it laying flat, so I thought I’d share some of that with you today!

Here’s another angle of the pyramid card, showing how it ties closed at the back.

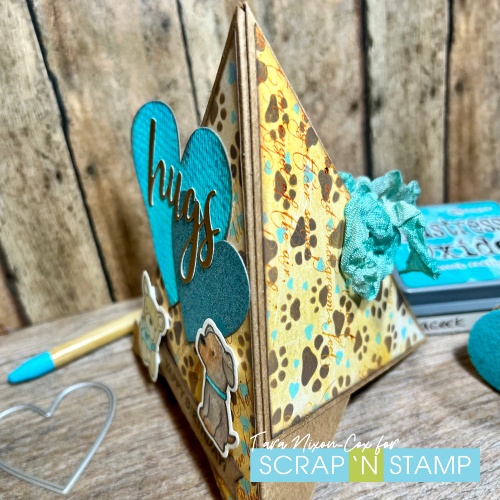
My card was formed from 3 squares (mine are 4 1/4″) which are scored diagonally.  The decorative pieces are cut from 4″ squares and I’m using 3 triangles on this card.  You also need two pieces of ribbon to tie it shut, but you could also use magnets or velcro or some other kind of closure!

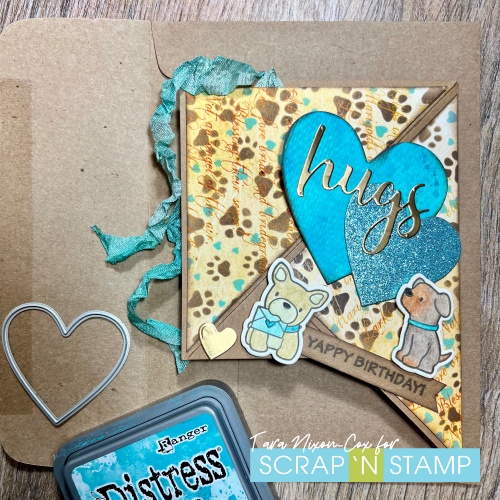
Here is a photo the flat lay of the card- start with the square on the left and layer a second square against the score line, then repeat with the third square as shown.  From here I suggest folding the card into a pyramid and marking where you will need to adhere your ribbon so it matches to tie together.  You’ll want to adhere the ribbon underneath the decorative panels, so start with the ribbon then decorate!  (You can catch the live tutorial of the pyramid card on the Scrap ‘N Stamp Facebook page!)

Simply fold the card in half to mail it- this size fits in a 5×7 envelope.  I’m still experimenting with sizes to figure out what fits perfectly in an A2 envelope!

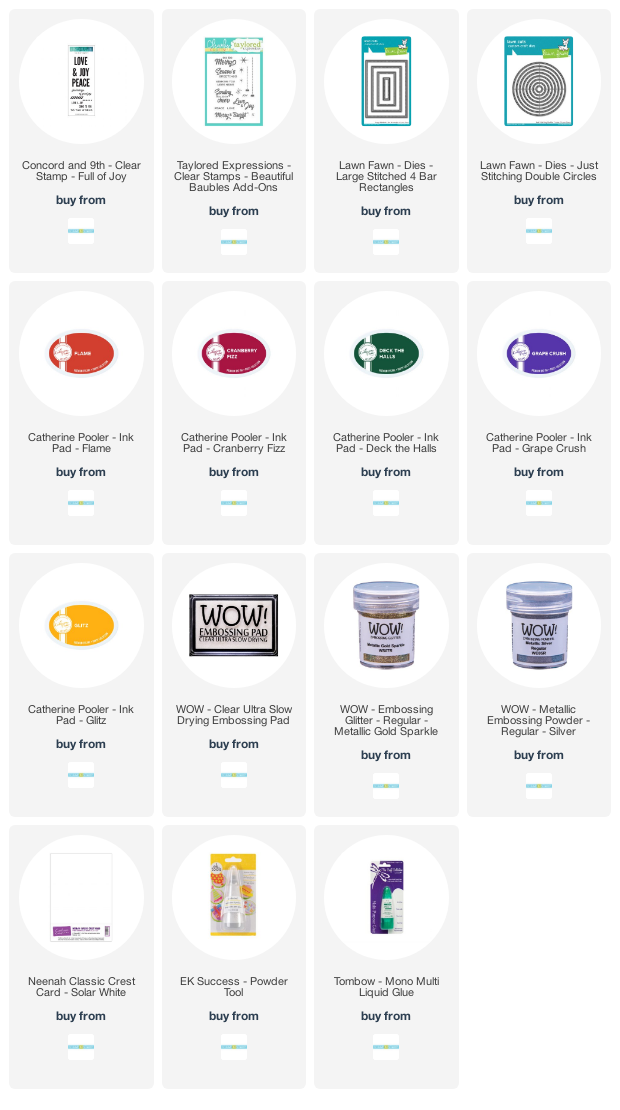
Here’s the details & links from how I decorated both cards:

I kept the decorating pretty simple on this one because I didn’t want to distract from the design and I also didn’t want to cover up the paper I stenciled!  I started with a vintage letter print from the new 6×6 pad by IO and layered on the Puppy Love Layering Stencil by Taylored Expressions.  I chose to use Distress Oxide Inks because the patterned paper has a slightly glossy coating on it that I knew regular Distress Ink would not work on.
I’ve used Puppy Play stamp & die set, coloring the pups simply with Distress Watercolor Pencil Crayons and stamped the sentiment on a strip of Kraft cardstock, to match my pyramid card base.
I die cut some of the Prism Nesting Hearts from scraps I had on my workspace.  The card still seemed to be missing something, and bling was not doing the trick for me this time (so weird, it is almost always the right finishing choice!) so I die cut the word ‘hugs’ from some brushed gold foil cardstock, and a tiny heart as well for my finishing touches!
Hope you like the card and this little tutorial was helpful!  It’s really quite simple to assemble and very fun to decorate!
Inky hugs,
Tara

Tuesday with Tara {take 430} Yappy Pyramid Card Read More »

SOME CHRISTMAS CHEER

Hi Friends! It’s Susan here with cards for today’s Random Acts of Cardness challenge. Today’s prompt is water. One of my favorite techniques is Ink Smooshing which you need water for so that’s what I did. I ink smooshed a larger piece of paper then turned it into 2 Christmas cards. If you haven’t heard of ink smooshing it’s so easy that I’m sure it you’ll love it.

There’s two ways that I do it. First one is to smoosh the ink pad onto my glass work surface, spritz it with some water then smoosh the paper into the wet ink. Don’t smoosh the whole paper into it – dab the paper into the ink in sections. Dry it with your heat gun, then repeat the process with another ink color. I did 5 colors on this one – it may not a traditional ink color combo but there is red and green in it so it works for me.

The other way that I like to do this technique is to use a piece of acetate. I smoosh my ink pad onto the acetate, spritz it with water and then instead of pouncing the paper into the ink I take the acetate sheet and dab it onto the paper. This way allows you to see exactly where and how much ink you’re adding.

When the panel was dry I cut 3 different sized circles to make ornaments with and one panel using a stitched rectangle die. The sentiments, stars and strings to hang the ornaments with on the card above are from Taylored Expressions Beautiful Baubles Add Ons Stamp Set. I embossed them with silver and gold because I couldn’t make up my mind on which one to use so I used them both.

For the card below I used the Full of Joy Stamp Set from Concord & 9th and again used both silver and gold to emboss the sentiment. I cut the panel with the second larges die in the Lawn Fawn Large Stitched Rectangle Die set.

I used a fine tip black marker to add some shadow to the embossing on both cards and I also used the Peaceful Poinsettia Embossing Folder from Taylored Epressions to emboss a piece of white card stock to add to both card bases before adding the ink smooshed pieces.

My favorite is the second one. Which one do you prefer?


Thanks for sharing part of your day with me 🙂

Take care,
Susan
Shopping list:
I use affiliate links when I can. If you shop through one of my links it will allow me to earn a small commission at no additional cost to you. Thank you for your support!!


SOME CHRISTMAS CHEER Read More »

Tuesday with Tara {take 359} Bookmarks!

Happy Tuesday, friends!

I’m sure I’m not the only person who looks forward to summertime reading!  I used to read so much when I was younger, but I find these days I really have to make an effort and take time to read.  All too often, when I finally do take the time I end up using a piece of junk mail or a receipt for my bookmark.  Friends, we can do better than that!  ha!

Today I’m sharing some sweet & simple bookmarks I stamped.  I paired this little mouse by Anita Jeram (not currently in the online store- sorry!) with some paint splatters & a swoosh from this fun crafty set by Taylored Expressions.  I stamped the painty bits in Distress Oxide Ink, picking the colors based on the scraps of ribbon I could easily find on my work space to match with them!  Here I’ve used Mustard Seed and Wilted Violet.  Lastly, the mice were quickly colored in with some watercolor pencils and honestly, it’s as simple as that!

The stamp set comes with some cute little sentiments that I added to the bookmarks as well.   Before stamping, I cut the bookmarks out of some mini slimline stackables stitched dies by Lawn Fawn, and they are perfect for this!

Here’s a closer look at my cute little bookmarks!  Now I just need to make the time to use them…

Inky hugs,

Tara

Tuesday with Tara {take 359} Bookmarks! Read More »

Free Shipping Anywhere In Canada