Scratch-N-Stamp
Search

Checkout

Keep up with Sales, New Products and other events at Scrap `n Stamp. Sign up for our newsletter now!

What's New

Hot Deals


Events

Scrap ‘n Stamp Festive Open House – #6

Hope you are enjoying our Festive Open House and having fun on our blog today. There’s lots of Blog Candy up for grabs so make sure to read how to enter at the bottom of all the posts today. Some of the posts will also give you a chance for a Bonus Draw that you won’t want to miss.

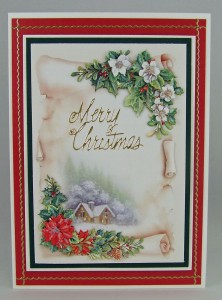
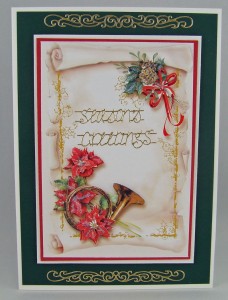
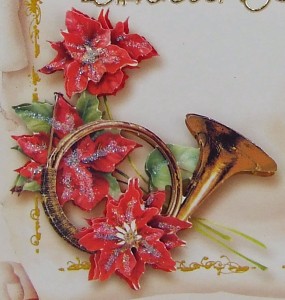
I have two more cards to share with you that I made with another one of the 3D prints – #83732 Poinsettia Frames. I just love these traditional Christmas images.This is a 2 sheet set and you can make 4 layered images from them and then there are four smaller images that would be great for matching gift tags. Cards made with these 3D prints go together so quickly and by adding just a few embellishments you can get many different looks. Both of these cards are 5 x 7 which worked perfectly with the size of the images and coordinating mats.

On this first card I added some gold Peel Off Decorative Lines #1016 to the red mat as a simple accent and then added a Merry Christmas Peel Off #2839 as the sentiment on the 3D image.

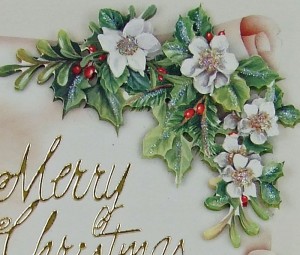
As a finishing touch I used a Quickie glue pen and some Studio K Crystal Rainbow glitter to the flowers and holly.

This second card uses another sentiment from the same Peel Off sheet but this time I added some Peel Off Border Scrolls #1020 at the top and bottom of the image.

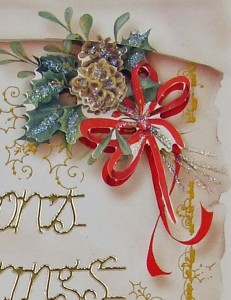
A little bit of shimmer on the layered images and this card was all done.

We have lots more to come so stay tuned.

HOW TO WIN SOME BLOG CANDY:

MAIN DRAW – Enter to Win 1 of five $10 Scrap ‘n Stamp Gift Certificates

It’s easy. Just write a review about any product on our website that you have used and tell us why you like it and how you use it. Keep a list of the products that you review and then comment at the bottom of any Festive Open House post and tell us what products you have reviewed. You will receive one entry for every product that you review. A random draw for the main Blog Candy prizes will be made from all the entries received from 9am – 6pm PST today. The names of all the winners will be announced in a blog post the following day along with details about how to receive their prize. Only one prize will be awarded per person.

Scrap ‘n Stamp Festive Open House – #6 Read More »

Categories: Cards, Events

Scrap ‘n Stamp Festive Open House – #5

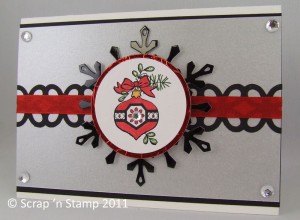
When Shellie and I were talking about samples that we wanted to make for the Festive Open House she said that she wanted to try something completely different and use lots of black on her cards. Black isn’t a color that I associate with Christmas but she’s very creative so I challenged her to see what she could come up with.

For her first card Shellie used the same Chinese Knot Chain punch that she used on the cards in Post #2 but this time she overlaid ribbon on top. The snowflake was cut out of black glossy cardstock using the Spellbinders Snowflake Pendant S4-286 and then layered the ornament digi image that she printed and colored onto red mirror cardstock. The silver shimmer cardstock used for the main card front gives a nice contrast. Just enough black on this card to make it interesting but she said she wanted to use LOTS of black. Well…hand on to your hat!

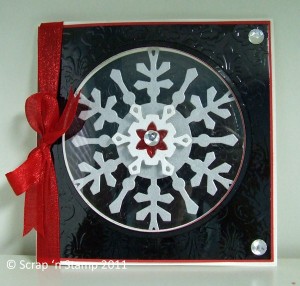
I think she was just getting warmed up because Shellie’s next card definitely used lots of black!

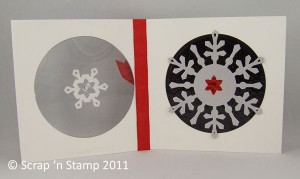
The card front is black glossy cardstock that was embossed and this was layered onto red glossy cardstock. Circles were die cut from all the pieces and acetate was attached to the inside of the card front to create  a window.

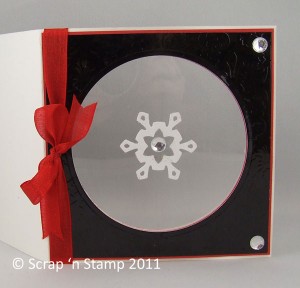
The center part of the snowflake was adhered to the acetate on the front and then she put the main part of  the snowflake on the inside on top of a black circle. Very cool!

Shellie added an extra white piece of cardstock  that she die cut with the same size circle on the inside of the card so you don’t see how the acetate was attached. It makes the inside look totally finished.

Thanks Shellie for thinking outside the box and showing us that you can use lots black on Christmas cards. I can’t wait to try making a window card like this. It is such a fun surprise when the inside of your card is all dressed up just like the outside!

HOW TO WIN SOME BLOG CANDY:

MAIN DRAW – Enter to Win 1 of five $10 Scrap ‘n Stamp Gift Certificates

It’s easy. Just write a review about any product on our website that you have used and tell us why you like it and how you use it. Keep a list of the products that you review and then comment at the bottom of any Festive Open House post and tell us what products you have reviewed. You will receive one entry for every product that you review. A random draw for the main Blog Candy prizes will be made from all the entries received from 9am – 6pm PST today. The names of all the winners will be announced in a blog post the following day along with details about how to receive their prize. Only one prize will be awarded per person.

BONUS DRAW

Comment on this post and tell us what your favorite Dreamweaver Stencil is and your name will be entered in a random draw to win a $5 Scrap ‘n Stamp Gift Certificate.

Scrap ‘n Stamp Festive Open House – #5 Read More »

Scrap ‘n Stamp Festive Open House – #4

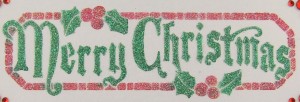
When I saw this Dreamweaver stencil ( Merry Christmas with Holly LL557) I knew exactly what I wanted to use it for – a gift certificate or money holder.

To get the glittered effect and different colors on the image I first stenciled the words and holly leaves with Evergreen Versacolor pigment ink and then used Cardinal Versacolor pigment ink for the frame and berries. After the ink had dried a little I added a layer of Dreamweaver Translucent embossing paste and while it was still wet I sprinkled Studio K Crystal Green glitter onto all the green areas and Studio K Crystal Rainbow onto the red frame and berries.

You might wonder why I used different colors of transparent glitter. Well, the really cool thing about our Studio K transparent glitters is that they are one color when you apply them to a white surface and reflect a totally different color when you put them on top of a dark color. So by putting theCrystal Green glitter on top of the green it makes that green color more intense but still keeps it really sparkly. It’s a totally different look than when you put opaque glitter onto something because you still get that transparent, watercolored look. By putting the Crystal Rainbow glitter onto the red it made it sparkle with all different colors. The overall look is frosted and shimmery. Our  glitters are so versatile because you get more than one color from them.

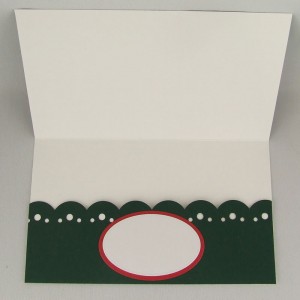
On the inside of the holder I created a little pocket to put in the money or gift certificate and made a decorative edge with Spellbinders Classic Scallop Edgeabilities E8-001. This was my first time using these new dies and I am totally hooked. They were so easy to line up and there are so many possible combinations when you team them up with the other Edgeabilities giving you endless design possibilities. If you are looking for an alternative to border punches they definitely offer you lots and lots of options.

Well, that’s it for this post. There’s lots more to come so be sure to check back every hour for our latest samples.

HOW TO WIN SOME BLOG CANDY:

MAIN DRAW – Enter to Win 1 of five $10 Scrap ‘n Stamp Gift Certificates

It’s easy. Just write a review about any product on our website that you have used and tell us why you like it and how you use it. Keep a list of the products that you review and then comment at the bottom of any Festive Open House post and tell us what products you have reviewed. You will receive one entry for every product that you review. A random draw for the main Blog Candy prizes will be made from all the entries received from 9am – 6pm PST today. The names of all the winners will be announced in a blog post the following day along with details about how to receive their prize. Only one prize will be awarded per person.

Scrap ‘n Stamp Festive Open House – #4 Read More »

Free Shipping Anywhere In Canada