Designer Showcase: Peel Off Outline Stickers – Birds & Tree Silhouette
Hi everyone! This week I had a little time to play and couldn’t resist trying out some of the fantastic Peel Off Outline Stickers that we have in stock.
There are so many different designs to choose from and after browsing a little I settled on the Birds & Tree Silhouette in black.
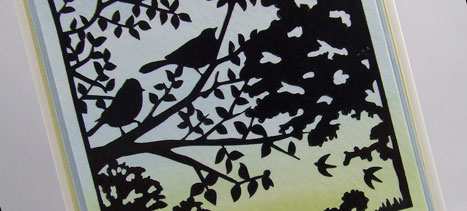
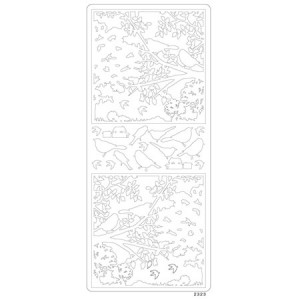
From the picture it’s a little hard to tell what the sticker is going to look like but it’s really very pretty and you get two silhouettes plus some extra little birds in the package.
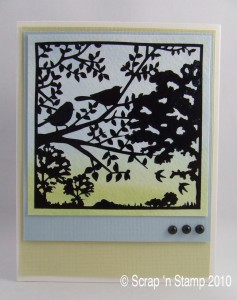
Since I love watercoloring I decided to create the background for the sticker using our Studio K Watercolor Paper and Lyra Aqualcolor Watersoluble Crayons. Using just two colors I was able to create the illusion of a horizon and give the image lots of depth.
To create the wash of color I first brushed the piece of watercolor paper with water – this lets the colors move better on the paper. Then I picked up color directly from the crayons with my brush and ‘painted’ them onto my paint palette and added more water to them. The colors are pretty intense when you take them directly from the crayon so I like to water them down so that I don’t end up with really dark areas when I am applying my wash.
Starting at the bottom I painted on a very light wash of green and then added a light wash of blue, overlapping the colors slightly and then working out to blue at the top. After this was a little bit dry I went over the green and blue on the top and bottom again with another light wash to add more color. By adding several light layers of color I was able to achieve the effect that I wanted without noticeable lines – just a subtle blending of colors.
After letting my background paper dry for a couple of hours I carefully placed the silhouette sticker on top so that the bottom part of the sticker was on the green area and the trees and birds were on the top. Then I trimmed around the image leaving a small border, layered it with some coordinating cardstock and added a few black pearls just to anchor everything. That’s it. Simple and yet very pretty. You could use this card for so many different occasions – birthdays, sympathy, thinking of you, thanks….just add a sentiment and it’s ready to go.
I hope this gives you a better idea of what these stickers look like and how you can use them. Sometimes it’s hard to imagine what they will actually look like from the pictures that we get from the manufacturer so we will be adding more samples as time permits. Darn…looks like I’m going to have to make more time to play. LOL!
Thanks for dropping by. Have a wonderful week!
© Scrap ‘n Stamp Canada 2010
Designer Showcase: Peel Off Outline Stickers – Birds & Tree Silhouette Read More »


