Scratch-N-Stamp
Search

Checkout

Keep up with Sales, New Products and other events at Scrap `n Stamp. Sign up for our newsletter now!

What's New

Hot Deals


Studio K

Designer Showcase – Happy BOO! to You

Wow! It’s hard to believe that Halloween is just a week away. This year we are going to be carving lots of pumpkins and decorating the front of the house to welcome all the little Trick or Treaters. It’s so much fun! And I’m going to try not to buy too much candy like I did last year. It was horrible! All those little chocolate bars that I just had to eat so they didn’t go to waste. LOL!

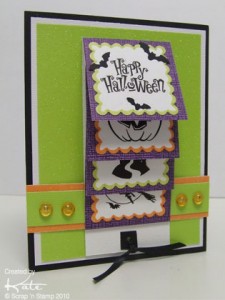
Some of my favorite little Trick or Treaters aren’t able to come to our house because they live too far away so I decided to do something a little special for them this year and will be sending cards with a ‘goody’ inside. I didn’t really have a plan until I got together with some friends last week and everyone decided to make ‘Waterfall’ cards. They are so cool and I knew that the kids would love how you pulled the ribbon and saw all the different pictures. Thanks for the inspiration ladies, my little friends are going to love their cards.

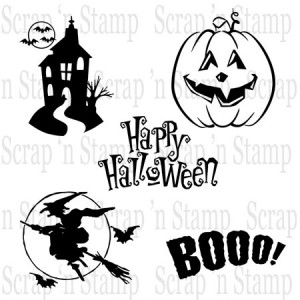
Finding images was really easy. Our new Halloween Digital Stamps gave me lots of selection and they were really easy to print in just the right size so that I could cut them out with my Spellbinders Nestabilities. Digis are so amazing to work with because you can make them any size that you need (try doing that with a rubber or clear stamp).

And to entice you a little bit more to try them we have put a Halloween set together that includes all the stamps that I used for these cards at a ghoulishly good price of only $5.95. You save 40% off the price of buying them individually. The set includes five (5) high resolution pngs files that you can print, resize and play with to create all kinds of great projects.

If you haven’t tried digis yet but want to get started check out our Digital Basics Tutorials for step-by-step instructions. Believe me, once you try them you’ll be hooked.

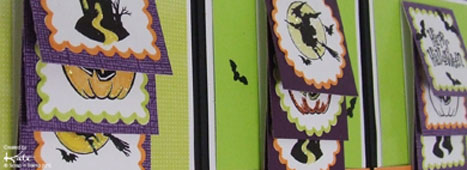
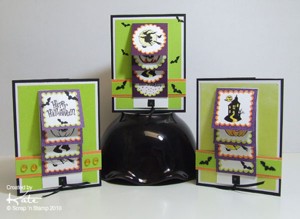
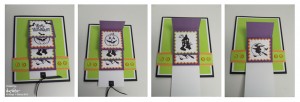
As you can see each card turned out a little bit different. I had so much fun coloring and embellishing the images – definitely brings out your inner child. I used Memento Markers for all the coloring and then added some bats I had punched out, a little glitter on a couple of the cards and some droplets just to finish off. The patterned paper and cardstock I used were from the DCWV Citrus paper stack & cardstock stack – the bright colors in these stacks were perfect and I all I needed to add was some dark purple Core’dinations cardstock for a little accent.

This was the first card I made and I used glittered paper for the background so I decided just to outline the edges around the images.

The second card has a little bit of glitter on each image and outlined edges.

And, last but not least, I decided to cut out circles with my Nesties for my third card and of course added a little bit of glitter.

Hope my little creations give you some inspiration.

Thanks for stopping by. Happy Halloween!

© Scrap ‘n Stamp Canada

Designer Showcase – Happy BOO! to You Read More »

Introducing Studio K Digital Stamps

Have you ever wished that the image on one of your rubber stamps was just a bit smaller so you could cut it out with one of your Nestabilities? Or maybe you would like to print out 25 of the same image for invitations and have each one come out perfect. Now, that isn’t a problem because you can do all that and more with our Studio K Digital Stamps. You can make them any size you want and print them as many times as you want – quickly and easily. And for a fraction of the cost of rubber or clear stamps. No wonder digital stamps are becoming more and more popular.

And, the best part is you don’t have to be a graphic artist or computer whiz to work with them. There’s no fancy software required – a basic word processing or photo editing program is all that you need.

When you are first learning how to use digital stamps it can all seem a bit confusing. Downloading, unzipping – what does it all mean and how do you do it? So, we wanted to make some of the ‘scary’ stuff easier for you. We created our Digital Basics Tutorials to do just that. By following the step-by-step instructions you will learn all the basics to start using our Studio K digital stamps on your own unique projects in no time.

Why are digital stamps so great?

Because…

  • – they are very inexpensive compared to rubber or clear stamps
  • – you can make each image any size you want -really small or really big – all with the same image. Try doing that with a rubber stamp!
  • – each image stays crisp and clear when it is resized
  • – Studio K digital stamps have transparent backgrounds so you can do more with them
  • – storage is never an issue – digital stamp files are small and take up very little space on your computer
  • – you can do almost anything with a digital stamp that you can do with a rubber or clear stamp
  • – they work beautifully with a lot of the supplies that you already have like inks, watercolors, glitter, papers and dies
  • – you can create completely ‘digital’ projects with them or you can print them and create beautiful ‘hybrid’ projects using your other crafting supplies
  • – there are no shipping charges and you receive your stamps as soon as we receive your payment. Talk about instant gratification!

How do you do all this? It’s easy! Just DOWNLOAD, PRINT & CREATE!

1. Download a Studio K Digital Stamp and save it on your computer.

– Digital Basics – How to Download & Save Digital Files

2. Open the file in your choice of software.

Don’t let this step worry you. Keep it simple by using a program like Microsoft Word or Paint. You may already be familiar with these programs so it will be really easy for you to PLACE or INSERT your image in a document. From there you can resize it and print it.

– Digital Basics – Using Digital Stamps in Word

Some of you may have Photoshop, Photoshop Elements or other photo editing or design software. If you do then you can do even more with your digital stamps. More tutorials are coming that will show you some really cool things you can do in those types of programs.

3. Once you have printed your stamp just the way you wanted it there is no limit to what you can do with it. Cards, scrapbook embellishments or pages, journals, home decor. Let your creativity flow and apply some of your favorite crafting techniques to make a truly one of a kind project.

Our Designer Showcase and Tuesday Tutorials will be featuring lots of samples and projects using Studio K Digital stamps so be sure to check back regularly.

We are very excited to be introducing our new Studio K Digital Stamps. The selection that you see is just the beginning.We have many more fantastic Studio K Digital Stamps and Printables to share with you in the coming weeks so click on What’s New when you visit the store to see all the latest images.

Thanks for stopping by. Have a wonderfully creative week!

Kate

Scrap ‘n Stamp Canada

Introducing Studio K Digital Stamps Read More »

Digital Basics – Using Digital Stamps in Word

How to insert, resize & print.

In our first Digital Basics tutorial we showed you how to download and save your digital files. Now we are going to show you how easy it is to use Microsoft Word or any similar word processing program to resize and print your digital stamps so you can use them on all kinds of paper crafting projects like cards, scrapbook pages, books and so much more. We think you will be amazed at just how easy they are to work with.

Step-by-Step Instructions:

(To see more detail you can click on any of the pictures and they will be enlarged)

Open a new document in Word.

INSERT YOUR IMAGE:


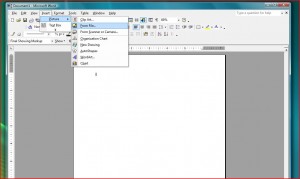
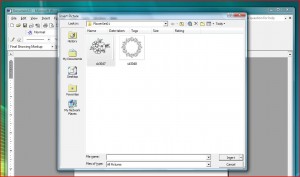
1. To add an image to your Word document click on Insert in the top menu bar and then click on Picture. Another menu will open and you need to click on From File.

2. The window that opens up allows you to locate and select the file that you want to work with. Select the image that you want to insert into your Word document and click Insert.

TIP: If you have created a file folder on your Desktop for your Scrap ‘n Stamp Digis as suggested in our previous tutorial you will definitely find it easier to locate and insert your images when you want to work with them.

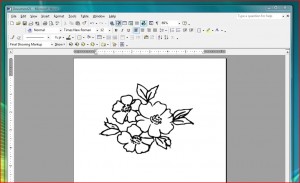
Your image has now been inserted into your Word document and is ready for you to resize or print.

RESIZING YOUR IMAGE:

Method #1 – Click & Drag:

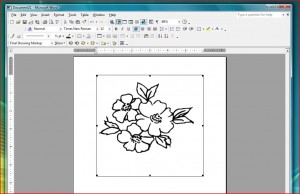
Click on your image once and a frame will appear.

To resize your image put the cursor over one of the corner nodes, an arrow will appear. Now hold down the left mouse button and drag the mouse in or out to make the image smaller or larger. When the image is the size that you want, release the mouse button.

Tip: You can use the rulers along the top and sides of the screen to see the exact measurements of your image.

Method #2 – Format Picture:

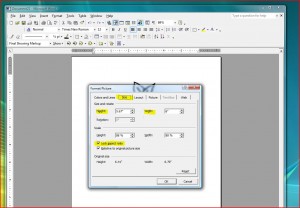
You can also resize your image by right-clicking on your image and selecting Format Picture.

From the tabs on the top select Size. Make sure that you keep the Lock Aspect Ratio box checked so that the image isn’t distorted in any way. Change the Height to the size that you want, press your Tab key and the Width will automatically be adjusted to the correct size.

This method is very accurate and makes resizing easy when you are going to cut out the image later with a Spellbinders Nestabilities Die.

Tip: You may want to save your resized image to use again later. Select Save As and put this new file with your other digis so you can find it quickly when you need it.

PRINTING YOUR IMAGE:

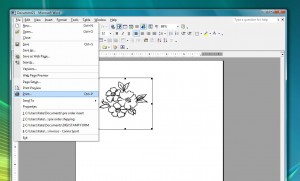
When your image is the size that you want you are ready to print. From the file menu select Print, review your printer settings and select OK.

Most printers are able to print on a variety of papers and cardstocks so you may have to experiment a little to find the best settings.

TIP: If you are going to be coloring in your image with paints or markers and you are printing with an Inkjet printer you may need to leave the ink to dry for a few hours or you can heat set it with your embossing heat tool. Different papers dry at different rates so you may want to do a test before you do your final project.

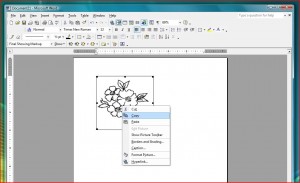
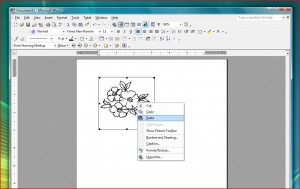
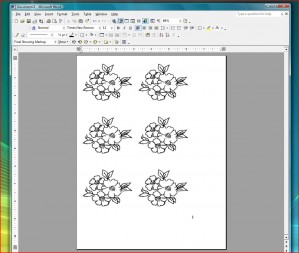
TIP: To get the most from your paper when you are printing you may want to insert several images or create several copies of the same image. To duplicate the same image simply right-click on the image and select Copy. Now right-click on an empty space in the document and click Paste. Your image has been duplicated. If you want more of the same image just repeat the second step until you have the number of images that you require.

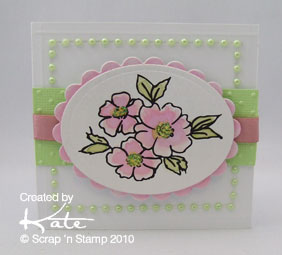
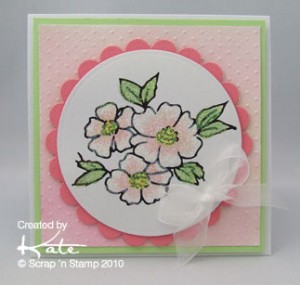
Here are some samples showing you how we used the stamps from the Studio K Flower Set.

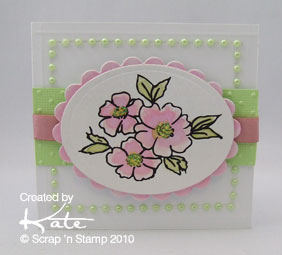
The Digital Stamp was resized to fit on a 2 3/4″ x 2″ Spellbinders Oval Nestabilities. Card size is 3 1/2″ x 3 1/2″.

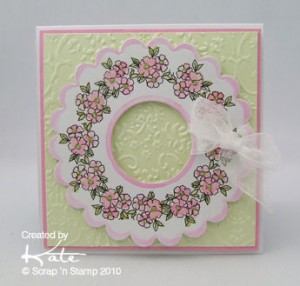
The same Digital Stamp was resized to fit on a 3 3/4″ Spellbinders Circle Nestabilities. The finished card size is 5″ x 5″.

This Digital Stamp was resized to fit on a 3 3/4″ Spellbinders Scalloped Circle Nestabilities and then layered onto a 4″ x 4″ card.

As you can see the same stamp can be sized to fit your project perfectly. By combining Digital Stamps with the products you probably already have and techniques that you use for rubber and clear stamps the possibilities are endless!

Digital Basics – Using Digital Stamps in Word Read More »

Free Shipping Anywhere In Canada