Scratch-N-Stamp
Search

Checkout

Keep up with Sales, New Products and other events at Scrap `n Stamp. Sign up for our newsletter now!

What's New

Hot Deals


Prima

Tuesday with Tara {take 187}

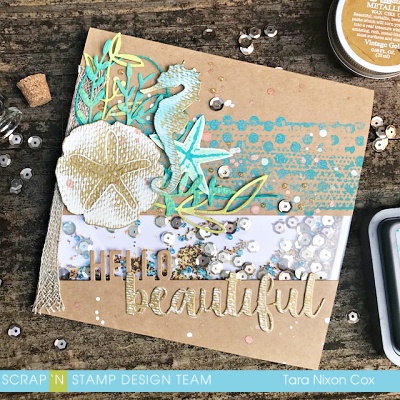
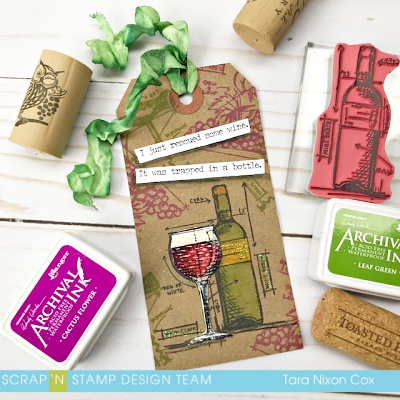
Happy Tuesday!  Today I wanted to take a little break from Valentine’s Day creations and I was totally planning on avoiding the color RED as well… but when I pulled out this sweet stamp set by Jane Davenport and thought I saw tiny cherry blossoms it led to Lunar New Year (that’d be today!) and the next thing I knew I was making a RED floral card with good luck wishes for the new year!


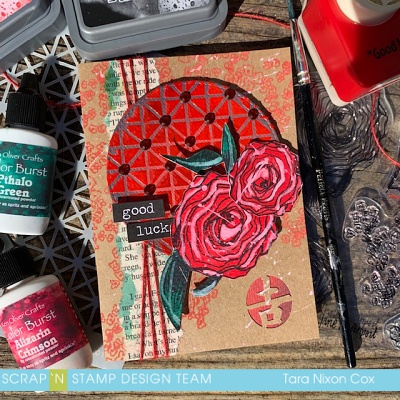
I stamped the images on watercolor paper and started some simple coloring using Color Burst as my watercolor medium. It ended up a little bit too monochromatic, so I watered down some white acrylic paint and added a bit of detailing, which mixed with my red to create soft pink highlights.  I stamped the small blossoms image in Candied Apple Distress Oxide on the kraft card base (because I just can’t get enough of Oxides on kraft!) and then splattered some of the remaining white/pink paint on the card background and over the stamped flowers.

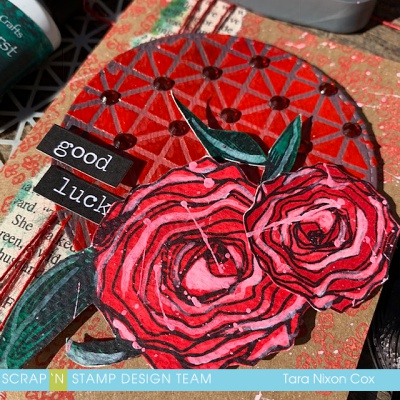
I had a scrap of book print with some green paint already on it, so I decided to add a bit more green to tie it in with the leaves from my florals, then added it as a strip along the left side of my card, which I wrapped some thin red twine around for texture.

I also had a piece of inked up watercolor paper that was red-ish which I die cut from the MFT inside & out stitched circle dies.  I pulled out some 3D gloss gel and swiped it over a MFT framework stencil to see what the result would be… turns out it looked fabulous.  The clear gloss over the watercolor intensified the color and really popped!  I inked the edges of the die cut circle with Black Distress Oxide to add more contrast and really love the results.

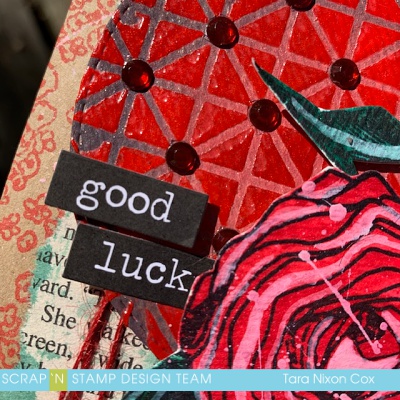
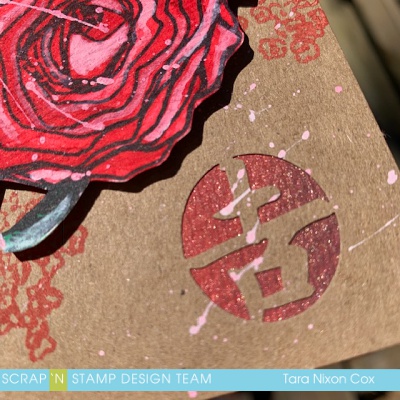
I added some red bling in some of the open spots of the stenciled design for even more shine & texture.  I found a really old punch (from back in the days before dies were affordable) with the Chinese symbol for ‘Good Luck’ which I added to the lower right corner of my card.  I searched through some Tim Holtz big chat stickers and found the same words in black & white (and English! LOL) I just had to black out the ‘y’ so it said luck instead of lucky.

If your January, like mine, got the new year off to a bit of a rough start… you have my permission (and invitation!) t0 join me in celebrating the Lunar New Year and another fresh start!  Good Luck!


Inky hugs,

Tara


Tuesday with Tara {take 187} Read More »

Shake Up Summer Blog Hop!

Welcome to the Scrap ‘N Stamp SHAKE IT UP Summer Blog Hop!  We are excited to have you here with us today and share with you each member of our team’s unique take on shaker cards!  You’ll see a mix of takes on ‘old school’ shakers as well as projects using shaker window & die combos, like the ones you can WIN by leaving comments along the way and by sharing about the hop on social media!  It should be a lot of fun, so let’s get started!

I decided to do a twist on an old school shaker, I wanted to find a way to create a shaker panel the full width of my card rather than a window in the center of the card.  I started with ‘hello’ edge die (by MFT) and cut it at an angle along the bottom of the card, leaving room for the coordinating ‘beautiful’ word below it.  I then used that angle as my guide to cut another panel the size that my shaker panel would be.  I pieced it back together with some clear plastic (I used the packaging from a stencil I’d purchased!) glued at the top and bottom then trimmed it to size.  Once my window was the right size, I had to figure out how to seal it off as a shaker- the clear edges kinda snuck up on me and I wasn’t sure how to tackle that.  I decided to let the white foam tape show on one side, but to camouflage it a bit by backing my window with white card stock.  Here’s a look at the hidden part of this panel so you can see how it went together.  I added a random mix of foam tape along much of the solid parts to give the whole card a smooth look.  The biggest part when assembling a shaker from scratch like this is to make sure there aren’t gaps in the foam tape around your window, you don’t want to leak any glitter 🙂

I cut my white panel to cover the inside (less about a 1/4″ at the top so it would fold flat), removed all the foam backing and then filled up my shaker window with a variety of sequins, glitter and beads/micro beads.  I think everything but the sequins were from Prima 🙂

Because that panel was such a stark white, I cut the ‘beautiful’ word and the Tim Holtz sand dollar & sea horse from white textured cardstock.  I love how the gold metallic wax picks up the texture!  The sea horse was inked with Distress Ink before I added the gold details to it.  I added a variety of greenery (aka seaweed) cut from Funky Flowers 2, all of which are watercolor paper painted with Distress Inks.  I grabbed an old Tim Holtz border/texture stamp and inked it up with Mermaid Lagoon Distress Oxide to give some balance to the top of the card. After that, I just added bits of ribbon, twine, paint and sequins to complete the card.

I love glitter, but hate when it gets everywhere… I managed to avoid the mess with this card, and that’s something I like about shakers.  It’s like contained chaos.  🙂

I’m excited for you (and me!) to see what the rest of the girls have to share with you today!  Don’t forget to leave comments along the hop- and enjoy special savings on Shaker windows this week too!

Here’s who’s hopping with us this month:

Tara (SNS blog- you are here!)
Jessica
Kia
Laurie
Karen
Amy

Shake Up Summer Blog Hop! Read More »

Tuesday with Tara {take 159}

Happy Tuesday!  If your weekend was anything like mine, you may have felt like your only super-power was the ability to rescue some wine that was trapped in a bottle 😉  If  you know someone having one of those days (or weeks, or…) this quick little tag and a bottle of wine might be just what they need!  It’s simple, but pretty fabulous I think… I know I’d welcome it if someone brought one to me!

I’ve used the stamps from Tim Holtz blueprints WINE mini stamps- love them!  I stamped all in Archival Ink on a kraft tag, layering the wine glass slightly over the bottle and stamping a second time on a scrap of watercolor paper.  The grapes & corkscrew images were stamped with colored Archival Ink and I simply colored the images to match using Watercolor pencils.  A touch of glitter on both (Nuvo Crystal Drops) and a finish of Glossy Accents on the glass add that little something special.  And of course, a snarky sentiment about wine from Tim’s new Small Talk set… love it.  I found some pre-colored krinkle ribbon in my little stash bottle to tie at the top (I tend to make this in large batches when I do so I can just grab a piece when I need it).  If you’re tying it to a wine bottle for a gift, a bit of twine through the hole works perfectly!

Quick & fabulous… just the way I like it!  Hope you like it too!  I’m loving these blueprints (they’ve been on my wishlist for a while, so you can expect to see more of them in the future!).   Cheers!


Inky hugs,

Tara


Materials Used:

Tim Holtz Blueprints mini strip stamp- WINE

Archival Ink Jet Black, Leaf Green & Cactus Flower

Watercolor Pencils

Prima Watercolor Paper scrap

Prima Watercolor Brush pen set

Kraft Tag

Ranger Glossy Accents

Nuvo Crystal Drops- White Blizzard

Tim Holtz Small Talk Snarky


Tuesday with Tara {take 159} Read More »

Free Shipping Anywhere In Canada